You are using an out of date browser. It may not display this or other websites correctly.
You should upgrade or use an alternative browser.
You should upgrade or use an alternative browser.
2nd Chance for a True Weber Classic: A 1998 1st Generation Summit 450
- Thread starter Jon Tofte
- Start date
-
- Tags
- restored summit
Steve Hoch
TVWBB Olympian
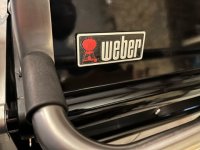
Looking good Jon! I think that you will notice from your own pictures that the "whiteness" of the emblem depends a lot on the light that it is viewed with.
Jon Tofte
TVWBB 1-Star Olympian
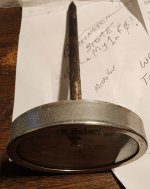
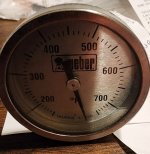
If you are willing to part with it, I would love to get that from you someday, if only for the history. I think you did a great job incorporating a current Weber thermometer as a replacement. It looks very sharpLooking really great! There was a lot of engineering and cut fingers that went into fitting that thermometerFWIW I still have the original non-operational thermometer
LMichaels
TVWBB 2-Star Olympian
Happy to send it. It won't fit anymore, and I actually don't even remember why I even still have it. But, here are picsIf you are willing to part with it, I would love to get that from you someday, if only for the history. I think you did a great job incorporating a current Weber thermometer as a replacement. It looks very sharp, and I was happy to re-use your workmanship.
Jon Tofte
TVWBB 1-Star Olympian
I wouldn't use it on this grill since you came up with such a nice solution. But maybe someday I will take on another 1st generation Summit. The thermometers are sometimes missing. An original, non-working one is better than a blank hole. Of course, knowing me, I will probably just keep it on a shelf in my office as another "museum" display piece!
I will PM you about this and some other parts you thought you might still have.
I will PM you about this and some other parts you thought you might still have.
Jon Tofte
TVWBB 1-Star Olympian
That's a great analogy, Larry! I would never thought of that one, but there is no question in my mind this grill has a special classy look unlike really any other. Don't get me wrong, if a Vieluxe fell into my lap I would be very excited. But, to me, even the Vieluxe doesn't LOOK as cool as the first Summit. I love the black and stainless "Tux" combination!That is one thing I loved about that grill it always looked like Sean Connery in a Tux. Buttoned down and ready for business
Jon Tofte
TVWBB 1-Star Olympian
Bringing this project to the finish line
I have been working here and there as I am able, and my 1st generation Summit is finally nearing the finish line. SInce I hope that this thread will linger on as a help to future restorers of these Weber legacy grills, here are some more details I did since my last significant post:
With the frame done, it was time to face fixing the porcelain-plated steel firebox and trying out my stainless reinforcement panels. The first big challenge was what to do about the rust that had already started on them. Larry had obtained this set from a donor grill, but even this second set was going towards Swiss cheese as he has described.
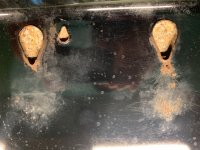
Attacking this problem posed some hard questions for me. From all that I can see, there are two types of products that relate to this problem: ONE, stuff like Rustoleum Rust Reformer, Eastwood Rust Encapsulator and POR15. These products directly attack the rust and neutralize it. Then cover with varying textures. They are not paint, and none of them is rated to as high a heat level as would be likely to occur inside a grill. TWO, paint products designed for high heat with rust prevention capabilities. This would include products such as Eastwood's High Temp Coating designed for exhaust manifolds. This, and similar products, can take the heat, and they prevent new rust. But, they really do not attack the existing rust.
So, I felt any decision was a compromise. I went with POR-15. Yes, I do get it that it is not high heat rated. However, it is the strongest rust treatment/restorer that I have worked with. It can't tolerate exposure to UV rays, but all these parts will be in the dark, so that is not an issue. If it were, top coating with quality paint would solve that. Anyway, POR-15 has supposedly been tested at 450 degrees for hours without issue. Of course, grill interiors are a LOT hotter than that. So, I guess the jury is still out. One important thing is that the parts I treated are almost all covered by the stainless steel reinforcement plates. I am hoping that will mitigate issues.
Here is the porcelain firebox part after treatment:
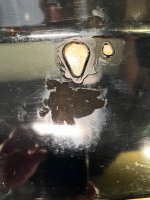
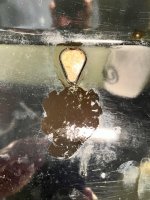
There were also a couple other rust areas I treated including where I had to cut-off an immovable bolt that held the top firebox part to the bottom and my less than perfect skill with a cutoff tool left scars:
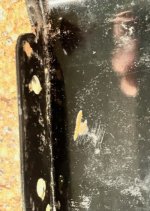
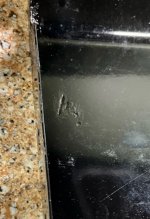
I think the risk was worth the benefits of arresting the rust monster on these irrreplaceable parts.
Then, it was on to applying the stainless panels. I posted earlier about the red "food grade" RTV rated to 650 degrees that I bought on Amazon. Having no experience with RTV, I asked @Bruce for some recommendations. I used painters tape to mark the areas of application on the porcelain and also applied the RTV to the stainless part. Bruce and I discussed levels of pressure to apply. I finally settled on using some dumbbell weights to keep some pressure on while the RTV cured for 24 hours.
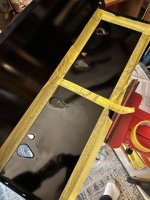
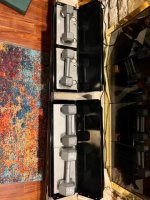
You may have noticed that in addition to the special pieces made by the sheet metal shop I am working with featuring laser drilled holes to match the burner and igniter openings , I also had them make plain pieces for the back porcelain panel. I was very bummed out to find after cleaning thoroughly that even this part was beginning to show rust and the start of burn-through.
The RTV seemed to work OK, but I was still nervous about the pieces ultimately falling off. The next step was to at last re-assemble the firebox. A couple cool things:
The cast aluminum sides of the firebox have channels cast in to use RTV to better secure the side and provide better heat retention
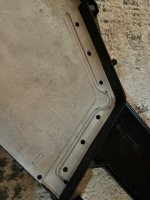
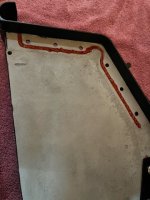
Securing really shouldn't be a worry when you consider the extensive number of bolts holding these parts together!
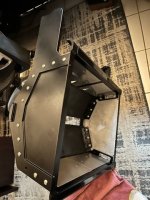
The missing bolt above is because I was awaiting the clean-up of the clip that holds the burners. It attaches directly to the lowest opening of the back porcelain panel, just above the bend. You can also see the cleaned-up clips at the top of front and back panels. These secure the larger clips that hold the flavorizer bars and also the grates of the grill.
Thankfully, all these clips are made of non-magnetic 304 stainless. But they are 25 years old and show some wear. I was reluctant to overdue the cleaning and risk damaging them. They are pretty much irreplaceable. My solution was to soak in a bucket with a mix of water and plenty of Sam's Members Mark Grill Cleaner. That MM stuff is a strong alkali which can burn sensitive skin, so be careful when you use it. I never noticed before, but the bottles clearly say "Not for home use!"
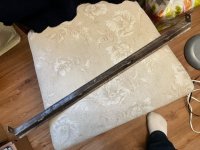
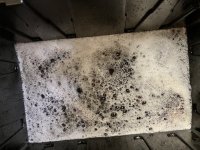
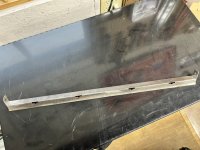
When I installed the burner clip and both flavorizer clips, I had to navigate a little around my added stainless steel reinforcement panels. The good news, though, is that these clips apply pressure to the panels and should help hold them securely.
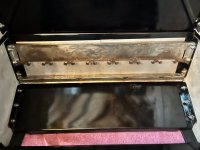
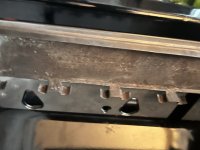
At the same time, I also secured the top section of the firebox (which is where the hood attaches) to the bottom. Originally, I believe this was done by using the same flat top bolts and speed nuts that Weber uses for the side pieces on this and on older Genesis grills. That is nice because it helps camouflages these holders. I decided in this case, that I didn't mind them showing and switched to stainless screw head bolts and stainless washers and nuts.
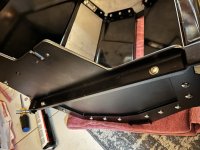
If you look at the lowest bolt opening of the upper part, you will see that I did use the flat bolt/speed nut combination for this hole because this opening is visible when the grill hood is open. I also went conventional using these on the hood side caps because i like the all-black look.
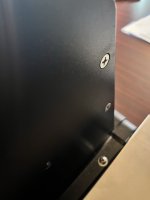
Take note of the stainless torx bolts I used to replace the originals which were regular steel and showing their age. The new ones I bought turned out to have heads larger than the openings in the cast aluminum. This was OK for the bottom, but when I put on the hood, they caused friction opening and closing it. I had to replace them with stainless screws that would fit inside the openings:
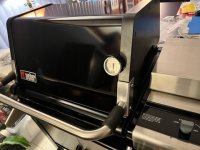
So, finally, I had a fully assembled firebox and hood. My Summit was starting to look like a grill!
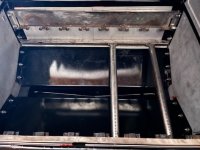
Larry gave me two sets of 304 stainless burners. I chose the better set to clean up with a wire brush on my bench grinder. Not perfect, but I would rather have the classic old Weber 304 ones than the newer, cheaper metal that might have to substitute. (I have found one place that sells Weber replacement burners. Not cheap. I have though about buying a set to have, but since Larry included a second set, I am not sure it is worth it.)
One challenge is that these burners use a long crossover between each set of two burners. What was left of the ones Larry gave me were good for measuring, and that's about it. I made my own from my stock of Genesis crossovers. (Hard to see in the picture below but they are there in the back.) After finishing them, I found where you could buy just these on GrillParts.com, so I ordered that to make my "2nd" set of burners complete.
While I was doing this, I also was soaking the two upper grates that Larry also kindly included in the deal. Once again, these are real 304 stainless. After a lot of soaking, some scrubbing and more soaking and a final clean-up with some Bar Keeper's Friend (sorry, Larry!) they came out looking pretty nice. Not sparkling stainless, but no worries about rust and corrosion:
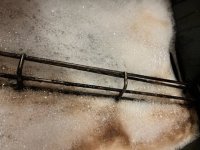
PHOTO LIMIT REACHED! TO BE CONTINUED
I have been working here and there as I am able, and my 1st generation Summit is finally nearing the finish line. SInce I hope that this thread will linger on as a help to future restorers of these Weber legacy grills, here are some more details I did since my last significant post:
With the frame done, it was time to face fixing the porcelain-plated steel firebox and trying out my stainless reinforcement panels. The first big challenge was what to do about the rust that had already started on them. Larry had obtained this set from a donor grill, but even this second set was going towards Swiss cheese as he has described.

Attacking this problem posed some hard questions for me. From all that I can see, there are two types of products that relate to this problem: ONE, stuff like Rustoleum Rust Reformer, Eastwood Rust Encapsulator and POR15. These products directly attack the rust and neutralize it. Then cover with varying textures. They are not paint, and none of them is rated to as high a heat level as would be likely to occur inside a grill. TWO, paint products designed for high heat with rust prevention capabilities. This would include products such as Eastwood's High Temp Coating designed for exhaust manifolds. This, and similar products, can take the heat, and they prevent new rust. But, they really do not attack the existing rust.
So, I felt any decision was a compromise. I went with POR-15. Yes, I do get it that it is not high heat rated. However, it is the strongest rust treatment/restorer that I have worked with. It can't tolerate exposure to UV rays, but all these parts will be in the dark, so that is not an issue. If it were, top coating with quality paint would solve that. Anyway, POR-15 has supposedly been tested at 450 degrees for hours without issue. Of course, grill interiors are a LOT hotter than that. So, I guess the jury is still out. One important thing is that the parts I treated are almost all covered by the stainless steel reinforcement plates. I am hoping that will mitigate issues.
Here is the porcelain firebox part after treatment:


There were also a couple other rust areas I treated including where I had to cut-off an immovable bolt that held the top firebox part to the bottom and my less than perfect skill with a cutoff tool left scars:


I think the risk was worth the benefits of arresting the rust monster on these irrreplaceable parts.
Then, it was on to applying the stainless panels. I posted earlier about the red "food grade" RTV rated to 650 degrees that I bought on Amazon. Having no experience with RTV, I asked @Bruce for some recommendations. I used painters tape to mark the areas of application on the porcelain and also applied the RTV to the stainless part. Bruce and I discussed levels of pressure to apply. I finally settled on using some dumbbell weights to keep some pressure on while the RTV cured for 24 hours.


You may have noticed that in addition to the special pieces made by the sheet metal shop I am working with featuring laser drilled holes to match the burner and igniter openings , I also had them make plain pieces for the back porcelain panel. I was very bummed out to find after cleaning thoroughly that even this part was beginning to show rust and the start of burn-through.
The RTV seemed to work OK, but I was still nervous about the pieces ultimately falling off. The next step was to at last re-assemble the firebox. A couple cool things:
The cast aluminum sides of the firebox have channels cast in to use RTV to better secure the side and provide better heat retention


Securing really shouldn't be a worry when you consider the extensive number of bolts holding these parts together!

The missing bolt above is because I was awaiting the clean-up of the clip that holds the burners. It attaches directly to the lowest opening of the back porcelain panel, just above the bend. You can also see the cleaned-up clips at the top of front and back panels. These secure the larger clips that hold the flavorizer bars and also the grates of the grill.
Thankfully, all these clips are made of non-magnetic 304 stainless. But they are 25 years old and show some wear. I was reluctant to overdue the cleaning and risk damaging them. They are pretty much irreplaceable. My solution was to soak in a bucket with a mix of water and plenty of Sam's Members Mark Grill Cleaner. That MM stuff is a strong alkali which can burn sensitive skin, so be careful when you use it. I never noticed before, but the bottles clearly say "Not for home use!"


When I installed the burner clip and both flavorizer clips, I had to navigate a little around my added stainless steel reinforcement panels. The good news, though, is that these clips apply pressure to the panels and should help hold them securely.


At the same time, I also secured the top section of the firebox (which is where the hood attaches) to the bottom. Originally, I believe this was done by using the same flat top bolts and speed nuts that Weber uses for the side pieces on this and on older Genesis grills. That is nice because it helps camouflages these holders. I decided in this case, that I didn't mind them showing and switched to stainless screw head bolts and stainless washers and nuts.

If you look at the lowest bolt opening of the upper part, you will see that I did use the flat bolt/speed nut combination for this hole because this opening is visible when the grill hood is open. I also went conventional using these on the hood side caps because i like the all-black look.
Take note of the stainless torx bolts I used to replace the originals which were regular steel and showing their age. The new ones I bought turned out to have heads larger than the openings in the cast aluminum. This was OK for the bottom, but when I put on the hood, they caused friction opening and closing it. I had to replace them with stainless screws that would fit inside the openings:

So, finally, I had a fully assembled firebox and hood. My Summit was starting to look like a grill!

Larry gave me two sets of 304 stainless burners. I chose the better set to clean up with a wire brush on my bench grinder. Not perfect, but I would rather have the classic old Weber 304 ones than the newer, cheaper metal that might have to substitute. (I have found one place that sells Weber replacement burners. Not cheap. I have though about buying a set to have, but since Larry included a second set, I am not sure it is worth it.)
One challenge is that these burners use a long crossover between each set of two burners. What was left of the ones Larry gave me were good for measuring, and that's about it. I made my own from my stock of Genesis crossovers. (Hard to see in the picture below but they are there in the back.) After finishing them, I found where you could buy just these on GrillParts.com, so I ordered that to make my "2nd" set of burners complete.

While I was doing this, I also was soaking the two upper grates that Larry also kindly included in the deal. Once again, these are real 304 stainless. After a lot of soaking, some scrubbing and more soaking and a final clean-up with some Bar Keeper's Friend (sorry, Larry!) they came out looking pretty nice. Not sparkling stainless, but no worries about rust and corrosion:

PHOTO LIMIT REACHED! TO BE CONTINUED
Last edited:
Jon Tofte
TVWBB 1-Star Olympian
PART TWO:
Here is the upper grate I selected to install. The other one is fairly nice, too, about the same condition, and it will be nice to have spare.
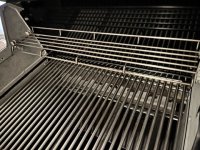
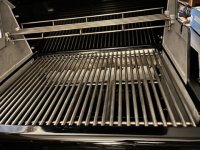
You may recognize the Dave Santana "rcplanebuyer" cooking grates. These have been left over from a few years ago when I did my Stainless-Steel Grate Throwdown comparison. They finally have a fitting home! I am not really fond of upper grates and always remove them from my Genesis grills. I find they get in the way, and if they are OEM nickel chrome plated steel, they are doomed to rust out after just a very few cooks. These are different, because of the stainless-steel composition but also because of how much higher they stand above the cooking grate. This is made possible by the very tall hood arrangement this Summit features. I think there is enough space that I will not mind them and maybe even find good use when something needs to be removed from high heat.
So, mainly what is left is to redo the manifold by cleaning the valves, replacing the NG orifices, treating for rust, painting, and installing new igniters (2, one for each pair of burners).
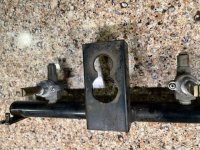
DETAILS:
Here are couple other final things:
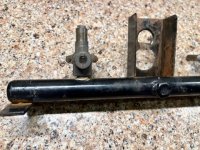
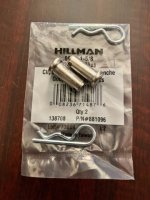
Even the hood hinge pins (thick) on this Summit turned out to be 304 stainless. I soaked them in a cup of 100% Sam's cleaner and they came out like new. I wish the new Hilman hitch pin clips I bought were also stainless!
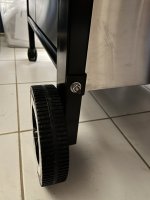
Pages earlier in this thread I showed how Weber used steel reinforcements on the leg corners to help protect the legs and give a stronger connection. Only problem was that I could only find two of these and had to leave the front legs without them:
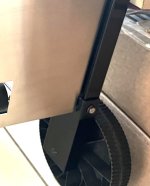
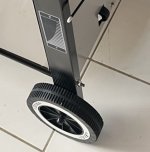
When I was pulling out the last parts for my Summit, I found the other two hiding in the bottom of the grooved black 27-gallon tub I was using to store them. I drafted my son today to help me redo this while holding everything together. Important? Not really. But I have been trying to go the extra mile - OK several miles - to give this beautiful old grill a new lease on life. Leaving those off would have bugged me every time I took the cover off this Summit.
Next post, I hope, will be the finale and a long-awaited show time. This project has taken ridiculously long, but that has at least added to the anticipation. I truly was afraid that after being in pieces for so long, and with some of those parts being stored in different places among my grill disasters, that this Summit might never come back to life. But it looks like it will. I am starting to taste that steak Larry - @LMichaels - promised upon a successful restoration!
Here is the upper grate I selected to install. The other one is fairly nice, too, about the same condition, and it will be nice to have spare.

You may recognize the Dave Santana "rcplanebuyer" cooking grates. These have been left over from a few years ago when I did my Stainless-Steel Grate Throwdown comparison. They finally have a fitting home! I am not really fond of upper grates and always remove them from my Genesis grills. I find they get in the way, and if they are OEM nickel chrome plated steel, they are doomed to rust out after just a very few cooks. These are different, because of the stainless-steel composition but also because of how much higher they stand above the cooking grate. This is made possible by the very tall hood arrangement this Summit features. I think there is enough space that I will not mind them and maybe even find good use when something needs to be removed from high heat.

So, mainly what is left is to redo the manifold by cleaning the valves, replacing the NG orifices, treating for rust, painting, and installing new igniters (2, one for each pair of burners).


DETAILS:
Here are couple other final things:
Even the hood hinge pins (thick) on this Summit turned out to be 304 stainless. I soaked them in a cup of 100% Sam's cleaner and they came out like new. I wish the new Hilman hitch pin clips I bought were also stainless!

Pages earlier in this thread I showed how Weber used steel reinforcements on the leg corners to help protect the legs and give a stronger connection. Only problem was that I could only find two of these and had to leave the front legs without them:


When I was pulling out the last parts for my Summit, I found the other two hiding in the bottom of the grooved black 27-gallon tub I was using to store them. I drafted my son today to help me redo this while holding everything together. Important? Not really. But I have been trying to go the extra mile - OK several miles - to give this beautiful old grill a new lease on life. Leaving those off would have bugged me every time I took the cover off this Summit.

Next post, I hope, will be the finale and a long-awaited show time. This project has taken ridiculously long, but that has at least added to the anticipation. I truly was afraid that after being in pieces for so long, and with some of those parts being stored in different places among my grill disasters, that this Summit might never come back to life. But it looks like it will. I am starting to taste that steak Larry - @LMichaels - promised upon a successful restoration!
Last edited:
Joe Anshien
TVWBB Honor Circle
Wow - Amazing job. We are going to need a video unveiling and first cook!
LMichaels
TVWBB 2-Star Olympian
Just an amazing resto. I just sort of lost heart with it when Weber let me down on the warranty issue. On that issue I am a little embarrassed I let it go to that level of degradation. But, I just felt like the air was let out of my balloon.
A note on the upper cooking rack. On the Summit because of being SS and because of the added height I made great use of that upper rack and Jon I am sure you will as well once you begin using it
Re, the Eastwood Rust Encapsulator. I am thinking since you are treating the areas then reinforcing with the SS panels, the SS panels will act sort of like a heat shield and keep max temps down in the areas Time will tell
Jon Tofte
TVWBB 1-Star Olympian
Larry,
Thanks for that encouragement. I hope I have come up with a fix for this - and others’ - 1st generation Summits. I thank you for selling it to me and hope you get at least some joy knowing I finally am giving it a chance for another long run. Pretty amazing to think that it is 25 years old!
Thanks for that encouragement. I hope I have come up with a fix for this - and others’ - 1st generation Summits. I thank you for selling it to me and hope you get at least some joy knowing I finally am giving it a chance for another long run. Pretty amazing to think that it is 25 years old!
Jon Tofte
TVWBB 1-Star Olympian
OOPS!
Just a quick post so you all can get a laugh at my expense.
I had purchased an old-style Weber handle light for this Summit.
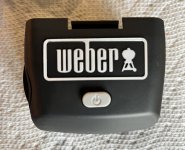
Today I had just enough time to paint the kettle red and install:
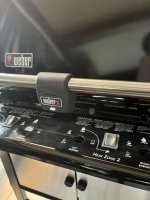
I always wondered why this Summit was not listed on the package as a grill this light will work on. Now I know!
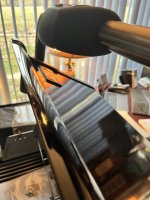
You would at least have a well illuminated hood front, anyway .
.
Oh well..
Just a quick post so you all can get a laugh at my expense.
I had purchased an old-style Weber handle light for this Summit.

Today I had just enough time to paint the kettle red and install:

I always wondered why this Summit was not listed on the package as a grill this light will work on. Now I know!

You would at least have a well illuminated hood front, anyway
 .
.Oh well..

