Another Furniture Picture!
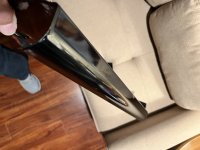
I won't even try to explain all the stuff pulling at my life right now, but I managed to find a very tiny window in the relatively mild late afternoon to drag out the last of my porcelain coated steel parts. This is the LONG drip tray extension that rests below the porcelain coated firebox front and back parts. Underneath it goes the same drip tray/liner and metal holder as used on Genesis x000 and Silver/Gold/Platinum grills. When I bought this grill from Larry
@LMichaels , he was kind enough to throw in some extra parts he had accumulated in trying to keep this Summit functional. One duplicate was one of these drip tray extensions, so I actually have TWO of them:
View attachment 63310
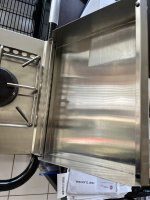
Here I am late this afternoon trying to get them clean enough to bring in the house. The one toward the back that looks cruddy, actually cleaned up slightly better than the front one. Both got clean enough for another "furniture photo shoot!"
 View attachment 63311
View attachment 63312
View attachment 63311
View attachment 63312
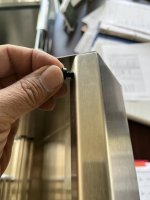
Neither of these are "perfect" after 24 years, but they are made with pretty thick steel and silky porcelain coating. They look to have plenty of life left. I am hoping two will last me for the rest of my grilling days. There are few replacement parts available for these old Summits, and this unique part is definitely not one of them. Having a spare is a huge blessing.
@LMichaels, if you uncover any more squirreled away Summit parts, please do let me know!


 a little to get it as close to the original as possible (to fit back in the mechanism). It felt like I was in metal shop - a class I never had the chance to take but wish I could have.


 !
!