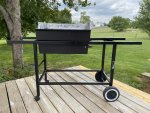
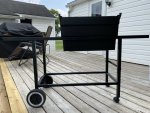
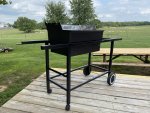
First Grill Restoration


The next piece I am starting to gather things for is the cedar wood slats and handle. Can anyone tell me what the approximate original width was for each slat on the work tables? The wood that the previous owner installed looks to be too thin compared to the examples I’ve found on here.
Also, I want to recreate the original handle, but have no idea what the dimensions are of the three grooves that are cut out. Would anyone be able to give those measurements?

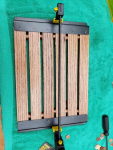
A lot of people are using the 1 x 2 slats, and search for the 5 penny spacing method. Can't find it off the top of my head, but here is a recent thread about the slats:

https://tvwbb.com/threads/weber-genesis-1000-resto-mod.82773/post-916333

They bought:
https://www.lowes.com/pd/Common-1-i...875-in-x-1-5-in-x-8-ft-Cedar-Board/1000465435
 
Steve have fun going thru those boards went thru like 30 of them cause I did not want any ones that had knots in them. Dave's trick works great just did those on the 1100 I did for my friend. I used the original wood it was 5 pennies on the top and drop down table and 7 pennies for the bottom wood.

I think Dave goes to the edge of the z bars my friend had marked the boards so I had the original starting points if I remember the top and drop down table were indented from the left and right side of the z bars about 1/8" on the bottom they were indented about 1/4". Don't think it matters as long as you get even spacing and remember I was using old wood so just play with the new pieces.
 
I think Dave goes to the edge of the z bars my friend had marked the boards so I had the original starting points if I remember the top and drop down table were indented from the left and right side of the z bars about 1/8" on the bottom they were indented about 1/4". Don't think it matters as long as you get even spacing and remember I was using old wood so just play with the new pieces.
I have both wood and Durawood tables. The Durawood table is a snug friction fit between frame rails and does not slide around...you definitely want this with Durawood because if it should slide against the left side cookbox crossmember the heat will cause the plastic to warp. The wood tables have obviously shrunk over the past 25 years because they are so loose in the frame, but if you indent the wood as Brian stated it will serve to keep the wooden slats away from that crossmember.
 
On the durawood grills, Weber started putting in a heat sheild between the cross member and side tables. But, i have still seen many grills where it didn't quite sheild it enough.
 
Steve have fun going thru those boards went thru like 30 of them cause I did not want any ones that had knots in them. Dave's trick works great just did those on the 1100 I did for my friend. I used the original wood it was 5 pennies on the top and drop down table and 7 pennies for the bottom wood.

I think Dave goes to the edge of the z bars my friend had marked the boards so I had the original starting points if I remember the top and drop down table were indented from the left and right side of the z bars about 1/8" on the bottom they were indented about 1/4". Don't think it matters as long as you get even spacing and remember I was using old wood so just play with the new pieces.
Thanks Brian!
I also went through quite a few boards today. I ended up buying a few more than I need just in case.
 
That screw holding the burner in is not meant to be removed. What you need to do is take the manifold off on the other end and then pull the burner out that way. I don't know why Weber actually put screws in there because it just seems logical to remove them, but that is not the case.

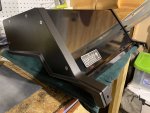
So... if it's a new cook box, do you know what size screw would go there? I thought I may be able to get by without them but that is definitely not the case and I don't won't to break the casting trying to force something in there
 
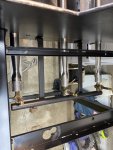
Installed new burner tubes today. These are loose and have play in them where the tube meets the valve as well. Is that okay?
F7D4B54B-94C2-4142-AA0B-0E561F310BD0.jpeg
 
So... if it's a new cook box, do you know what size screw would go there? I thought I may be able to get by without them but that is definitely not the case and I don't won't to break the casting trying to force something in there
A new cook box should have them already in place.


Back
Top