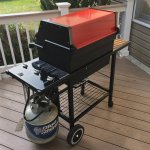
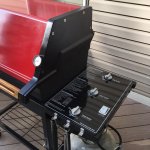
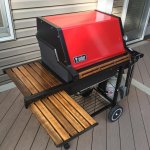
*RESTORED* Tackling my First Restore - Genesis 1000


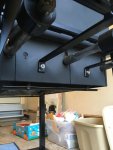
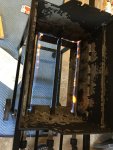
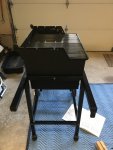
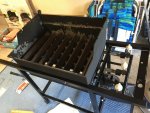
Made some progress last night! After assembly I found that the top and panel could use some more cleaning, so I’ll have to do that too.

159F6D24-CDC8-4508-8443-67869376A965.jpeg 9C03BF37-8212-42C0-944A-6D1A5AA391AE.jpeg 01684394-05A9-4DA9-A8D6-B459F03874BD.jpeg63A21B96-CECB-408D-A995-5D765AF8DC1A.jpeg
I’m thinking next year for the RCPlaneBuyer grates, and the originals are honestly in great shape after a serious cleaning and I love the idea of using original where possible.

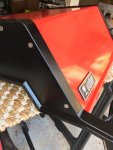
Also, my favorite part so far was reassembling the lid. I can’t believe how much I like the stainless bolts that really pop! I’ve seen them (Socket flat head, Stainless steel 18-8, 1/4"-20 x 5/8") recommended a few times on this forum, so a big thanks to whoever used them first! They rock!

024677F2-A49D-48A2-9649-3BFCA6131013.jpeg
 
Last edited:
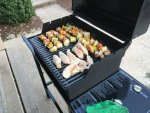
Still haven’t made any progress on the wood. With that said, was simply too excited about it being functional to not take a break and use it!

6AAC8095-E040-460F-BC20-1850A03AA5EC.jpeg
Also, with no front handle to grab onto, those handle-holder endcap parts get hot! Thanks again for all the help!
 
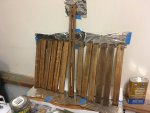
Trying to knock out the final steps of this restore in the next two days. After sanding with 150 and 220 grit sandpaper, vacuuming, and wiping down with a tack cloth, I hit the original tables with Golden Oak stain. I let it sit for about 15 minutes before wiping off excess.

Nearly instantly I started to see blotchy-ness on a few of the pieces, so I sanded them back down after drying and tried again. The result was a bit better but still not ideal. With that said, I think I might be the only person who notices.

Here is pic after the first coat:
0A41702E-A05A-4B0A-95CF-4F87E22E890D.jpeg
(The left set of boards are the flip-up table, and the right set of boards are the top table that sits against firebox)
I think it’s the right amount of dark, so I’m not going to stain again. With that said, I plan to hit it with a few coats of Spar Urethane as suggested.
While I wait for this to dry, anything that I can do to save this blotchy-ness? I think it could be character, but I just figured I would ask before I apply the spar.

I’m leaning more and more toward recreating all the boards at a later date.
 
There is a pre-stain treatment that is supposed to help stain apply more evenly. I am not sure you would want to go through a whole reboot, though.

 
I had that appearance when I restored a Gen 2000, using the original wood. Did the same thing that you did, but could never get the blotchiness completely gone, so I just chalked it up to character for a 25 year old grill. I guess you could minimize it by turning the most blotchy side in or under so that they won't be visible. After the fact, I thought that the blotchy appearance was from 25 years of dirt/grease that got absorbed in to the wood over time, deeper than I could sand it away.
 
There is a pre-stain treatment that is supposed to help stain apply more evenly. I am not sure you would want to go through a whole reboot, though.


Saw some mentions of that online - seems like a solid product! I'm probably not going to completely scrap it but I will keep that in mind for future grills! Thanks!

I had that appearance when I restored a Gen 2000, using the original wood. Did the same thing that you did, but could never get the blotchiness completely gone, so I just chalked it up to character for a 25 year old grill. I guess you could minimize it by turning the most blotchy side in or under so that they won't be visible. After the fact, I thought that the blotchy appearance was from 25 years of dirt/grease that got absorbed in to the wood over time, deeper than I could sand it away.

Ya know what, Rick, that's good enough for me. Glad to hear I wasnt the only person. I tried to put in the details so that someone could tell me where I went wrong, but I like the "character" narrative quite a bit! Thanks!
 
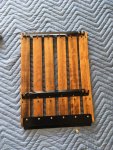
Beyond confused. I was meticulous about keeping the boards in order. I expected slight shrinking because of sanding, but I can’t seem to understand why these brackets don’t line up with the original holes. Anyone want to tell me the obvious detail I’m missing?
7E94AD56-ED6F-4C07-9AC5-DBE2C4AE547E.jpeg
Thanks in advance!
 
The slats should not extend outside of the bracket. I don't know it you used existing holes on the six screws you installed so far. But look at this pic from your first post, the slats are flush with the edge of the bracket:
2-jpg.8894


I suggest you forget about using the previous holes and use Dave in KC's penny method.
img_3267-jpg.2012

This is Dave's penny method in action. Here, I did not go for a flush end because this was one panel of two for the bottom shelf and I wanted the same gap between the two panels as between each slat on the panels.

Edit: I know you were meticulous, but if you did use existing holes thus far, I think you might need to swap the ends. Say the slats are currently 1-2-3-4-5-6; would it work better if they were 6-2-3-4-5-1?
 
Last edited:
Also, my favorite part so far was reassembling the lid. I can’t believe how much I like the stainless bolts that really pop! I’ve seen them (Socket flat head, Stainless steel 18-8, 1/4"-20 x 5/8") recommended a few times on this forum, so a big thanks to whoever used them first! They rock!

Aww shucks :rolleyes:

Jeff
 
The slats should not extend outside of the bracket. I don't know it you used existing holes on the six screws you installed so far. But look at this pic from your first post, the slats are flush with the edge of the bracket:
2-jpg.8894


I suggest you forget about using the previous holes and use Dave in KC's penny method.
img_3267-jpg.2012

This is Dave's penny method in action. Here, I did not go for a flush end because this was one panel of two for the bottom shelf and I wanted the same gap between the two panels as between each slat on the panels.

Edit: I know you were meticulous, but if you did use existing holes thus far, I think you might need to swap the ends. Say the slats are currently 1-2-3-4-5-6; would it work better if they were 6-2-3-4-5-1?
Right, this is exactly why I’m confused. I used all of the original holes. It has to be user error. Thanks!
 
I'm guessing 1-2-3-4-5-6 should be 6-5-4-3-2-1

The fact that people on this thread messaged me and helped me through this complete oversight are the reason I love this place! Thanks David! Figured that out a few hours ago and am happy to report a blazing success!
 
A huge thanks is in order to all of you who helped me through this! Safe to say I'm pleased with how it turned out and look forward to upgrading the grates and flavorizor bars with time.

Final 1.jpg Final 2.jpg
Final 3.jpg
Also, the craziest thing happened. While I was working on this grill, two others found their way into my garage! Looking forward to giving another as a birthday present soon. Cheers!
 
Awesome job on your resto.....shes a beauty!!!! And I told u about Weberitis didnt I????? Your hooked.....get used to carbon and grease under your finger nails and searching craigslist with coffee in the morning
 
Wow, that grill turned out beautifully. Now you need to do something about that dirty propane tank. :p


Back
Top