*RESTORED* Tackling my First Restore - Genesis 1000


AHymel

TVWBB Fan
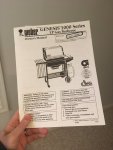
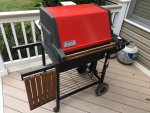
Bought a Weber Genesis 1000 off of Nextdoor for $40. It included what appears to be nearly all original parts, but has been taken great care of. So well in fact, that the person selling still had the original manual that their father was given when he purchased the grill. It has handwritten notes and highlighted portions which I find to be an awesome testament to how much he appreciated the grill. This grill was actually purchased one month before I was born, so I can't wait to see it when its all cleaned up!
1.jpg 2.jpg
3.jpg
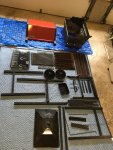
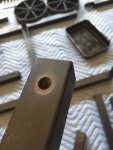
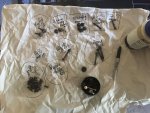
After extensive reading on this forum, I stocked up on supplies to get started and pulled it apart. This process was fascinating to me. For all of the familiar names I see on these posts, I'm sure some of the awe is gone while you take these old Webers apart, but for me, it is wild how well-made these things are! Everything feel sturdy, under surface rust is serious metal, even stuff like the tank gauge was awesome to check out! Got super excited when I had everything laid out.

6.jpg
My next steps will be taking the firebox endcaps off and starting to clean everything. Thanks in advance for all the help this forum will give me! I have found some rust here and there, but overall it seems to be mostly on the surface.
 
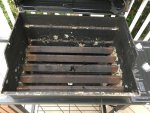
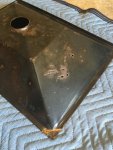
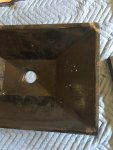
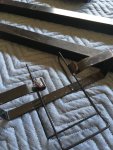
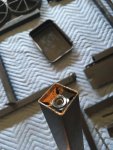
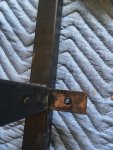
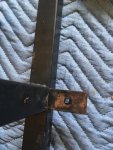
With further inspection, this is really the only rust that I found and with the exception of the bottom tray and catch pan holder, all seem to be surface rust only.
14.jpg 7.jpg 9.jpg
10.jpg 11.jpg
13.jpg 12.jpg
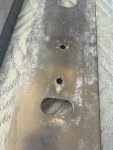
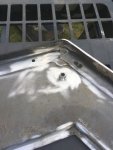
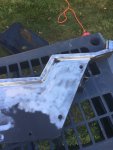
This is after some work with a putty knife and angle grinder on the firebox and the bottom tray. Are the holes in the tray something that I should be worried about? Should I take the grinder with a wire cup wheel to the frame rust or will that result in something that is impossible to get smooth after?

I have Rust Reformer, High Heat Black, and High Heat Black Ultra for the painting when the time comes.
 

Attachments

  • 12.jpg
    12.jpg
    239.4 KB · Views: 5
That drip pan is nearing it end. Those holes will allow grease to drip through which will make a mess.
Otherwise, that grill does look in great shape for its age. I am not sure, but it looks like you are missing the top left shelf.
I would either remove that rust or at least hit it with some rust reformer before painting over it. It is minor, but if left as is, it will likely eat through any paint over it unless you mitigate it now.

Thanks for the input, Bruce! Seen your name for months, so appreciate any insight you have. You're exactly right about the holes being a dripping issue, just wasn't sure if there was any alternative for sealing them that doesn't involve completely buying a new drip tray. I sent out a few feelers about welding new pieces of sheet metal on top, but honestly just wouldn't like how it looks. I will be getting some instant gasket for the back of the weber logo - any chance you think I could plug the holes with that and sand it smooth?

Also, next hiccup, that size of drip pan seems to be discontinued (19 3/4" x 13 1/2") or the prices are through the roof because of the age. Has anyone found any alternatives? I imagine the answer is yes because the old Genesis seems to be very common here.

I have the top shelf and the other internals, just didn't put them back in for the picture. :) Good eye!

And it settled then, I'll remove the frame rust and spray with rust reformer and high heat paint. Any advice on if I can use angle grinder or only sand paper on the frame? And will rust reformer do alright in the heat if it's properly covered with high-heat paint?
 
Also, next hiccup, that size of drip pan seems to be discontinued (19 3/4" x 13 1/2") or the prices are through the roof because of the age. Has anyone found any alternatives? I imagine the answer is yes because the old Genesis seems to be very common here.
Yes they are no longer available. Weber has discontinued them. As far as I know there was never aftermarket part. I think the only option is to find another parts grill or someone here has one left he is willing to sell.
 
You should also remove the end caps from the lid. It will be a lot easier for cleaning both the lid and painting the endcaps.
 
Yes they are no longer available. Weber has discontinued them. As far as I know there was never aftermarket part. I think the only option is to find another parts grill or someone here has one left he is willing to sell.
Solid idea. I was also considering some extreme-heat JB Weld products. I think the holes are small enough that I might be able to fill and sand them down after. Hmmmm...

You should also remove the end caps from the lid. It will be a lot easier for cleaning both the lid and painting the endcaps.

Couldnt agree more, Rick! Honestly, just ran out of time, but thats next on the list! Cheers!
 
JB weld is a possibility. You can probably get away with using the Non-High heat stuff as well. But, that rust is going to continue to progress.
Use the JB Weld as a temp fix and keep your eyes out for a donor grill.
 
JB weld is a possibility. You can probably get away with using the Non-High heat stuff as well. But, that rust is going to continue to progress.
Use the JB Weld as a temp fix and keep your eyes out for a donor grill.
Hearing ya loud and clear. So if I grind down as far as I can, probably making the hole even bigger to get rid of the rust, you think im better off just looking for new one? You've done this more than me, I guess what I'm asking is can I realistically remove all the rust from that section, or should everything be considered temporary?
 
Well, I am in a bit different position than you. I have probably 7 or 8 trays, so if I needed one, I would just grab one. But, if I didn't, I would probably line it with some aluminum foil for now and look for a donor grill. Just keep changing out the aluminum foil regularly until you find a replacement.
 
Well, I am in a bit different position than you. I have probably 7 or 8 trays, so if I needed one, I would just grab one. But, if I didn't, I would probably line it with some aluminum foil for now and look for a donor grill. Just keep changing out the aluminum foil regularly until you find a replacement.
Totally fair! Thanks! Ill give it a whirl with the JB Weld and see how it goes.
 
Nice work so far. I see you have the OCD tendencies :) I recognize them because I have them as well. You just had to lay out all the parts nice and neat, I love it. That is a great looking grill. I am new to the hobby as well but I am on my 5th or so resto. The most enjoyable part of the process is cleaning the hood inside and out. Simple green and 0000 steel wool for the outside and simple green and a new sharp razor on the inside......it will look like new when you are finished. Good luck!
 
Yah, I notice a lot of guys like to lay all their parts out nice and neat and in order. That looks cool. I just put them all in one big tupperware storage bin. Early on when I first started doing grills I came up with one trick that made things a lot easier when putting it all back together and that was to take smaller parts like screws and clips and such and put them in small zip lock sandwich or snack bags. Then, I would write on the bag with a marker what they were for and where they went on the grill. It sure saved me from how my first couple grills went where I had had spare parts when I was done.
 
Yep I have been doing the big plastic tub and ziplock baggie as well. For a quickie turn around grill I will remove the part but put the screws back in their location so when its time to put a cover back on the screw is right there....no wondering which one it was or where it is
 
OCD tendencies you say?

15.jpg
Jokes aside, I think this is mostly because it's my first try. I don't want to mix anything up so its more just for my organization. Y'all can probably see a bolt and know where it came from, but not me (not yet at least). Trying to stay organized so I don't make more work for myself. With that said, I saw an old Bruce post on another thread saying that he marks the backs of boards before taking them off... that's something that I'm wishing I had done. But I guess that's what this is all about - learning for next time.

Keep us posted, I want to know how that goes.
Good luck.

Ordered the JB Weld Extreme Heat, so hopefully this weekend I'll seriously grind down those drip pan holes and see how it goes. I'm hoping I'll still be able to grind/sand down the weld after its set for a nice, smooth finish.

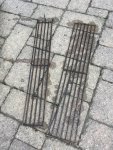
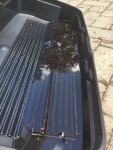
Also, after ordering a new warming rack and basket I figured I might as well try to salvage the originals that came with the grill. Snagged some White vinegar and the only plastic bin I had long enough to hold them and will be letting them sit out all day, scrubbing every now and then. Fingers crossed for some improvement because saving $30-40 on those replacements would be nice!

16.jpg 17.jpg
 
yep I love it.......and yes it just falls into the being smart category. No no need to stress out later trying to remember where things go. The one nut and bolt that I can always recognize is the cook box to frame bolt....cause its always snapped/broken.
Here is one of my examples.......when I replace a door lock actuator motor in one of my cars I always watch youtube vids first etc etc......but when I start the project I grab a large piece of cardboard box and draw a life size picture of my car door. When I remove a screw I then push it in the cardboard box like a push pin.....so if it came from the door handle I push the screw in the box at the door handle......I can also write notes on the box as I go along. You could do the same thing with the grill project.
 
91B7A731-0312-4171-9565-F476D9527292.jpeg76E52D7D-98BF-48F3-AC93-502FA2FF0BC8.jpeg
After testing the ultra paint on the endcap I found that I didn’t like the blotchy paint underneath. I decided I want to grind it all off, but how do I get into these corners? I’m not so worried about the inside of the endcap, but the outside obviously has to go.
Should I be sanding after this too?
 
This is what you need to strip off the finish on the outside of the end caps.

and


You won't need to do any sanding after you strip the outside of the end cap with this. You might not be able to get the finish off completely one or two small areas, but the finish will wind up getting smoothed out from the brush and you won't even notice it after you repaint it.


Back
Top