AHymel your grill is coming along nicely! Please report......how did u prep your frame and how did the high heat look when painted on the frame? Also how did your experiment go with the smooth end cap and the OEM end cap? How about a close up of the the end caps. Your grill is gunna be a stunner......nice work on the Weber badge too!!
You are using an out of date browser. It may not display this or other websites correctly.
You should upgrade or use an alternative browser.
You should upgrade or use an alternative browser.
*RESTORED* Tackling my First Restore - Genesis 1000
- Thread starter AHymel
- Start date
Hey, Jim! Thanks for following up!AHymel your grill is coming along nicely! Please report......how did u prep your frame and how did the high heat look when painted on the frame? Also how did your experiment go with the smooth end cap and the OEM end cap? How about a close up of the the end caps. Your grill is gunna be a stunner......nice work on the Weber badge too!!
So the frame paint seems to have worked pretty well. Cleaned with degreaser, then treated for rust. all my rust was surface-only, which was a blessing, so each got scrapped and sanded with 400 grit sandpaper. For all the frame rust that was close to the firebox, I hit with High Heat Ultra Semi-Gloss, but for all the frame rust not near the firebox I hit it with Rust a Reformer.
I haven’t finished much of the frame completely, but was happy to see that the 2x gloss and the High Heat Ultra are nearly indistinguishable.
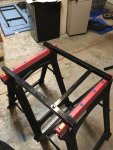
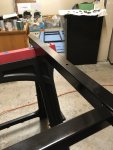 For reference, this is the only frame piece I finished. Got rust reformer around some of the holes, and the transition from High Heat Ultra to 2x is right about at that hole, halfway down. Hard to see a sheen-change even when looking.
The endcap experiment sucked. It’s very easy to see where the paint was not grinded off. I suppose it would have been a different story if the cap was good from the start, but the real issue is visible whenever it transitions from bare metal to OEM paint. Tomorrow I will have to grind that off again and repaint. Unless sanding and repainting will help but I don’t think it will. Looks like I’ll need bare metal
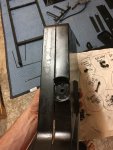
Lesson learned!
Hey your frame paint turned out really nice.....thats a big plus!!! Nice job.....what degreaser did you use? Sorry to hear about the end caps. That is a very common mistake for us rookies. You will notice a lot of resto pics are from far away and dont show the end caps very clearly. The pros on this forum know how to get it done correctly but I have struggled just like you did. You might be able to find my post when I did the same thing.....boy was I shocked. I thought I prepped properly and did everything right and I had no idea the spots where it was bare aluminum would show up as shiny after painted. At least you only did one that way....you will find wire wheelin that new paint off is a little different then wheelin the old stuff off. I am determined to figure out a way to add texture to the bare spots so we dont have to grind the end caps down to smooth as I much prefer the textured look. Keep moving forward......its a fun and sometimes a not so fun project. Not sure if the guys mentioned this to you or not......but there is more then just one pandemic going around.....so be very careful......you might catch Weberitis.......yep.....I caught it bad after my first resto....I am now on grill #20 and have zero control of myself.....Craigslist and Facebook Market place 24/7.....man I hope I am cured soon cause I really hate wire wheelin cook boxes.
Thanks! Your response made me laugh out loud! It’s definitely a dangerous game! Plus I have all the tools and knowledge now! I actually got a quote back from a local sandblasting spot for $60 for the firebox and endcaps, so will likely use them if I’m lucky enough to snag another grill.Hey your frame paint turned out really nice.....thats a big plus!!! Nice job.....what degreaser did you use? Sorry to hear about the end caps. That is a very common mistake for us rookies. You will notice a lot of resto pics are from far away and dont show the end caps very clearly. The pros on this forum know how to get it done correctly but I have struggled just like you did. You might be able to find my post when I did the same thing.....boy was I shocked. I thought I prepped properly and did everything right and I had no idea the spots where it was bare aluminum would show up as shiny after painted. At least you only did one that way....you will find wire wheelin that new paint off is a little different then wheelin the old stuff off. I am determined to figure out a way to add texture to the bare spots so we dont have to grind the end caps down to smooth as I much prefer the textured look. Keep moving forward......its a fun and sometimes a not so fun project. Not sure if the guys mentioned this to you or not......but there is more then just one pandemic going around.....so be very careful......you might catch Weberitis.......yep.....I caught it bad after my first resto....I am now on grill #20 and have zero control of myself.....Craigslist and Facebook Market place 24/7.....man I hope I am cured soon cause I really hate wire wheelin cook boxes.
Grinded and repainted. A pain, but very much worth it!
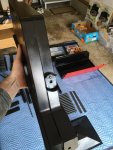
After a day of painting, the grill is ready for reassembly! Just waiting for my shipment from Marsh Fasteners to come in and I’ll be ready to roll!
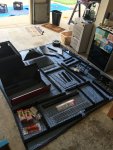
For those curious about the white vinegar treatment on the warming rack and basket, it did about 90% of the rust removal, but I couldn’t get the last layer off. With that said, the replacements I ordered will be put to good use. Bummer, but worth trying. Curious if anyone has had success saving these? Sandblasting?
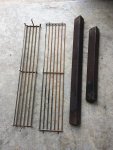 Now begins the side table wood work. I’m going to try and save the original wood because it seems to be in great shape! Going to sand with 150 and 220, tack cloth, then apply Golden Oak Rustoleum stain and Helmsman Span Urethane. This will be my first time working with outdoor wood, so looking forward to learning!

For those curious about the white vinegar treatment on the warming rack and basket, it did about 90% of the rust removal, but I couldn’t get the last layer off. With that said, the replacements I ordered will be put to good use. Bummer, but worth trying. Curious if anyone has had success saving these? Sandblasting?
 Now begins the side table wood work. I’m going to try and save the original wood because it seems to be in great shape! Going to sand with 150 and 220, tack cloth, then apply Golden Oak Rustoleum stain and Helmsman Span Urethane. This will be my first time working with outdoor wood, so looking forward to learning!
Last edited:
Sorry to single you out for a specific question, but I snagged some RTV gasket maker as I saw you suggest elsewhere to attach the emblem.It is porcelain. However once it's full of holes who cares
Do I literally put that paste behind the emblem? Between the emblem and hood? Or inside the hood where the friction caps were? Thanks in advance!
Ed P
TVWBB Honor Circle
As for the warming racks, I have never sandblasted one of these and I won't, either...both of mine are shot, too, BTW. It's too tedious and time consuming and rust, especially the loose, flaky kind, is like cancer in that it gets in the "pores" of steel...once there, you can clean it off the surface but it will rust up much faster than when new.
Bruce
TVWBB 2-Star Olympian
Yah, don't bother blasting a warming rack. All you do is expose the bare carbon steel which will rust immediately. I understand you can buy stainless steel ones, but they sell at a premium price. Or, you can do what most people do and that is put them in the corner of the garage or even the trash bin.
That’s what I’m finding. Thanks for confirmation that I’m not crazyAs for the warming racks, I have never sandblasted one of these and I won't, either...both of mine are shot, too, BTW. It's too tedious and time consuming and rust, especially the loose, flaky kind, is like cancer in that it gets in the "pores" of steel...once there, you can clean it off the surface but it will rust up much faster than when new.
Use RED Rtv and yes, you paste the emblem on with it. The stuff goes between the emblem and lid.
Thanks again, Bruce! Just around the joints or would an “X” hold it in place? I’m sure it doesn’t matter but just want to be sure!
Sorry I missed this, but I used simple green on the majority of the grill, but some automotive brake cleaner on the real messy internals. But frame was simple green!Hey your frame paint turned out really nice.....thats a big plus!!! Nice job.....what degreaser did you use? Sorry to hear about the end caps. That is a very common mistake for us rookies. You will notice a lot of resto pics are from far away and dont show the end caps very clearly. The pros on this forum know how to get it done correctly but I have struggled just like you did. You might be able to find my post when I did the same thing.....boy was I shocked. I thought I prepped properly and did everything right and I had no idea the spots where it was bare aluminum would show up as shiny after painted. At least you only did one that way....you will find wire wheelin that new paint off is a little different then wheelin the old stuff off. I am determined to figure out a way to add texture to the bare spots so we dont have to grind the end caps down to smooth as I much prefer the textured look. Keep moving forward......its a fun and sometimes a not so fun project. Not sure if the guys mentioned this to you or not......but there is more then just one pandemic going around.....so be very careful......you might catch Weberitis.......yep.....I caught it bad after my first resto....I am now on grill #20 and have zero control of myself.....Craigslist and Facebook Market place 24/7.....man I hope I am cured soon cause I really hate wire wheelin cook boxes.
Bruce
TVWBB 2-Star Olympian
I just put a dab at near each corner and then near top and bottom in the middle. Just put it on the raised areas and not too close to the outside.That’s what I’m finding. Thanks for confirmation that I’m not crazy
Thanks again, Bruce! Just around the joints or would an “X” hold it in place? I’m sure it doesn’t matter but just want to be sure!
LMichaels
TVWBB 2-Star Olympian
I just pasted it with a good dab in the middle spread with a stick a little bit and slap it on. Make sure both surfaces are clean and free of grease. Cool thing here is if you ever want to take it off again slipping a thin putty knife in there is easy, pops right off and the rtv will clean right off. The simply repeat to reinstall it.
Those auxiliary racks a kind of a waste of effort and money unless you opt for stainless ones. They will rust away in short order. They're hard to clean as well without damaging the chrome plating on them. If they're really wanted/needed IMO get stainless ones
Those auxiliary racks a kind of a waste of effort and money unless you opt for stainless ones. They will rust away in short order. They're hard to clean as well without damaging the chrome plating on them. If they're really wanted/needed IMO get stainless ones
Thanks, gonna add emblem after a final clean. And you’re right about the racks. I might look for stainless but return if I find them unnecessary.I just pasted it with a good dab in the middle spread with a stick a little bit and slap it on. Make sure both surfaces are clean and free of grease. Cool thing here is if you ever want to take it off again slipping a thin putty knife in there is easy, pops right off and the rtv will clean right off. The simply repeat to reinstall it.
Those auxiliary racks a kind of a waste of effort and money unless you opt for stainless ones. They will rust away in short order. They're hard to clean as well without damaging the chrome plating on them. If they're really wanted/needed IMO get stainless ones
Final step is the wood! I’ll be using the originals because they are in shockingly great shape and I appreciate the lack of guesswork about reassembly. Sanded the set of left, handle and right set haven’t been touched.
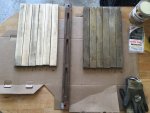
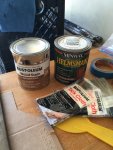
I watched a few videos about staining and finishing with spar but I saw one where they diluted the spar with some paint thinner for the first few coats. Am I overthinking it? I just don’t wanna mess up the final step!


I watched a few videos about staining and finishing with spar but I saw one where they diluted the spar with some paint thinner for the first few coats. Am I overthinking it? I just don’t wanna mess up the final step!
Jon Tofte
TVWBB 1-Star Olympian
I don't see any reason to dilute the spar. Most important to me is getting the original wood looking as good as you can and then making sure it is clean. A tack cloth will help with that. Also, a LIGHT sanding between coats after fully dry will help you get a nice finish. At least three coats.
Hearing ya! Thanks for the advice! I’ll give the light sanding a try!I don't see any reason to dilute the spar. Most important to me is getting the original wood looking as good as you can and then making sure it is clean. A tack cloth will help with that. Also, a LIGHT sanding between coats after fully dry will help you get a nice finish. At least three coats.
My thumb screws that hold the manifold on couldn’t be more of a pain. I think I want to replace them with stainless as well, but couldn’t even get a 1/4-20 bolt in there! Any alternatives? They don’t seem to be holding much weight
Hmmm mine seemed to have been just the thumb nut with a washer on the outside, nothing on the inside holding it if I recall correctly. I couldnt get any of my 1/4-20 bolts in there beyond the threading, so I'll have to find some long enough that the threading doesnt stop halfway. I appreciate all your help!You can just put a plain old hex nut on the manifold bolt instead of the wing nuts. But, I suggest stainless for both the bolt and nut.
