Food Photography Tips and Techniques *****


Jose,

The Milwaukee Journal-Sentinel had a bacon dessert contest several years ago. My wife entered a recipe for Chocolate Bacon Baklava, that she made up, but had never made.

Her recipe won.

The paper was going to send a photographer so she baked her recipe. The day before he showed up we arranged the baklava on a platter on our kitchen table. It was sitting in direct sunlight when I took the picture. The white thing is a candle that was on the table but outside the subject of the photo.

If you google Chocolate Bacon Baklava you will find her recipe (I don't know how to post a link from my smartphone).

Jim

WOW!! Great Story Jim. And congrats to your wife!! Great job with the P&S. You have a great eye for compositions.

Best,

Jose
 
Jose, I am not at all artistic, but that photo of the boat takes my breath away. How did it get there? What might the backstory be? It's not just another boat. There were people involved with it. An author could take that photo and run with it. It is sticking in my minds' eye.

Rita

Thanks Rita! Nothing sinister to the story. Here in Florida there are a lot of sailboat owners that can't afford marina slip fees so there are a lot of them anchored in what they believe to be "safe" anchorages. But, there is no such thing. Eventually a storm brings in high winds and the anchor drags. Then they hit bottom, tilt to the side, and sink. I hunt these for photography, and they come few and far between. Conditions too have to be perfect.

That first boat sank and was under water for over a year before a salvage company pulled it out. It was only on the beach for 12 hours. I was very lucky to get the shot.

Here's another one. I found this one about two months before I made the shot. The background is very cluttered so I had to wait for a really foggy morning. It paid off :). I was able to shoot it with my large format film camera and will print perfectly at 40x40.

i-cSwkKcG-XL.jpg

Thanks again!

Best,

Jose
 
Saw this thread, did a quick read through, and can only say there's lots of good advice given already.
Only flaw I've seen is Mildo putting me on his list.
Brother Mildo, please remove my name and put yours there instead.

This subject can get pretty technical, and I like simple.
Jo and I are just back from a little trip to Memphis where I took about 95 photos, and I've been doing small adjustments on them using Picasa's photo editing software.
Here's my 2 cents worth.

If you're not using some sort of editing software, then I suggest you get one.
I like Google's Picasa, it's free, but there are other free ones out there.
After trying Lightroom, I decided it's not for me since I shoot only jpegs and only want to tweak my photos.

I downloaded Jim's original pic to Picasa:
redo%2520pic%2520tvwbb.jpg


Slightly cropped it, and used the re-touch tool to get rid of the white object.
Then I made only a slight color temperature adjustment.
Not great, but better to my eyes:
redo%2520pic%2520tvwbb-001.jpg


Another feature of Picasa is "I'm feeling lucky"
It's a one click auto adjustment, sometimes it works well, other times not so well.
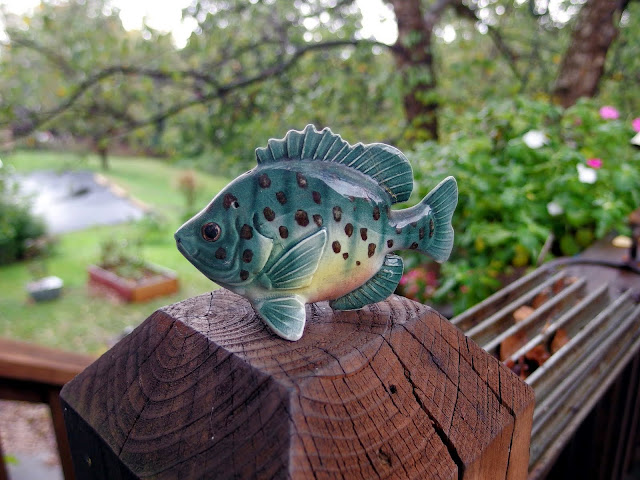
Below is a shot at f1.8, 200 ISO.
IMGP1414.JPG


Using only IFL (I'm feeling lucky)
IMGP1414-001.JPG


Same subject at f5, and 1600 ISO:

IMGP1415.JPG

and with IFL:
IMGP1415.JPG


Another point is that many modern cameras do high ISO's very well, so if your camera has the adjustable setting, then give it a try when lighting is low.
For most of my cook shots I use aperture priority, and auto ISO letting the camera make the decisions on shutter speed and ISO rate.

I confess to being lazy when it comes to plate shots, I've had fun cooking and taking photos, now it's time to eat!
Hope this was helpful.

Edit to add,
reviewing the above fish photos, after posting, there does not seem to be as much change in them as when viewed in my Picasa albums.
I'm not smart enough to know why. :)
 
Last edited:
Actually Bob, there is. I prefer the first (f5, and 1600 ISO) fish over the second (I rarely if ever--ie never--use IFL). To me, #2 colour of the fish seem's not as 'rich' although some may feel #1 is too 'dark'. It's as if the software focused on lightening the wooden beam and the fish got in the way (ie: the beam was primary and the fish was the secondary subject).

I'll use picasa for pics that are not meant "for publication" (printing). For posting online, it's just fine. Otherwise, I'll use GIMP or Lightroom (as I can work in raw).
 
Last edited:
Agree Len, as I prefer to adjust with the individual settings, but thought others might benefit if only wanting to try a quick fix.

I've tried shooting raw many times, (insert jokes here) and simply don't like the process.
I do wish I had the raw capture of the photo below, it was taken several years back with a 1mp Kodak.
It's a favorite, but I've messed with it too much and no longer have even the original downloaded jpeg.
Downtown Hannibal, MO.
edit to add:
let's see if anyone can pick out what bothers me most about this image.


Downloads.jpg
 
Last edited:
Saw this thread, did a quick read through, and can only say there's lots of good advice given already.
Only flaw I've seen is Mildo putting me on his list.
Brother Mildo, please remove my name and put yours there instead.

I am sure that your name on my list is justified bro.;)
Editing and correction using an image editing program is necessary and beneficial, I think. I use Zoner Photo Studio, cheap and effective. I am not a professional photographer and that fully covers my needs (and it's Czech Made product)
Thanks Jose for your willingness to share with us. Your tutorial you started in a very understandable style, and I look forward to the sequel.
 
Saw this thread, did a quick read through, and can only say there's lots of good advice given already.....

......This subject can get pretty technical, and I like simple......

.......If you're not using some sort of editing software, then I suggest you get one.
I like Google's Picasa, it's free, but there are other free ones out there.
After trying Lightroom, I decided it's not for me since I shoot only jpegs and only want to tweak my photos......

Some very interesting observations Bob. I cropped your post to get to the points you made, post #43 for those to want to see the whole post.

Simple is always good. It not only makes things easier, it's less likely that you will forget something and ruin the shot. I LOVE simple.

Processing software is not only beneficial, it is necessary, especially if you are shooting jpegs. Jpegs are completely unforgiving, that means - NO mistakes, especially in white balance. On a jpeg everything is set. Shooting in RAW mode gives you all the controls that you have in your camera on your computer screen and you can change all of them after the shot, a huge benefit. This is not to say that jpegs cannot be edited, it's just easier with RAW files.

Jpegs are also 8-bit color by default, while RAW files are, not really but we call them 16 bits. Using processing software you can also process a jpeg at sixteen bits and that is a huge benefit. Why? Because 8-bit color only has 256 shades per color channel. That's 16.8 million different colors! Sounds like a lot, but there's a problem. When you process an image you lose a LOT of those colors with each processing step, no if then and buts about it, trust me on that. Now then, a 16 bit image has 281 trillion colors!! What this means is that you can process 16 bit images and lose a lot less colors. Read this of you don't believe me:

http://www.photoshopessentials.com/essentials/16-bit/

And why is losing colors important? Because where you lose the colors you get what is called "banding". this is what happens when you remove colors wherever you have a subtle gradient of light and therefore color. This results in very noticeable lines in color gradations whereas the color gradient should be butter smooth.

I process in lots of different software and plugins. It depends on what I'm shooting with. I shot a lot of film and I need that flexibility. My preference is whatever comes free with the camera. I shoot Nikon for digital. They have a wonderful free software called Capture NX-D. That said I always use Lightroom as well. Let's face it, a good point and shoot goes for $300~$1000. Lightroom goes for $150. Trust me, it's worth it. Once you learn how to use it, and that's not really simple, it's a wonderful tool.

And getting to the fish shots, for me the best by far is the second one, ISO 200 IFL. It has the best soft focus, sharpness, definition and saturation. Low ISO always wins :).

Best,

Jose

Ps. I shoot pretty much all my food shots with the Nikon 1 system. It just works. And now they have some incredible deals at Amazon for the 10 megapixel cameras. I've owned one of those, the Nikon 1 V1 for the last 3 years or so and love it. Although I just bought the 18MP N1 V3, those 10MP pixel cameras are an incredible deal for a P&S with interchangeable lenses.
 
Agree Len, as I prefer to adjust with the individual settings, but thought others might benefit if only wanting to try a quick fix.

I've tried shooting raw many times, (insert jokes here) and simply don't like the process.
I do wish I had the raw capture of the photo below, it was taken several years back with a 1mp Kodak.
It's a favorite, but I've messed with it too much and no longer have even the original downloaded jpeg.
Downtown Hannibal, MO.
edit to add:
let's see if anyone can pick out what bothers me most about this image.


Downloads.jpg

Bob,

I think it's a beautiful image, I wish it was mine :). If I had to nitpick I'd say the lack of resolution creates jaggies (steps) in the electrical wires. The only other thing I can think of is the brightness of the white building in the center, but I find that to be really minor. Beautiful colors and contrast throughout though. It has a very nice punch to it :).

Ok now I took the plunge now fess up :).

Best,

Jose
 
Bob, re your Hannibal pic, the white building is a bit 'bright' (not a biggie) but I would have preferred less 'greenery' up top and more buildings (unless there were no more houses below).

The houses/greenery should be in a 2/3 1/3 ratio (looks 50-50 to me) as they are the star of the pic. IMHO.
 
I'm gone for a week so I'll defer to the experts

Hi all,

I'm still going to get into the light, light, light, it's all about the light thing but I'm going on a shoot for a while so I can't shoot my own examples. Be that as it may, there are others that do a great job of communicating this information so I will instead post a couple of very valuable links. These people do this for a living so in a sense they are more qualified than me.

The fist link is all about handling light from more than one source so as to diffuse light as much or as little as you want to get that perfect picture, all by using foam boards. The link takes a REALLY LONG TIME to load so be patient :). Here's that link (If it loads at all):
http://taylortakesataste.com/food-photography-lighting-tips/

The second link is to a successful professional food photographer. Let the slide show on the main page play through and you will notice that for most of the shots the stronger light is in the back of the food. This is a strong trend in food photography and with good reason, the food looks a lot better. After the slide show go to the blog or the articles, there's a ton of information in this site:
http://foodportfolio.com/

Be back in a week or so :)

Best,

Jose
 
Last edited:
Safe travels Jose, thanks for the tips and taking the time to help us improve our food photos.

Good answer Jim!
I even enlarged the house areas looking for a Weber, but couldn't positively identify one. :(

Jose and Len spotted what I dislike, the washed out white building.
 
Safe travels Jose, thanks for the tips and taking the time to help us improve our food photos.

What Bob said. Very nice reading.
OK, I'm going to look for a suitable white reflector. At this time my neighbors banging on his forehead when he sees me run a tripod back and forth ... What will they think when I will be run with a big white thing ??? But ... yes! I have to try.
Thank you Jose.
 
Last edited:
I tried to take pictures of a walnut. Source of light - natural light (cloudy) in the living room by the window. I used the white reflector and a small mirror to illuminate the shadowy areas. It worked, sir!

tmp91EE.jpg


ISO: 100, Exposure time: 2.0 s, Aperture: 18

tmpAF15.jpg


ISO: 100, Exposure time: 4.0 s, Aperture: 13

tmpE9D0.jpg


ISO: 100, Exposure time: 0.8 s, Aperture: 10
 
Last edited:
Just saw this post. Exellent idea. Normaly im to lazy to do anything about my pics...But knowing the logics behind it is always great. Mildo that is some killer nut pics. Do you have a tree?
 
I tried to take pictures of a walnut. Source of light - natural light (cloudy) in the living room by the window. I used the white reflector and a small mirror to illuminate the shadowy areas. It worked, sir!

I've looked at these pictures for the last couple of days and am amazed - Mildo, they are wonderful. I'm trying understand what you exactly did? The walnuts look almost suspended - could you explain a little more how you took these, or maybe share a picture of the setup you used - Or, are they a result of some post processing? Curious minds want to know!
thanks, - pbg

Same here! Fantastic shots Mildo.
 
Thank you guys.
This really was only a test of the use of reflective plates and mirrors.
You know: a quick idea. Nuts on the kitchen table (we have several trees in our neighborhood Dan;)) seemed to me ideal due to irregular and interesting shape.
I used a tripod, cable remote, Kenko DG Extension Tube Uniplus 25 mm, lens Minolta 50 / 1.7, Sharp Aquos 60 for a live preview (I photographed in the living room:)) + HDMI cable.
Very easy to setup. Walnut impaled on a toothpick, situated on the edge of the chair. Background on the first two pictures is the wall, on the third green towel, away from the nut of about 1.5 meters. Due to the extremely shallow depth of field remains completely blurred background and walnut, though, levitates:).
On the watch: light - on 10, camera - on 6, mirror - on 15-20.
Shooting distance from the nut - 10 cm.
Post processing? A slight cut, in the bottom of the visible part of toothpicks retouched - levitation effect created.

Here is a failed picture . You can see at the bottom, a chair and a piece of toothpick.

tmpDC00.jpg


ISO 100, Exposure time: 4.0 s, Aperture: 13

I was surprised of the results and I will add two more pictures when I see your interest

tmp4BEE.jpg


ISO 100, Exposure time: 6.0 s, Aperture: 13

tmpBE1E.jpg


ISO 100, Exposure time: 0.8 s, Aperture: 10
 
Last edited:
Very cool, Mildo! I enjoy macro/close-up photography and the walnut meats really worked well for you.

I'm not sure if it's been mentioned in the thread yet so I'll throw this out there. Consider the use of a clear UV or skylight filter when closely photographing foods while they're cooking; macrophiles will debate for hours the issue of lens protection vs. image quality but it's a lot cheaper to replace a filter that's been marred by a sudden grease pop, undetected spatter, or wayward ember than it is to replace a damaged lens. Granted, good filters aren't cheap but they're still not as expensive as a good lens.


Back
Top