Chris in TX
TVWBB Fan
Restoring a 2000 Genesis Silver B with Maroon Lid
This grill was purchased in 2000 at a Navy Exchange in Sasebo Japan. It served for 2 tours in Japan and 1 tour in Washington before the serviceman retired. Then he brought it to Texas some years after that. I picked it up in the DFW area off CL for free this Aug and I hope to give this grill a new life since it has a cool history of being around the world!
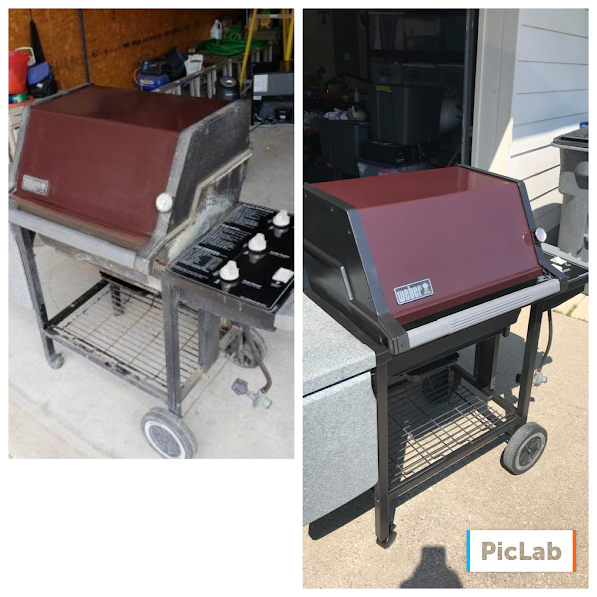
I will post more of how I got to looking at older Weber grills in my next post. But for now here is a picture from the CL ad and a n after shot. I will include more after pictures on page 4
Cost:
Grill - Free
HF Nylon Cup (Get the wire cup), Gloves, Tarp - $5
AZ High Heat Metallic Paint - $13
Cleaning Supplies (Did not help) - $7
HF Wire Cup Kit - $9
Ear Plugs - $6
Sand Paper - $3.5
High Heat Primer - $8.5
Scrape Blades - $2
JB Weld Extreme Heat - $9
Steel Wool - $1
High Heat Black Paint - 8.5
Screws Bolts Nuts - 7.5
Total: $80
======================================================================================================
I like to grill and be outside a lot. I have another grill that I picked up used for cheap and lasted me for 8 years! I keep it under a patio and covered so things tend to last a while that way. But this summer the flavorizer bars fell apart and the grate started to also. So I figured it was time to get a new grill. I found a great deal on a pellet grill and picked it up but ran into issue (I kept hearing Hank Hill saying "Propane Bobby!" in my head as I was dealing with the pellet grill issues.) Working in electronics I decided that I wanted my grill to not use electronics and be simple....turn on and light. So back to gas I decided to go.
My search led me to craigslist and I started seeing some older grills. It impressed me that you could restore them and make them like new again. I thought about restoring my current grill but it is not a Weber and after doing research figured that would not have as good of a return or feeling. (Actually I found this site and saw all the Weber grills and really wanted to get one of the older models!) So I figured I would wait until something popped up this winter and pickup a weber somewhere. Then this post happened:
I came upon a 2000 Genesis Silver B for a great price......FREE!!!!!
Now I have never done a restore before but I wanted to give it a try. Plus I found out the cool back story of this grill being purchased in Japan and it seemed like it was meant to be. So far I have taken it apart and there is years of wear on it. Some rust which I will do my best to get rid of.
I will try to document everything that I do and what works/fails along the way.
Plus I wanted to put out here how much I spent in the restore process in case others look at doing the same thing.
So Lets Get Started!
=============================================================================
When I got the grill home the first thing I did was start the disassemble process. This was not as hard as I thought it was going to be.
The lid was already removed because we had to do that to get it into my van!
Start by getting a box and putting everything in it that you are saving that is not big! (Plus little plastic baggies to put screws in.)
Here is my box. I have the side table, burners, controls, wheels, and screws all in this box.

I do recommend reading several of the other restoration projects on here as they will help with thing they ran into.
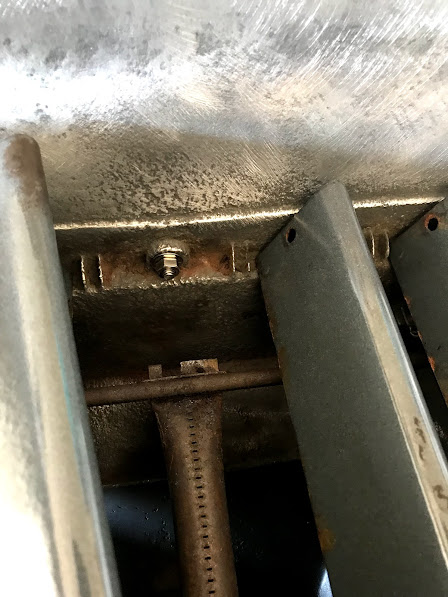
For the box I did not remove all the screws and tried to stick to the ones on the outside of the box that connected it to anything. This worked out pretty well (but the main one that hold on the frame appears to have broke!) So here is what I took outside to start working on:

I purchased some cleaning supplies thinking they would do the trick with a Nylon cup brush I had purchased. Don't waste your time on the cleaning supplies or the nylon cup brush, go straight to the wire brush kit. The nylon cup brush went on my drill and I don't think that had enough RPM. I picked up a kit that has two diff cup brushes and a couple other wire brushes. Worth the money!!!
Oh and if you don't have a angle grinder....get one! (I will note here that you need to make sure you have a high rpm angle grinder. I used a cordless but found out it had about 1/2 the rpm as some of the plug ones. This is why I had to use the twisted wire and it took longer. So this is something to think about if you are purchasing an angle grinder.)

I started sanding down the frame of the unit removing everything from it (tank holder, and braces.) I was going to remove all the bolts of the frame and sand it piece by piece but I ran into some rust problems when I took the box off. So it really needs a new frame and since I do not weld of have the tools I decided that this was best to keep in once piece. I am going to spray a rust converter on the frame for now and see how it turns out. Using the wire cup on the frame make things nice and smooth. It did not stip it like I thought it would but that is ok:

More to come!
This grill was purchased in 2000 at a Navy Exchange in Sasebo Japan. It served for 2 tours in Japan and 1 tour in Washington before the serviceman retired. Then he brought it to Texas some years after that. I picked it up in the DFW area off CL for free this Aug and I hope to give this grill a new life since it has a cool history of being around the world!
I will post more of how I got to looking at older Weber grills in my next post. But for now here is a picture from the CL ad and a n after shot. I will include more after pictures on page 4
Cost:
Grill - Free
HF Nylon Cup (Get the wire cup), Gloves, Tarp - $5
AZ High Heat Metallic Paint - $13
Cleaning Supplies (Did not help) - $7
HF Wire Cup Kit - $9
Ear Plugs - $6
Sand Paper - $3.5
High Heat Primer - $8.5
Scrape Blades - $2
JB Weld Extreme Heat - $9
Steel Wool - $1
High Heat Black Paint - 8.5
Screws Bolts Nuts - 7.5
Total: $80
======================================================================================================
I like to grill and be outside a lot. I have another grill that I picked up used for cheap and lasted me for 8 years! I keep it under a patio and covered so things tend to last a while that way. But this summer the flavorizer bars fell apart and the grate started to also. So I figured it was time to get a new grill. I found a great deal on a pellet grill and picked it up but ran into issue (I kept hearing Hank Hill saying "Propane Bobby!" in my head as I was dealing with the pellet grill issues.) Working in electronics I decided that I wanted my grill to not use electronics and be simple....turn on and light. So back to gas I decided to go.
My search led me to craigslist and I started seeing some older grills. It impressed me that you could restore them and make them like new again. I thought about restoring my current grill but it is not a Weber and after doing research figured that would not have as good of a return or feeling. (Actually I found this site and saw all the Weber grills and really wanted to get one of the older models!) So I figured I would wait until something popped up this winter and pickup a weber somewhere. Then this post happened:
I came upon a 2000 Genesis Silver B for a great price......FREE!!!!!
Now I have never done a restore before but I wanted to give it a try. Plus I found out the cool back story of this grill being purchased in Japan and it seemed like it was meant to be. So far I have taken it apart and there is years of wear on it. Some rust which I will do my best to get rid of.
I will try to document everything that I do and what works/fails along the way.
Plus I wanted to put out here how much I spent in the restore process in case others look at doing the same thing.
So Lets Get Started!
=============================================================================
When I got the grill home the first thing I did was start the disassemble process. This was not as hard as I thought it was going to be.
The lid was already removed because we had to do that to get it into my van!
Start by getting a box and putting everything in it that you are saving that is not big! (Plus little plastic baggies to put screws in.)
Here is my box. I have the side table, burners, controls, wheels, and screws all in this box.
I do recommend reading several of the other restoration projects on here as they will help with thing they ran into.
For the box I did not remove all the screws and tried to stick to the ones on the outside of the box that connected it to anything. This worked out pretty well (but the main one that hold on the frame appears to have broke!) So here is what I took outside to start working on:
I purchased some cleaning supplies thinking they would do the trick with a Nylon cup brush I had purchased. Don't waste your time on the cleaning supplies or the nylon cup brush, go straight to the wire brush kit. The nylon cup brush went on my drill and I don't think that had enough RPM. I picked up a kit that has two diff cup brushes and a couple other wire brushes. Worth the money!!!
Oh and if you don't have a angle grinder....get one! (I will note here that you need to make sure you have a high rpm angle grinder. I used a cordless but found out it had about 1/2 the rpm as some of the plug ones. This is why I had to use the twisted wire and it took longer. So this is something to think about if you are purchasing an angle grinder.)
I started sanding down the frame of the unit removing everything from it (tank holder, and braces.) I was going to remove all the bolts of the frame and sand it piece by piece but I ran into some rust problems when I took the box off. So it really needs a new frame and since I do not weld of have the tools I decided that this was best to keep in once piece. I am going to spray a rust converter on the frame for now and see how it turns out. Using the wire cup on the frame make things nice and smooth. It did not stip it like I thought it would but that is ok:
More to come!
Last edited:


") I was able to get a screw that fit the hole and make a perfect hole in the jb weld!
I was able to get a screw that fit the hole and make a perfect hole in the jb weld!