Andy Rue
New member
I picked up a Genesis 3 a few months back, and the information I gathered from this forum was a huge help in restoring it. I wanted to start my first post with a big thank you to the TVWBB community.
So, thank you all, very, VERY much. I learned a lot, and here are my results.
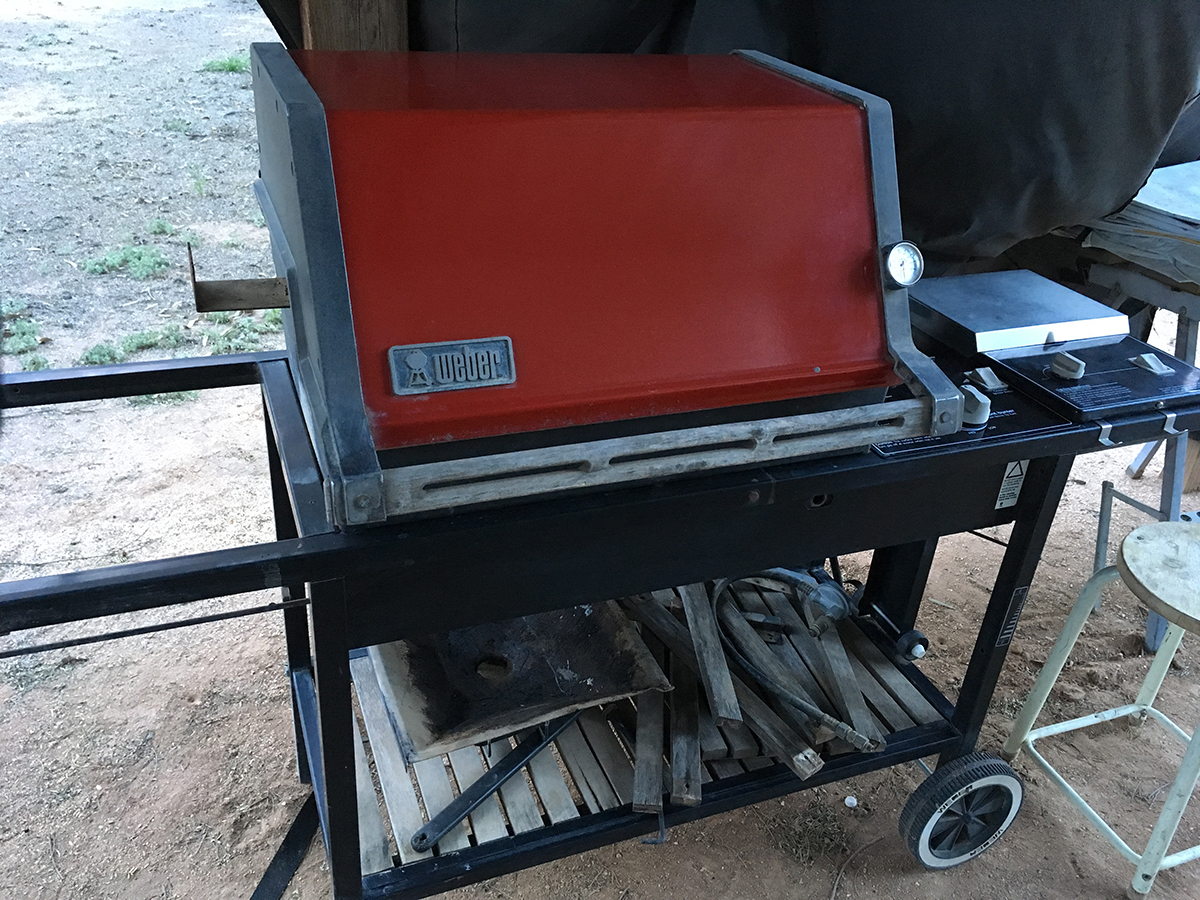
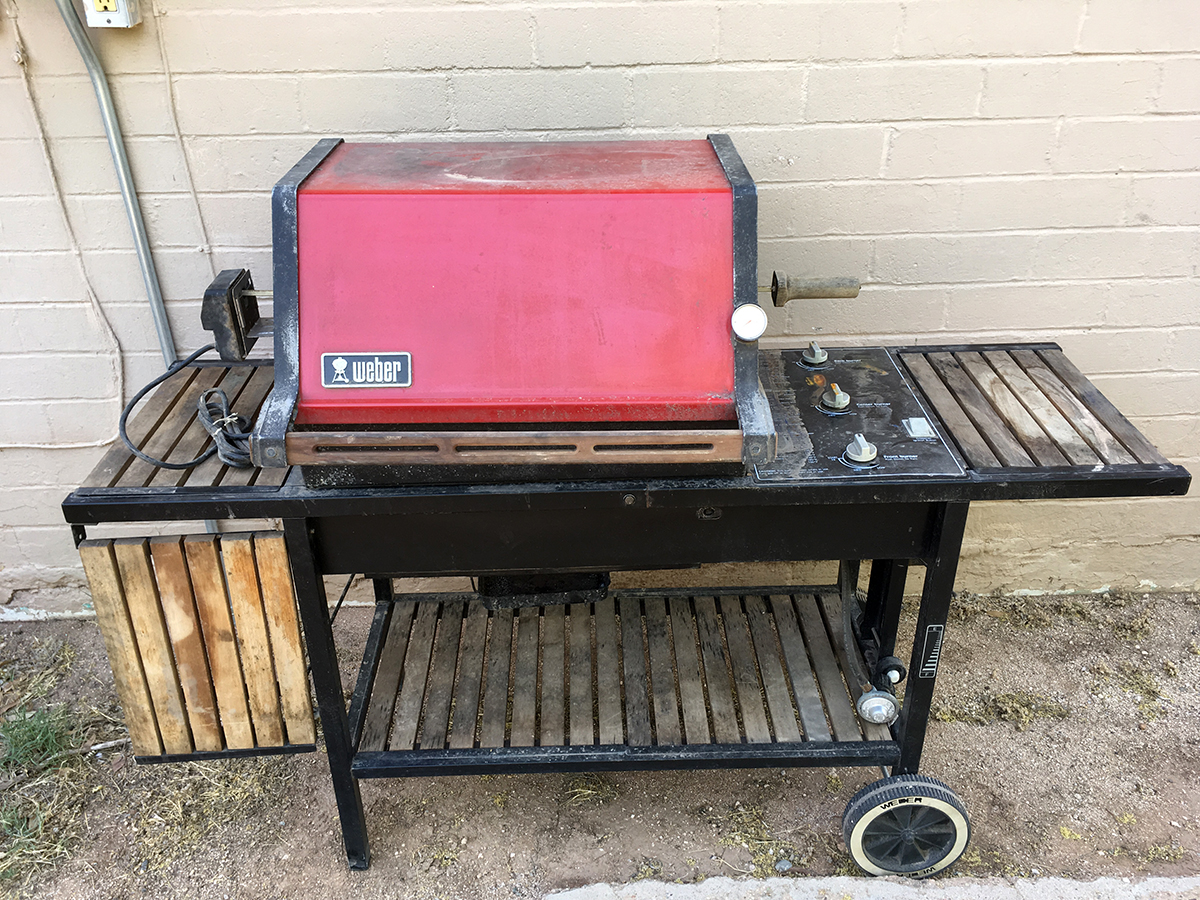
Here's the grill after I brought it home for $40. Based on the information I learned from the post on decoding serial numbers, it's a Genesis 3. Plus, I also learned that no casters = earlier, pre-1992 grill.
The flavorizer bars were completely rusted out, so I went with bars from rcplanebuyer, and grates from Qulimetal. I cleaned and I painted and did everything I could do before trying to tackle the main issue- the wood. It was toast. I spent a good amount of time reading threads on this forum, seeing what others had done, and seeing what my options were. I finally decided to make new slats myself. I had absolutely no experience doing anything like this, and I was understandably a little intimidated.
The first thing I did was buy some wood. I went with redwood fence posts from HD. I learned that both cedar and redwood are good choices for outdoor applications because of their natural rot resistance. I decided on redwood because I liked the color more. Plus, it just made sense- redhead, redwood.
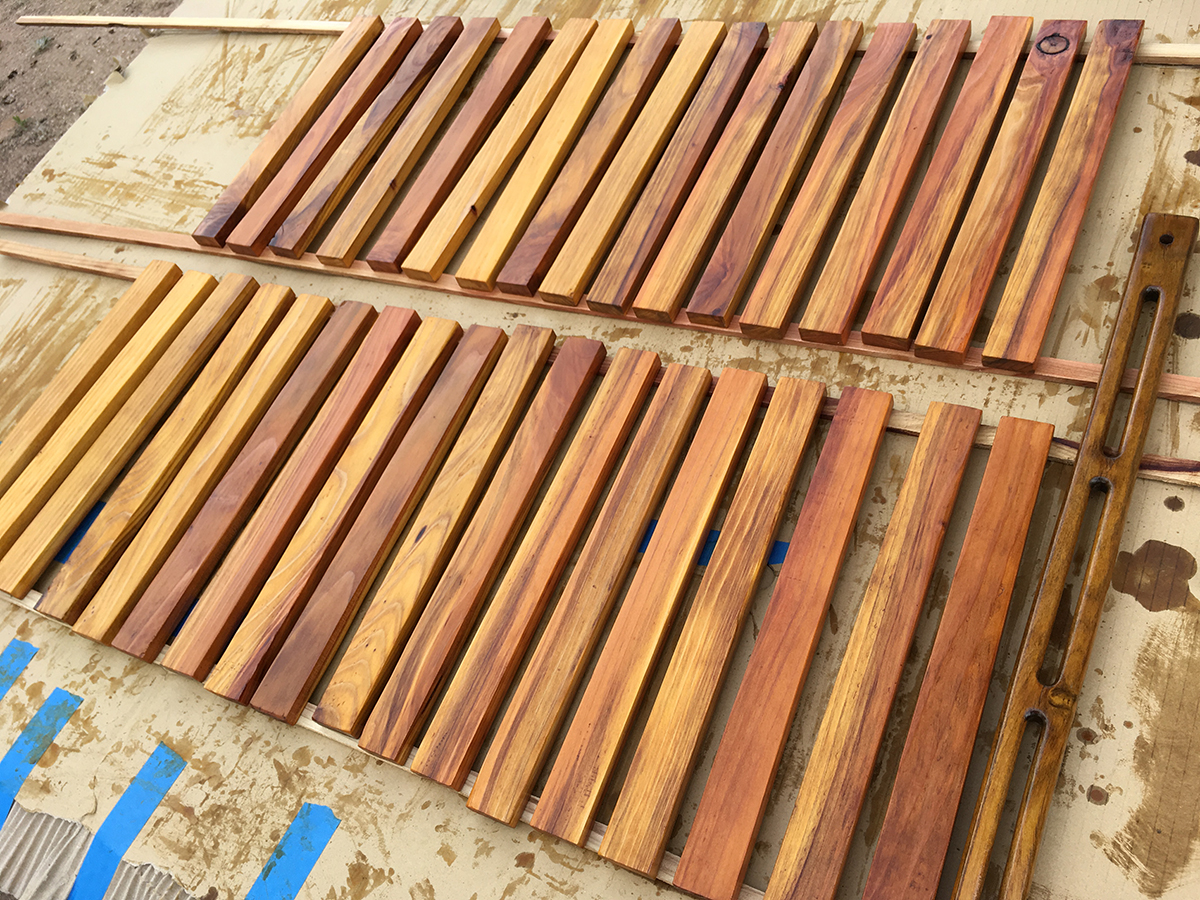
I knew a hand saw wasn't going to cut it (groan), so to maximize my potential for success, I bought a used table saw. I wanted to make these slats as square and consistent as possible. I also bought a decent miter gauge. Here's the result.
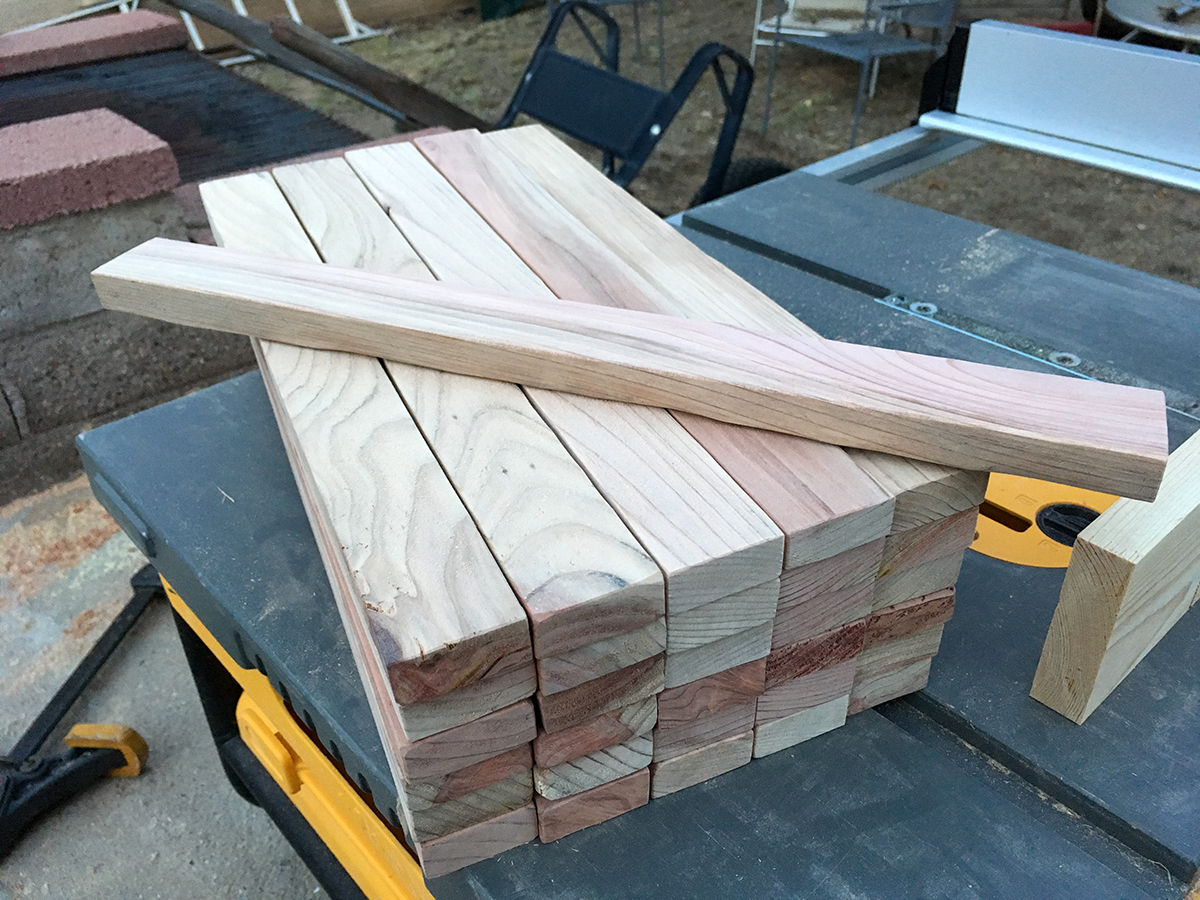
I used one of the old slats to line up my cuts, both for ripping the posts and then cutting them to length. After that came the sanding. Lots and lots of sanding. More sanding than anything else, for sure. I started with a palm sander, and then final sanding was by hand, mainly so I could have a close look for imperfections.
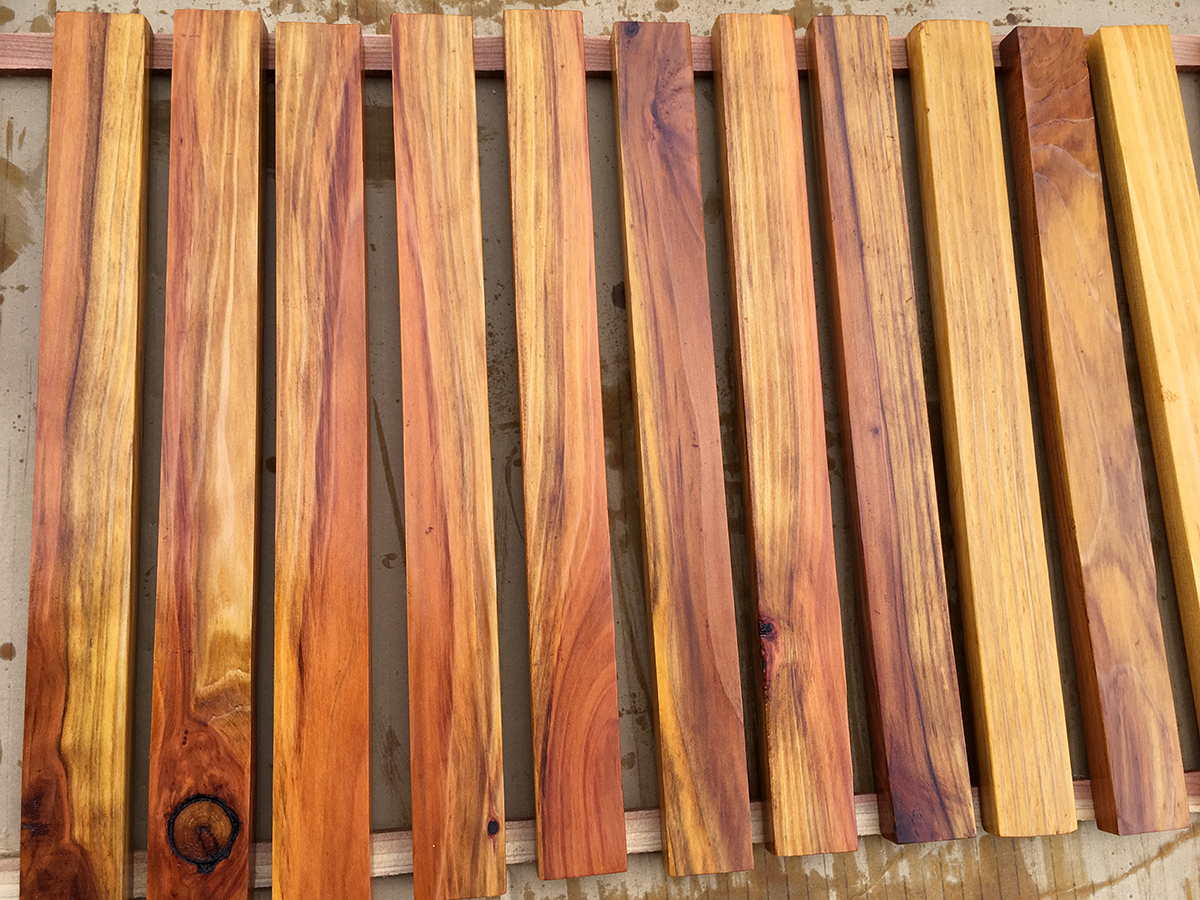
After the sanding was complete, I started researching finishes. I decided on PPG Proluxe Cetol Log & Siding Wood Finish in transparent satin. I came to this decision after some research on redwood care and finish from foreverredwood.com.
Here's the link: https://www.foreverredwood.com/redwood-furniture/care-finish/
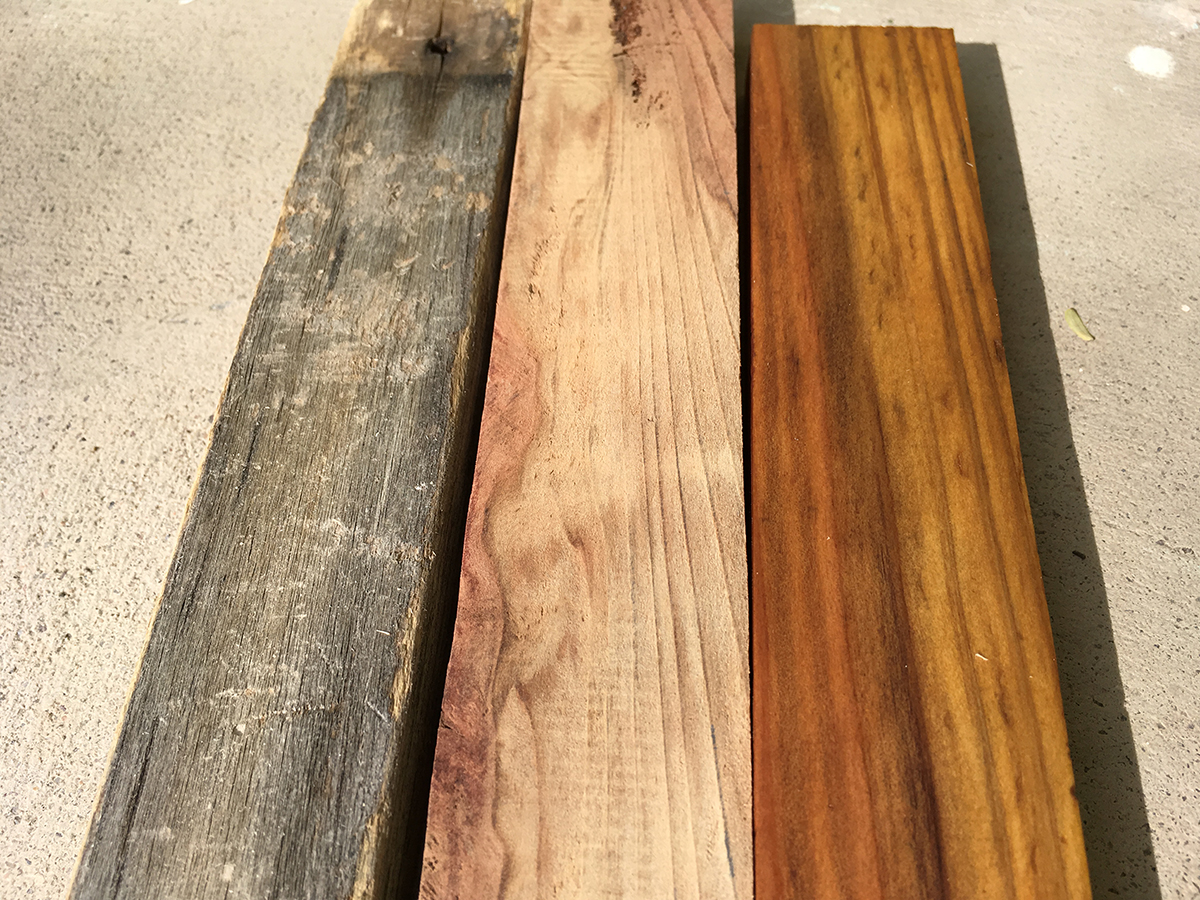
I took a scrap piece of redwood to test the finish. Here's a shot of an original slat, a new unfinished redwood slat, and a new finished redwood slat.
I liked the result, so I started using the finish on all the slats. I wasn't about to try to make a new handle, and thankfully the original handle was in decent shape, so I sanded it and gave it the same finish.
After two coats and some drying time, I started to assemble the grill. I think it turned out great.
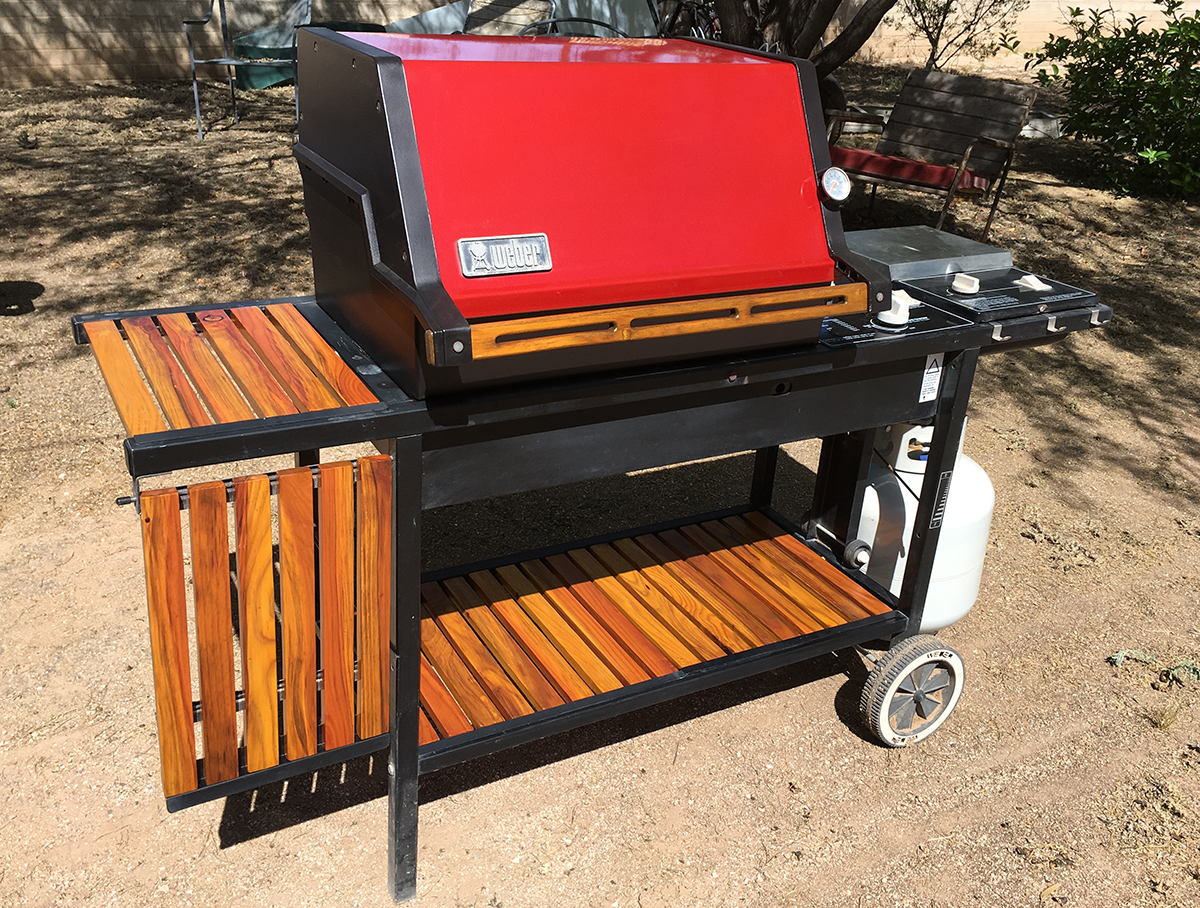
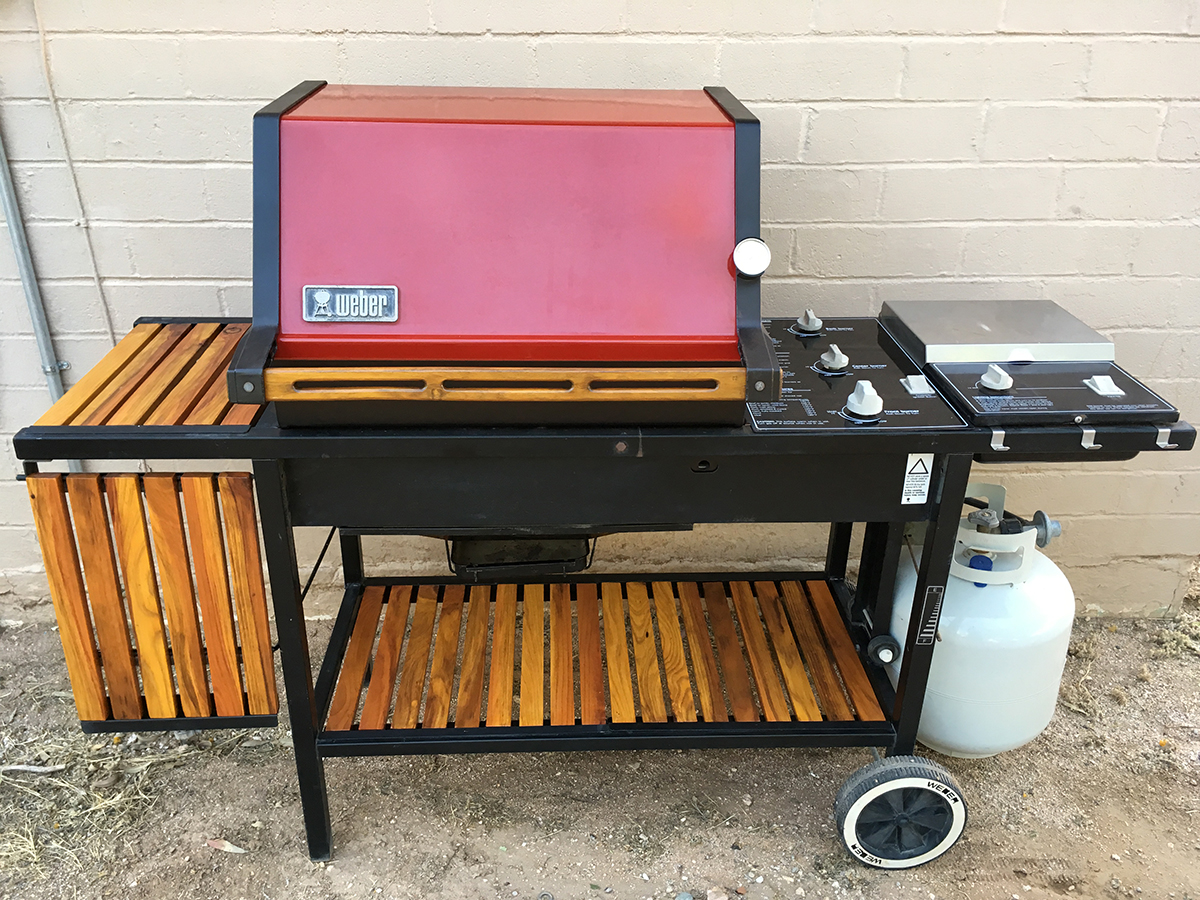

I'm planning on refreshing the logo on the lid, but for now I'm happy with it. I bought a cover to help protect it. And to emphasize how much this site has influenced me, I brought home another grill. No side burner on this one, but from the same era, and with the rotisserie. Paid $20 for it. Looking forward to making this one look just as good.
So, thanks again. Couldn't be happier with how my old Weber turned out, and I couldn't have done it without the information I found on this forum.
So, thank you all, very, VERY much. I learned a lot, and here are my results.
Here's the grill after I brought it home for $40. Based on the information I learned from the post on decoding serial numbers, it's a Genesis 3. Plus, I also learned that no casters = earlier, pre-1992 grill.
The flavorizer bars were completely rusted out, so I went with bars from rcplanebuyer, and grates from Qulimetal. I cleaned and I painted and did everything I could do before trying to tackle the main issue- the wood. It was toast. I spent a good amount of time reading threads on this forum, seeing what others had done, and seeing what my options were. I finally decided to make new slats myself. I had absolutely no experience doing anything like this, and I was understandably a little intimidated.
The first thing I did was buy some wood. I went with redwood fence posts from HD. I learned that both cedar and redwood are good choices for outdoor applications because of their natural rot resistance. I decided on redwood because I liked the color more. Plus, it just made sense- redhead, redwood.
I knew a hand saw wasn't going to cut it (groan), so to maximize my potential for success, I bought a used table saw. I wanted to make these slats as square and consistent as possible. I also bought a decent miter gauge. Here's the result.
I used one of the old slats to line up my cuts, both for ripping the posts and then cutting them to length. After that came the sanding. Lots and lots of sanding. More sanding than anything else, for sure. I started with a palm sander, and then final sanding was by hand, mainly so I could have a close look for imperfections.
After the sanding was complete, I started researching finishes. I decided on PPG Proluxe Cetol Log & Siding Wood Finish in transparent satin. I came to this decision after some research on redwood care and finish from foreverredwood.com.
Here's the link: https://www.foreverredwood.com/redwood-furniture/care-finish/
I took a scrap piece of redwood to test the finish. Here's a shot of an original slat, a new unfinished redwood slat, and a new finished redwood slat.
I liked the result, so I started using the finish on all the slats. I wasn't about to try to make a new handle, and thankfully the original handle was in decent shape, so I sanded it and gave it the same finish.
After two coats and some drying time, I started to assemble the grill. I think it turned out great.
I'm planning on refreshing the logo on the lid, but for now I'm happy with it. I bought a cover to help protect it. And to emphasize how much this site has influenced me, I brought home another grill. No side burner on this one, but from the same era, and with the rotisserie. Paid $20 for it. Looking forward to making this one look just as good.
So, thanks again. Couldn't be happier with how my old Weber turned out, and I couldn't have done it without the information I found on this forum.
") !
!