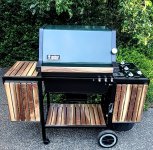
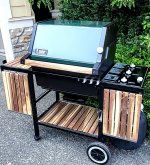
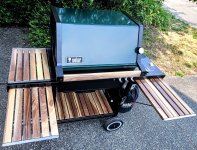
Green Genesis 1000LX Build


I purchased it from a local industrial hardware store, but Amazon has them.

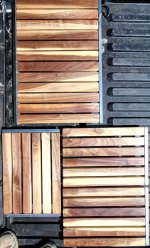
I set up that quick jig using a framing square, and some nuts for spacers. I think you were going for 1/4" spacing so depending on the accuracy of your woodworking a 1/4 or 5/16 hex nut will be in the 1/4" thickness.

Think I used a 1/8" drill for the pilot holes. I wrapped a piece of blue tape on the bit to use as a depth gauge at about 3/8" from the top of Z-metal. I have a 12v Dewalt drill and impact I like for these delicate jobs, and hand tighten the screws after I get them close. That 18v is just too bulky, but like for construction projects for me.

I too am close, finished cleaning up the drip pan. Tomorrow will pull the guts out and test the valves I rebuilt and the burners.
Awesome can't wait to see it!

Perfect! I ordered those screws. They will be here tomorrow. I also ordered all different sizes of horse shoe shims in case I have to find tune my spacing.

I just went out and finished the last 3 coats of GF 450 after my family went to bed so that can dry overnight. Maybe I'll get it wrapped up. I know my wife wants me to finish sanding her 1940s cabinet so she can finish it though so we'll see.
 
Last edited:
Back when I did my old Genesis 2, I got marine brass screws. with brass washers. Was kinda cool as well
You must have patience. I would strip the heads or snap off the threads using brass in hardwoods.

Looked nice laying on your back on the ground staring at your tables though.

My ss screws are about 8 years old from last set of wood on minor rebuild. I through them in new ultrasonic cleaner with simple green and they came out like new.

Love how messed up our brains are with different ideas
 
Oh, I did not use hardwoods. I simply refinished the original slats it had (redwood IIRC). I sanded them, primed and painted them in the same red as the lid (which BTW matches perfectly using the International Harvester red). So, I shot them in primer, then hit them with the IH red enamel from my little paint sprayer (honestly some cheapo little touch up gun I bought at IIRC Northern Hydraulics in MN).
Looked REALLY sharp.
Do you by chance have any pictures of that project? Sounds interesting!
 
Do you by chance have any pictures of that project? Sounds interesting!
Not now. Was a long time ago. It's the grill I bought over 30 years ago, and ended up about 5 or 6 years ago giving to my son in law which recently was crushed by a piece of construction equipt being used by a contractor at his house. So now, the only 2 items remaining are the firebox/gas controls, and lid. Somehow the lid escaped even though being hit by the bucket of a front end loader. Rest of the grill? Not so lucky :D. It now has a VERY early Gen 1 Genesis 2 frame thanks to G. Shaeffer who kindly donated a whole frame to the cause. Rest of it was trashed
 
Not now. Was a long time ago. It's the grill I bought over 30 years ago, and ended up about 5 or 6 years ago giving to my son in law which recently was crushed by a piece of construction equipt being used by a contractor at his house. So now, the only 2 items remaining are the firebox/gas controls, and lid. Somehow the lid escaped even though being hit by the bucket of a front end loader. Rest of the grill? Not so lucky :D. It now has a VERY early Gen 1 Genesis 2 frame thanks to G. Shaeffer who kindly donated a whole frame to the cause. Rest of it was trashed
Oh wow! I bet that grill has had some pretty good use over its lifespan. It's always cool to hear stories like that!
 
@Josh Dekubber I am in need of seeing the progress I hope you’ve been making on these slats! I was just talking to a friend of mine about making some slats…
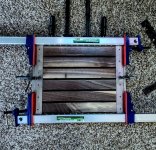
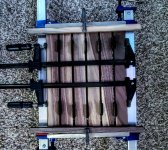
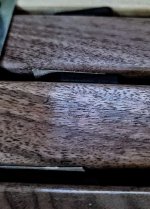
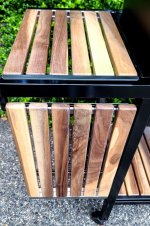
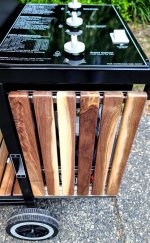
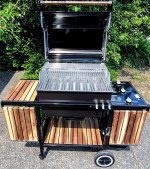
Screenshot_20240727_153641_Photos~2.jpg20240726_203238~3.jpg20240726_201549~3.jpg
To get my spacing just right I used 1/4 inch horseshoe shims and a piece of 1/32 inch paper.

Really glad I used plastic horseshoe shims because after I clamped and screwed everything they were in there very tight and I really had to pull them out one of them even broke it was so tight in there but no scratches thanks to plastic shims.

The screws that Mark Anaheim recommended worked absolutely perfectly with 1/8 in pilot hole that he also recommended


Back
Top