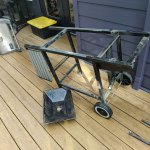
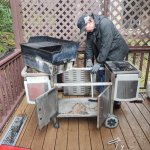
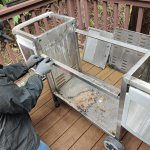
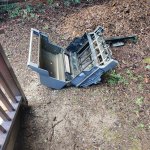
Genesis Platinum C


Mine are all Bosch or DeWalt. IIRC Rigid is same as Ryobi but not entirely sure. If I was right now starting from scratch and did not need really powerful or "pro" level tools for some things I do I would likely go that same route with Rigid or Ryobi for the lifetime batteries. But they don't make anything in the 3/8" and 1/2" drive impact or 20V grease gun. So it's why I have the ones I do. My battery powered impact wrenches (Bosch 1/2" and DeWalt 1/2"and 3/8") are more powerful than my air powered SnapOn 3/8" and my CP734H air powered impacts. So now all I need is a battery powered ratchet or 2 and I am all set. I will hardly ever again need my big air compressor :DII
I've been amassing Ryobi 18V tools for several years- started with the blue tools that came with NiCad batteries (these batteries are all pretty much gone, but they're going on 10+ years). The newer lime-green tools have the Li-ion batteries- my current ones are probably 3-4 years old and seem to be holding up well. They also seem to hold a charge longer than the old NiCad ones. Smaller form-factor, too. As others have stated, the batteries are compatible with the older tools.
However, Ryobi only has a three-year warranty on their batteries (and tools).
 
Thanks Bruce and Dan. Another question. Trying to get the lid off the Platinum, one of the sides is stuck. The post appears to be rusted. It turns when the lid is lifted but does not turn independently. I've tried force (hammer blows), I've tried charm (lubricant) -- nothing seems to working. Anyone run into this?

Also, I've misplaced a cotter pin. I assume they can be replaced easily but does anyone have specifics?
Common problem with stainless lids.

Check which side the hinge pin moves on.

If it’s the firebox you can either carefully cut the hinge pin between the lid and firebox to remove the lid. Or you can carefully disassemble the offending end cap from the lid then remove the end cap from the firebox.

If the lid moves freely on the hinge pin you can cut the outside nub off the hinge pin and carefully remove the lid. You will be stuck with the pin in the firebox.

If you are comfortable with a torch you can heat the pin and try twisting the hinge pin with a vice grip.

Or as others stated pb blaster and patience

Please note that the firebox “ear” where the hinge pin mounts is very hard to drill out without damaging the firebox
Thanks BPratt.
 
I’m not sure I can create the right visual here with my description, but I use a C-clamp and a socket along with the PB Blaster to move the process along more quickly with little to no extra effort. I put one end of the clamp and the socket over the offending pin after spraying both sides of the pin to shroud / tub connection liberally. I then draw down the other end of the clamp onto the tip of pin. I’m not killing it or cranking it down with a cheater bar...I’m only putting it on hand tight to keep constant pressure on the pin. The ring of the socket helps to distribute the stress evenly to prevent from cracking or breaking the cast aluminum and the recess created by the socket gives the pin someplace to go as it comes free. I’ve walked out into the garage on more than one occasion after an overnight wait to find the C-clamp & socket on the ground and a newly freed pin waiting for my next move. In the event that it has not come free, I’m usually able to gain a turn on the clamp and then find it all free the following day.
 
Last edited:
I think Tom is onto something there.
But yah, patience is good here.
If the pin is frozen in the cook box, you can still get the lid off by removing the pin on the other side of the lid, then slide the lid out with the pin still still stuck in the cook box and work on it there. If it frozen in the end cap and you cannot get a cut off wheel in between the end cap and cook box bracket, then carefully grind off the head of the hinge pin so you can get the lid off and work on it easier.
Heat will help a whole lot as well. First hit it with penetrating oil several times over a couple days. Then try to grab the pin with some locking pliers and twist it out. Or give Tom's method a shot. If that doesn't work, then hit it with a propane torch for a few minutes before you try again to remove it.

If all else fails, cut the pin even with whichever piece it is stuck in and drill it out like you would a frozen cook box bolt.
 
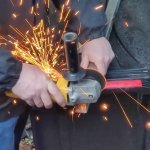
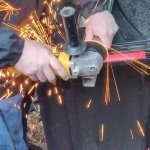
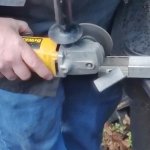
My buddy came by and with his help we got it out fairly easily. We used an angle grinder with cutoff wheel to remove the head of the pin and then worked hard to wiggle the lid and slide it off the box. The pin was stuck in the lid. We used heat plus a hammer and punch to slowly remove it. The pin is toast. How does one find a replacement pin? Fortunately the cook box and the lid are fine.

We worked mostly on the Summit today. Refabricating the frame and dropping in the 13 bar box from my 1000-LX. More on that in a bit. First, we removed the lid on the Platinum and fixed the rails using the method Bruce suggested. Turned out nice.

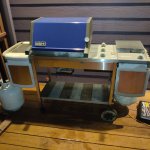
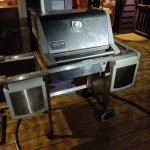
Here's the Platinum, not done but getting close. The blue hood still needs a handle. There's some cleanup left to do. More bleaching, some painting. But it's getting close.

IMG_20220220_191424(1).jpg

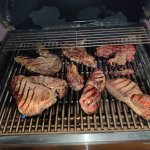
And after a full day spent on these projects, we grilled a ton of steaks on the Platinum. Two ribeyes, a t-bone, a marinated sirloin and two sirloins neat.

IMG_20220220_194418(1).jpg
 
Last edited:
Most of our day was spent creating this new Frankengrill -- part Summit, part 1000 with the old Platinum hood.

We've lifted the boxes off the Summit and the 1000. Now the latter's firebox is sitting on the former's frame.

IMG_20220220_142947.jpg

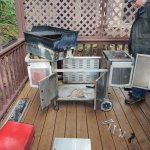
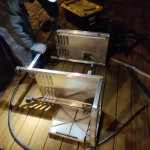
Here we're assessing how to dismantle and reassemble the Summit frame to accommodate the 1000 box sitting on the side board. Notice the lid from the Platinum sitting on the deck, the Platinum now sporting blue. The 2000, my other keeper, is wearing the burgundy lid, formerly belonging to the 1000.

IMG_20220220_142940.jpg

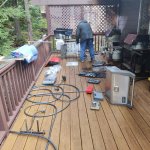
Here's the 1000 frame after the important stuff's been removed.

IMG_20220220_142937.jpg

Measuring, deciding what to use and how to reassemble.

IMG_20220220_142952.jpg

Decision's been made to use the side panels but not the doors or the rear panel. To cut down the stainless shafts to accommodate the 1000 box without extra space, moving them up to sit inline with the part of the frame that holds the side decks. My friend plans to copy my use of angle irons and Fiberon to create a new lower deck in place of the stainless bottom panel.

IMG_20220220_143335.jpg

The box and hood from the Summit looking like a beached whale.

IMG_20220220_152517.jpg

Cutting down the stainless beams to remake the frame.

IMG_20220220_151927.jpgIMG_20220220_151926.jpgIMG_20220220_151638.jpg

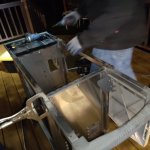
Two separated halves of the cart on their sides, first angle iron being bolted onto the bottom.

IMG_20220220_191045.jpg

Bolting the shortened top rails to the separated sides, recreating a single frame, now the proper length for the 1000 box.

IMG_20220220_194650.jpg

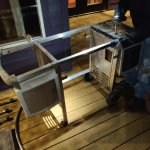
Integrating the control panel plate together with the frame. Still needs one angle iron at the bottom.

IMG_20220220_194443.jpg

Thankfully, box fits perfectly.

IMG_20220220_194922.jpg

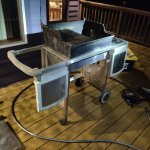
This is as far as we've gotten so far. The box sits in the frame and the stainless lid from the Platinum sits on top.

IMG_20220220_200949.jpg

Left for another day, second bottom rail angle iron, reassembling the burn tubes, control panel, igniter, bars, grates, etc. Painting and cleaning too. But the challenging and creative part is done. The result will be a simple 1000 box in a stainless Summit frame.

Was nice having so many spare parts available from the Summit. The igniter on the 1000 was of course toasted long ago, as they usually are. But I was able to piece it back together using one of the many electrodes from the Summit.

My friend elected not to include the side burner from the Summit because he didn't think he'd have any real use for it. Decided he wanted nothing more than a great little grill that will last forever.

We'll probably get together again next weekend. Will post more photos when we're done.
 
Last edited:
Count yourself incredibly lucky you did not break the tab off the lid. Back in my mechanic days a small (or whatever appropriately sized socket) is used to support the side being pushed to. Then a clamp or vice used to push the other part through. We used a similar method to push out ball joints. There would be a "cup" and a "mandrel" with a clamping device. Put the old impact wrench on one end and have at it. The ball joint would come out with a nice "pop".
 
Why did you choose to strip the stainless back and bottom from the grill? Also, did you have to modify the area that the cook box sits in to make it smaller for the Genesis 1000 cookbox?
 
Why did you choose to strip the stainless back and bottom from the grill? Also, did you have to modify the area that the cook box sits in to make it smaller for the Genesis 1000 cookbox?
Had to reduce the size to fit the cookbox. We could have cut down those panels and reattached them but the doors couldn't be cut down. Plus, he said he prefers an open cart look. He said he liked what I've down with my Platinum and wanted to do something similar. I suggested we should take off the sides too but he elected to keep them on. Perhaps because part of his focus is on what's easiest and most practical.

His motivations are a bit different than mine. When I first mentioned this hobby, he said he has a grill and it's good enough. Then he watched me cook some chicken for my son and he was impressed so he began thinking about getting an old Weber. He's accompanied me on trips to pick them up just because we enjoy hanging together. So this was half just an excuse to hang. He's a really skilled craftsman who can do all sorts of stuff in all sorts of mediums. He can fabricate metal in his sleep. So I knew that if we did this together, we'd fly through it. On my own, something like this would be way dicier. If I could do it, the project would be long and arduous.

When we talked about melding these two grills, he asked if it was for him or for me. We were driving back from the trip to pick up the Summit. I said, "If you do it with me, it's yours. If I do it myself, it's mine." He was good with that. As we worked on it yesterday, I presented options and he made choices since it's his grill.
 
Count yourself incredibly lucky you did not break the tab off the lid. Back in my mechanic days a small (or whatever appropriately sized socket) is used to support the side being pushed to. Then a clamp or vice used to push the other part through. We used a similar method to push out ball joints. There would be a "cup" and a "mandrel" with a clamping device. Put the old impact wrench on one end and have at it. The ball joint would come out with a nice "pop".
At first I didn't understand what you were saying. But now I do. Hitting that spot with a hammer, without supporting the lid, could have caused the hinge to crack. I'm sure that's possible and maybe we were lucky. My friend had taken the lead on that and he's really good with metal work (and wood work and tile and paint and everything else) so I figured he knew what he was doing. My guess is the failure is my explanation. In describing what I saw, I'm probably not including whatever he was doing to make sure the hinge didn't break. He's miles ahead of me on stuff like this.
 
Last edited:
I'll be interested to see how you and your buddy tackle mounting the igniter to the frame as well as creating space for the burner tubes and manifold to be attached.
 
I'll be interested to see how you and your buddy tackle mounting the igniter to the frame as well as creating space for the burner tubes and manifold to be attached.
Yes, we'll have to rig something up for the igniter. There's plenty of space for the burner tubes but we'll have to drill holes for them to pass through the side panel. The bracket that holds the burner tubes should mount to the frame pretty much the same way it did on the old one. I don't expect he'll want to create a new one out of stainless so I'm guessing it will just be cold rolled steel against stainless on the underside.

I say this because we were buying parts on a Sunday so the best stores were closed. I suggested picking up stainless angle irons during the week. That's what I did with my Platinum to avoid any chance of corrosion. He wanted to do as much as possible right away so we found aluminum ones at Lowe's. For him, if there's a problem later on, changing a part out is nothing. For me, any change is kind of a big deal so I wanted to do it once and get it right. Different needs and different philosophies.


Back
Top