Twenty Dolla Holler - New Q200 Pickup


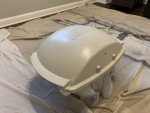
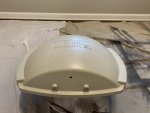
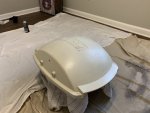
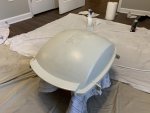
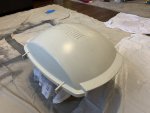
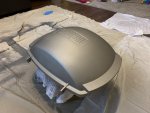
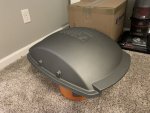
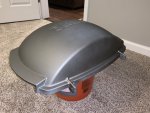
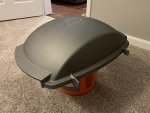
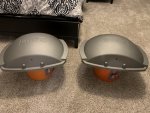
So here are some pictures of the crappy $15 Q grill lid after I used angle grinder on it. Didn't get paint 100% off but about 99%. There were just some corners I couldn't get to.
 

Attachments

  • 20200216_142915.jpg
    20200216_142915.jpg
    68.1 KB · Views: 13
  • 20200216_142929.jpg
    20200216_142929.jpg
    83.3 KB · Views: 11
  • 20200216_143005.jpg
    20200216_143005.jpg
    82.2 KB · Views: 9
  • 20200216_143019_HDR.jpg
    20200216_143019_HDR.jpg
    59.1 KB · Views: 8
  • 20200216_143050.jpg
    20200216_143050.jpg
    112 KB · Views: 8
  • 20200216_143055.jpg
    20200216_143055.jpg
    88.9 KB · Views: 8
  • 20200216_143104.jpg
    20200216_143104.jpg
    96.5 KB · Views: 8
  • 20200216_143109_HDR.jpg
    20200216_143109_HDR.jpg
    77.4 KB · Views: 7
Fee more pictures before the paint.
 

Attachments

  • 20200216_143118.jpg
    20200216_143118.jpg
    86.6 KB · Views: 4
  • 20200216_143122_HDR.jpg
    20200216_143122_HDR.jpg
    86.5 KB · Views: 5
  • 20200216_143125_HDR.jpg
    20200216_143125_HDR.jpg
    92.2 KB · Views: 5
So since I was painting this lid, I figured I'd go ahead and paint another one of my lids while I had the drop clothes and everything setup.

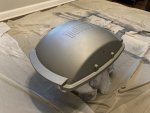
Here are the before pictures of one of my Q lids that was in decent shape. I decided not to grind this one down. Only scuffed up the paint with 150 grit and cleaned with soap and water. Then cleaned with xylol (might have spelled that wrong).
 
Forgot I took these pictures with other phone... this is the lid I mentioned in the post above. This was from the nicer $20 Q a recently bought and mentioned in original post on this thread.
 

Attachments

  • BF6977CA-93AC-4971-8917-0708C8D43BD2.jpeg
    BF6977CA-93AC-4971-8917-0708C8D43BD2.jpeg
    94.9 KB · Views: 11
  • 29AEE053-7625-4023-9E2D-219FC28EE28C.jpeg
    29AEE053-7625-4023-9E2D-219FC28EE28C.jpeg
    81.2 KB · Views: 11
  • AB84E697-AF13-445C-8E72-CD591AF85D3B.jpeg
    AB84E697-AF13-445C-8E72-CD591AF85D3B.jpeg
    93.3 KB · Views: 12
  • EDE65095-999E-43DD-83B9-DB663BA9BEEE.jpeg
    EDE65095-999E-43DD-83B9-DB663BA9BEEE.jpeg
    94.4 KB · Views: 13
  • AB73F03C-5279-461B-9DBE-35078359D33E.jpeg
    AB73F03C-5279-461B-9DBE-35078359D33E.jpeg
    94.4 KB · Views: 11
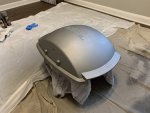
For the $15 one, I used primer and paint. 2 coats of each. Waited 10 min between coats.

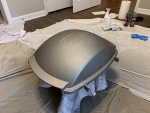
On the $20, that I didn’t grind down, I just put 2 coats of paint. I might end up putting a 3rd on there.

Primer
https://www.amazon.com/exec/obidos/ASIN/B00296BR00/tvwb-20

Paint
https://www.amazon.com/exec/obidos/ASIN/B000CPINBG/tvwb-20

When painted they look almost identical. First thoughts is I’m happy with how they look. In a day or so I’ll be curing them in the oven.

I painted these in the basement and the spray paint stunk up the whole house. 😎
So I’ll have to wait until the wife isn’t home to put these bad boys in the oven.
 

Attachments

  • C2D60663-936C-4656-83FA-A62213A9EE06.jpeg
    C2D60663-936C-4656-83FA-A62213A9EE06.jpeg
    102.7 KB · Views: 10
  • E1345ACC-9313-4402-AF94-66A15C8DDD10.jpeg
    E1345ACC-9313-4402-AF94-66A15C8DDD10.jpeg
    99.6 KB · Views: 9
  • 1CB936B5-25F5-4C0B-9528-8826492DC2C4.jpeg
    1CB936B5-25F5-4C0B-9528-8826492DC2C4.jpeg
    113.3 KB · Views: 9
  • 0CCE2408-A07F-4842-82C5-F5DE85295FE3.jpeg
    0CCE2408-A07F-4842-82C5-F5DE85295FE3.jpeg
    108.5 KB · Views: 8
  • 33A1B15A-1857-4E4D-82CC-3051217334DD.jpeg
    33A1B15A-1857-4E4D-82CC-3051217334DD.jpeg
    157.4 KB · Views: 9
  • D24DC886-4E22-4D22-9C29-3A3443E8493A.jpeg
    D24DC886-4E22-4D22-9C29-3A3443E8493A.jpeg
    174.8 KB · Views: 10
  • D7519E3F-F82F-4D33-B319-701B59CD5F75.jpeg
    D7519E3F-F82F-4D33-B319-701B59CD5F75.jpeg
    168.9 KB · Views: 10
  • 39A5335A-242C-4F65-B331-A3B408297076.jpeg
    39A5335A-242C-4F65-B331-A3B408297076.jpeg
    224.7 KB · Views: 12
Last edited by a moderator:
I linked it, but forgot to mention the paint color is Cast Iron. I had already bought some for a Genesis project. Color looks nice. Way better than stock color. For the 3rd Q I might try a blue or red color.

I’ll post again once I’ve cured them and after I reinstall on the grills.
 
Looking good on both of those Kyle. I would maybe take a small piece of 150 sandpaper to the small paint areas and make sure it is feathered out nicely before painting.
I am looking forward to some After pictures.
 
The pictures in my last post are with the Cast Iron paint. It hasn't been cured in the oven yet, but I don't expect that to change the color a lot. It should be a lot better looking once I slap it back on top of a grill.

Here is the nicer lid, before and after. Didn't use primer on this one.
 

Attachments

  • before after, pre-cure, no primer.jpeg
    before after, pre-cure, no primer.jpeg
    55.1 KB · Views: 18
Glad I didn't do all three of my Qs in this color. Painting these lids is actually much easier than I thought it would be. Especially if you don't have to grind off all the factory paint first. Of course I haven't put heat on any of them yet. Might have to retract my statement if I get bad bubbling.
Looking forward to doing a red or blue version next. I even think this gold color would look nice. Anything should help with resell over the OEM vanilla color.

https://www.amazon.com/exec/obidos/ASIN/B000CPIN8O/tvwb-20
 
decided against curing the lids in the kitchen oven. So I'm curing them now on the grill. Figured I'll heat it up a few minutes, then off too cool. Heat it up a little longer, off then cool. And then again for a 3rd and final time and let it reach max temp. Then cool.

that sound about right for curing?
 
The directions for the paint I used recommended what you are describing, raising the temperature each time. Using a grill you I would think you need to be careful you don't smoke damage your nice work. Needs to be pretty clean first.
 
decided against curing the lids in the kitchen oven. So I'm curing them now on the grill. Figured I'll heat it up a few minutes, then off too cool. Heat it up a little longer, off then cool. And then again for a 3rd and final time and let it reach max temp. Then cool.

that sound about right for curing?

What Kyle said:

"decided against curing the lids in the kitchen oven..."

The rest of the story:

"[My wife] decided against curing the lids in the kitchen oven...."

:smilekettle:
 
Those don’t seem to come up around me! I think I would find myself using one pretty often, the Genny is great but for two, sometimes it even a little bigger than necessary. Do I “Need” one? No, would it be convenient. Probably! I will muddle through with the other nine grills and suffer!
So glad that folks that find them, enjoy (or flip) them!
 
I pressure washed all three of the carts for my Q200s today. Let them dry then wiped them down with Xylol. Let them dry again the. Used a 50/50 mix of Boiled Linseed Oil and Paint Thinner and applied it to all the hard black plastic areas of each one of the carts. I put it on with a cheap foam brush and applied it very liberally. Let it all soak in for a few hours and then wiped off the excess oil. All I can say is, Wow! That made all my carts look brand spanking new!

I will post some pictures of my carts later this week.

Highly recommend the boiled Linseed / paint thinner mix application.
 
One thing I noticed while spraying the undersides of my carts, the portable / collapsible one all had multiple hinge pins and cotter pins. All of mine looked brand new and sparkling clean because they were on the underside and hidden from the elements. I pulled all the cotter pins out and swapped them for my old rusty ones from my Genesis and Q lids.
 
I pressure washed all three of the carts for my Q200s today. Let them dry then wiped them down with Xylol. Let them dry again the. Used a 50/50 mix of Boiled Linseed Oil and Paint Thinner and applied it to all the hard black plastic areas of each one of the carts. I put it on with a cheap foam brush and applied it very liberally. Let it all soak in for a few hours and then wiped off the excess oil. All I can say is, Wow! That made all my carts look brand spanking new!

I will post some pictures of my carts later this week.

Highly recommend the boiled Linseed / paint thinner mix application.

Kyle,

Definitely would like to see the results. I have just always used auto trim restorer, not always with stunning results. I am interested in trying out your formula!
 
Yah, that seems like an interesting formula as well. I would be concerned about how it would hold up and whether or not those chemicals would do any damage to the plastic/vinyl long term.


Back
Top