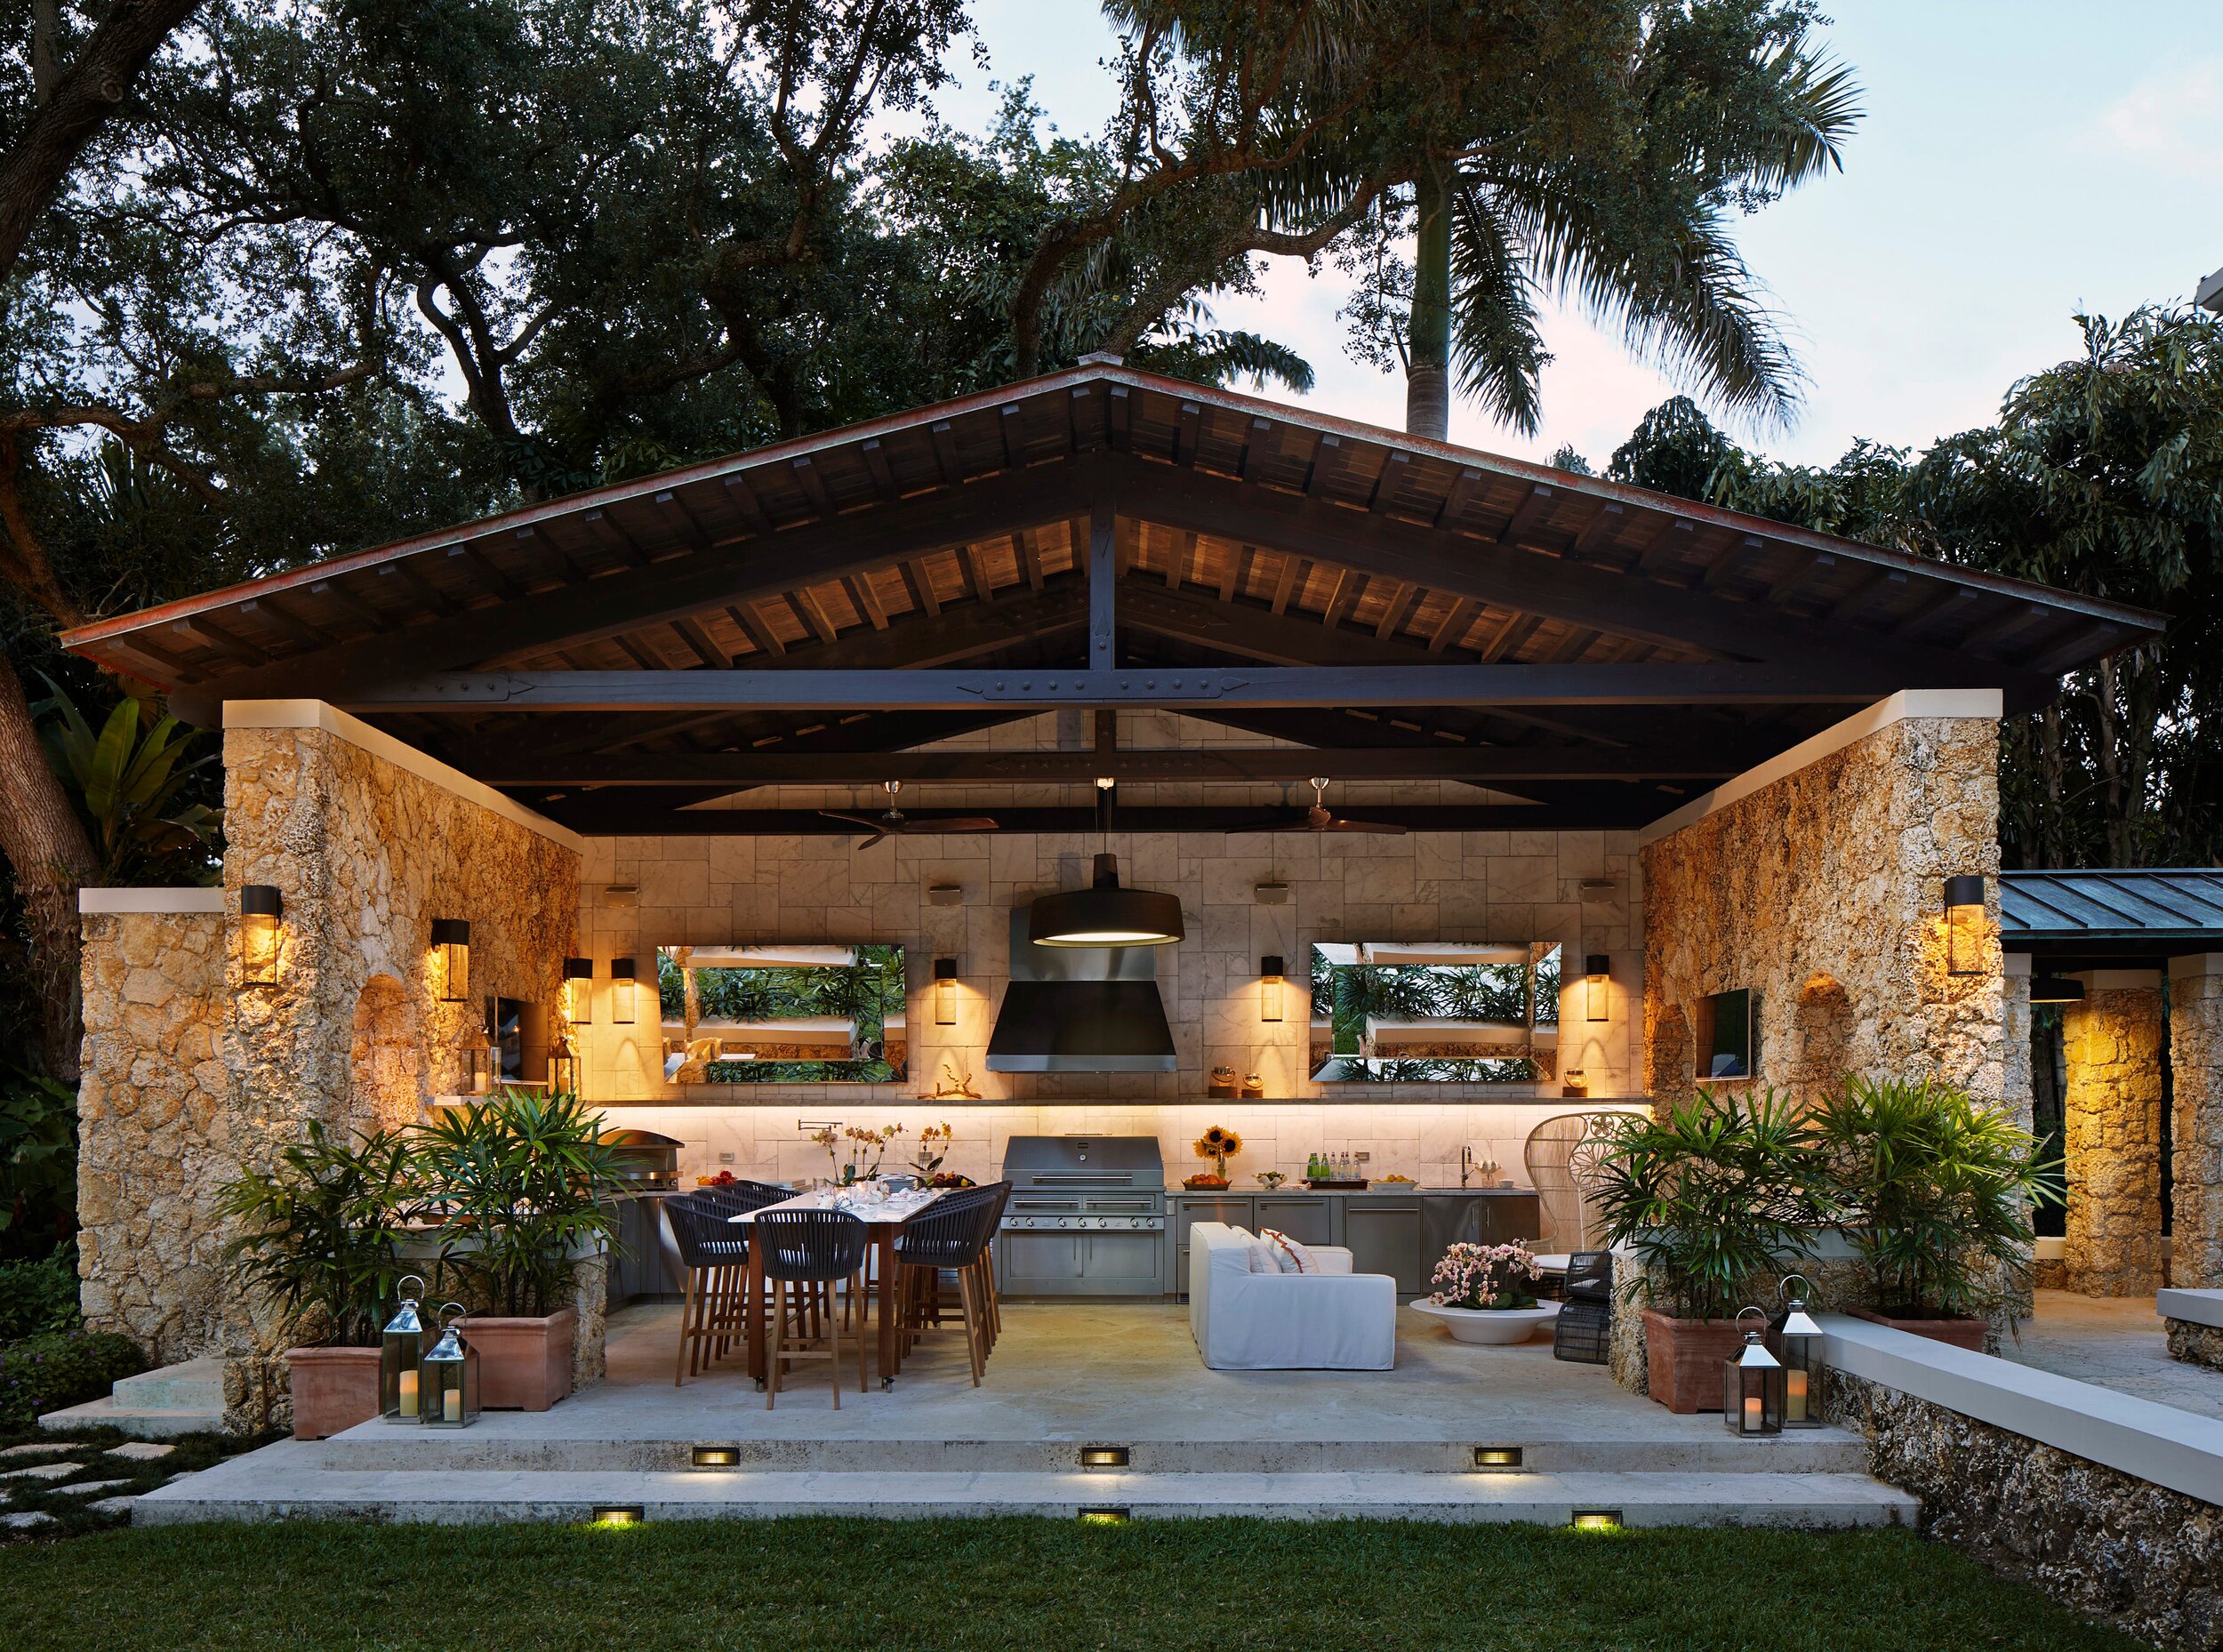
My home was brand new when I purchased it with a deck made of treated wood with 4 x 6 posts with a walkout basement to bottom of the deck. After years of having to power wash it & apply sealer, I opted to give it a facelift with composite decking & a vinyl railing system. Knowing that I had a small footprint below the deck, I wanted to utilize every square inch of it for grilling & entertaining. I added a ceiling to trap the excess water & released it via a gutter system to the back yard. Prior to adding the ceiling, conduit & electricity was installed, also added were three light fixtures, a ceiling fan with an additional light & 4 GFCI outlets.
After many hours of deliberation, not to mention countless libations, I was able to design a floor plan. The framing consisted of treated 2 x 4’s, deck screws & backer board, with stainless steel cabinetry. The posts were squared off with 2 x 2’s & backer board. The exterior is a product called AirStone, it is a faux stone veneer which gives it the rustic look I was going for.
View attachment 88041
I have (2) 22” kettles with modified legs on the lower portion of the island. I like the ability to have one kettle for protein & the other for appetizers & side dishes such as veggies.
View attachment 88042
A long countertop to accommodate storage underneath for a SS rolling cooler & additional bar stools as well as ample space on top for food & beverages.
View attachment 88043
All the pizza accessories are stored in a large tote underneath the two kettles when not in use.
View attachment 88044
Here is another angle of the “L” countertop.
View attachment 88045
Here is a view of the back or front side depending on what side you are facing. Porcelain tile was used to block the north wind. Toward the top right side, you can see where awnings have been installed to enlarge the grill space below when it is raining. This didn't happen overnight & was a long drawn-out process, but I am very happy with the results.
")


