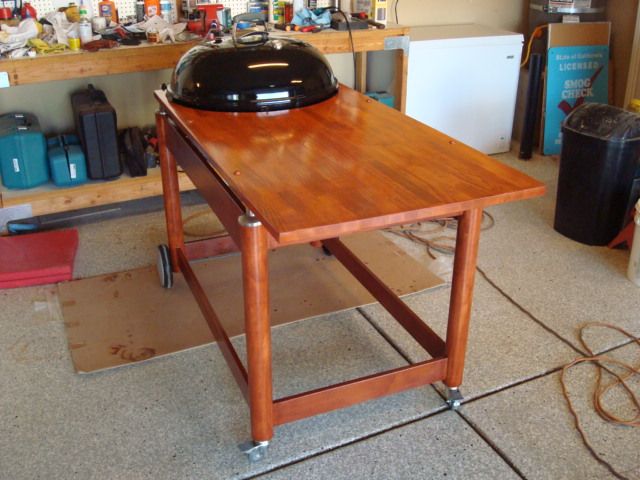
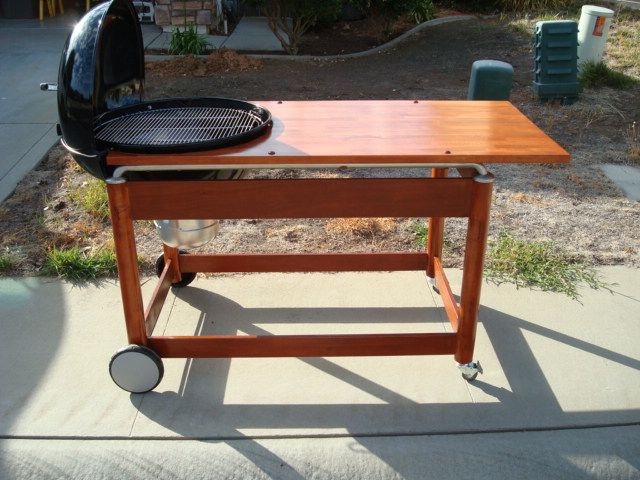
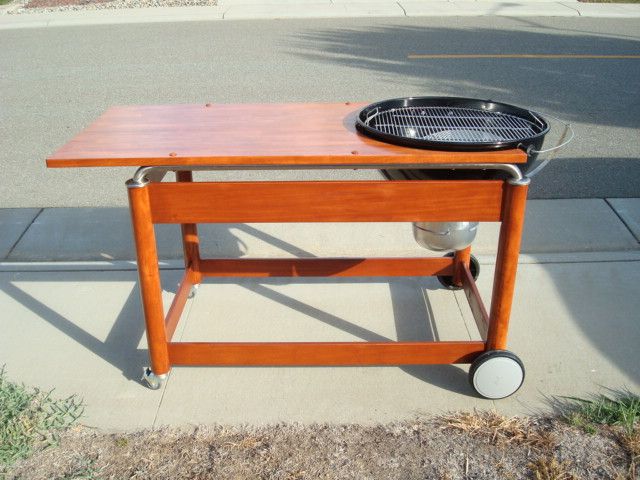
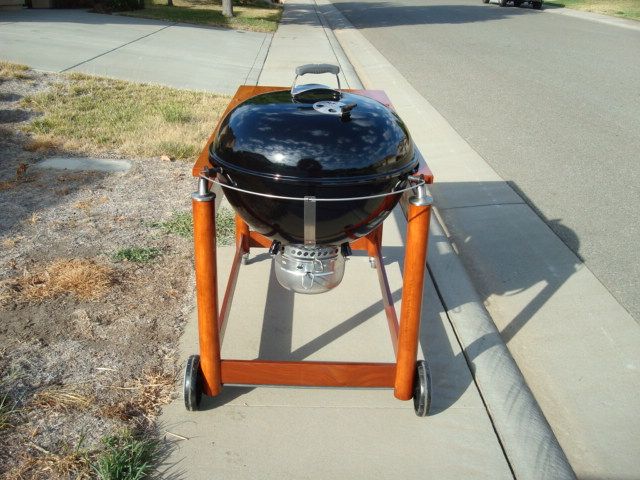
Finally I have this new 26 inch grill done!! I have many pictures and things to share but for now I just wanted to get this out so everyone can see the final product. The grill will have some more add on's like a lower wire shelf and some dress up items to label it like a Weber emblem etc.
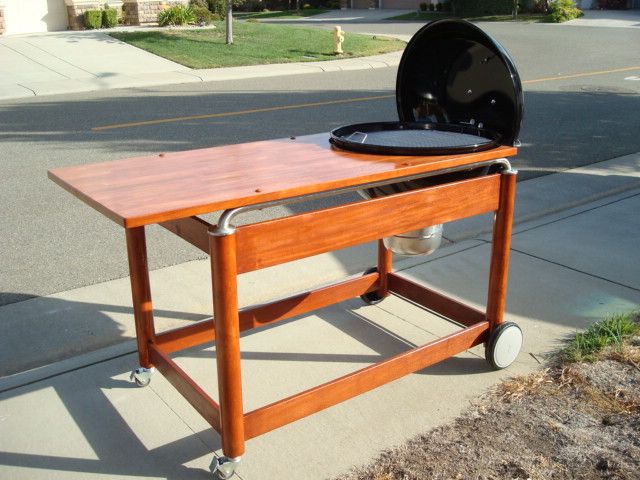
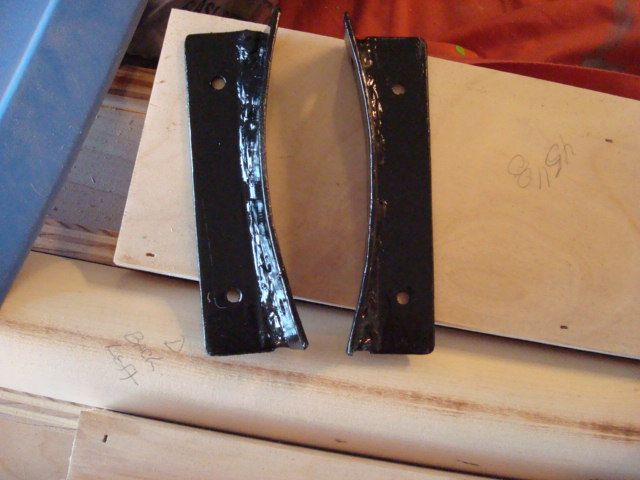
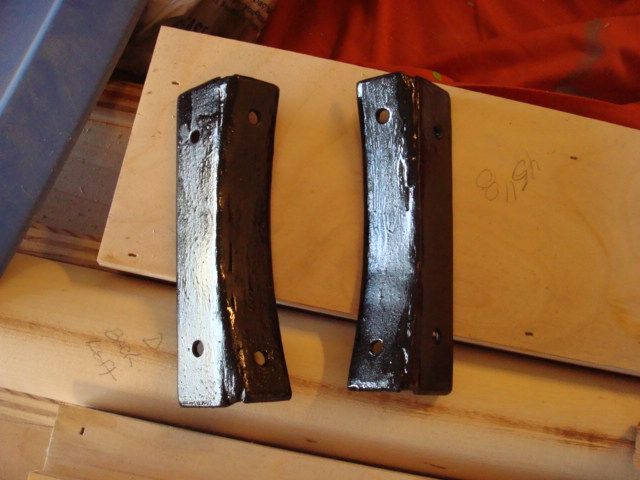
Mark, I purchased a 3 ft. section of angle iron. It was 1 1/4 inch material. I cut two 6 inch length pieces. I then took a hack saw and cut down lengthwise close to the angle from both ends of the piece about 2 to 2.5 inches so I was approximately 1 inch short of cutting it completely off. I left one side straight to mount on the stainless steel bar and the other side where my cuts were I bent to contour to the kettle. I then went to a muffler shop and had him weld in the space from the bent side to the straight side at the angle for support. I prepped, sprayed a primer, then used a coating I use on chassis and sheet metal on automobiles that prevents rust. They didn't look real pretty but they are not really seen anyway once assembled. Here are some pics of those.
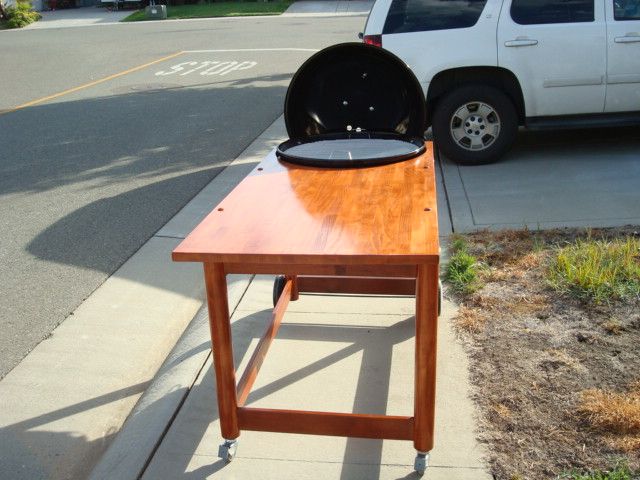
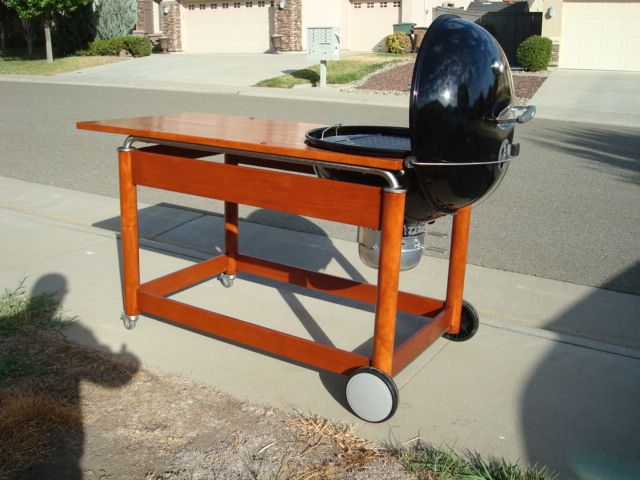
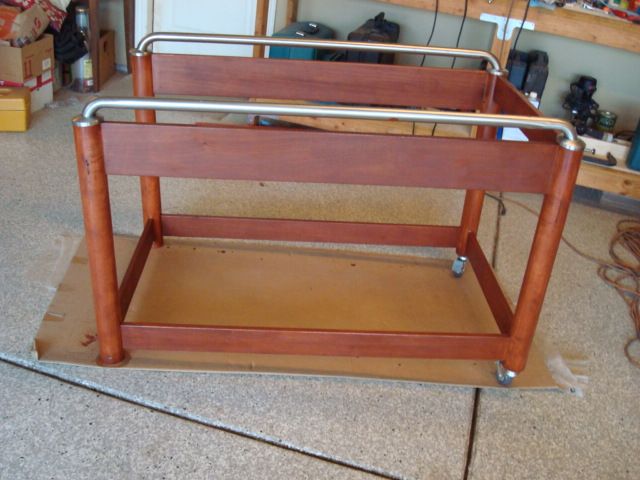
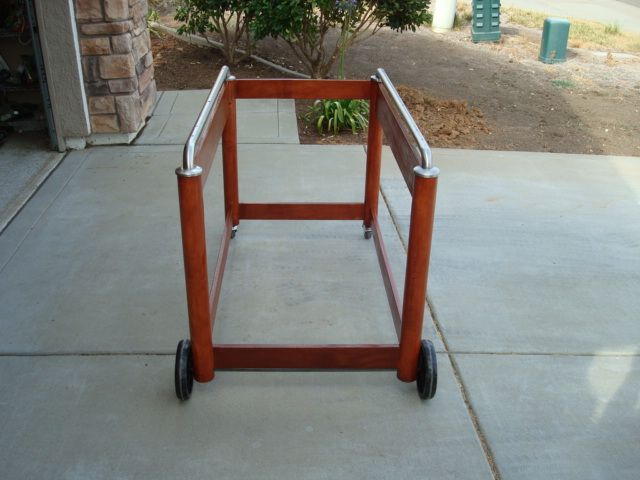
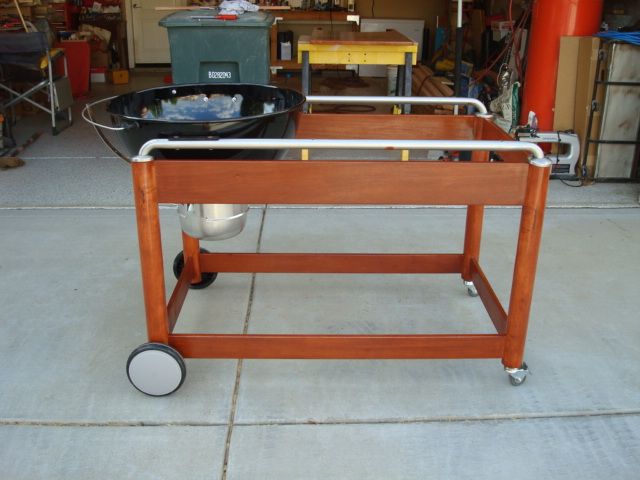
Here are so more pics of the assembly. I have many more pictures and your questions will help me decide which picture to post like for Mark on how I attached the grill to the rails. This was a fun project. At times I thought I bit off more than I could chew but the vision in my head was very clear. I just had to short out how to put it all together. Learned some wood working skills to create the mortise and tenons to build the frame and it was worth it. As with any project the first one is rocky and after built many should of, could of thoughts come to mind. Could I build a better one? Absolutely, I learned so much building this one I would do some things differently. I would still like to make the stainless steel frame like I originally planned.
Cliff, that turned out very well indeed! It's "almost" too pretty to get dirty, almost.
Excellent finished product, nice work.
Now, grill a nice BIG steak and enjoy every bit for me!
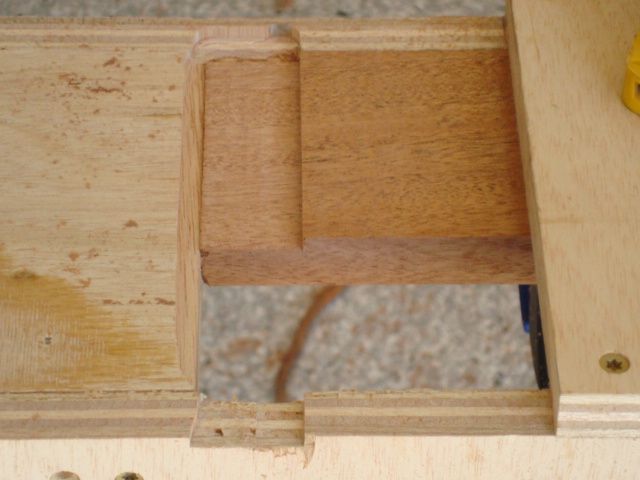
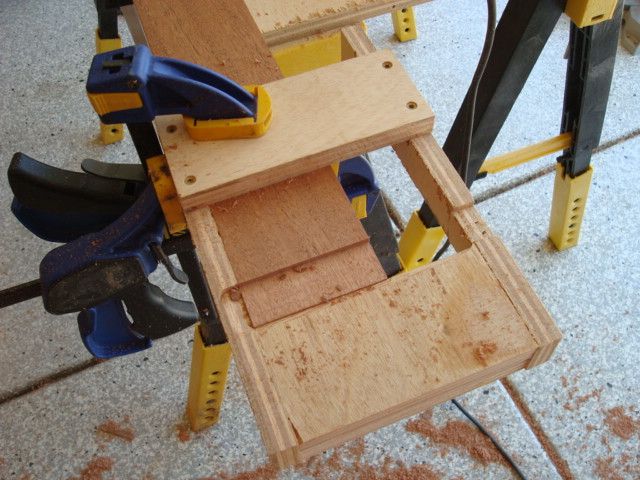
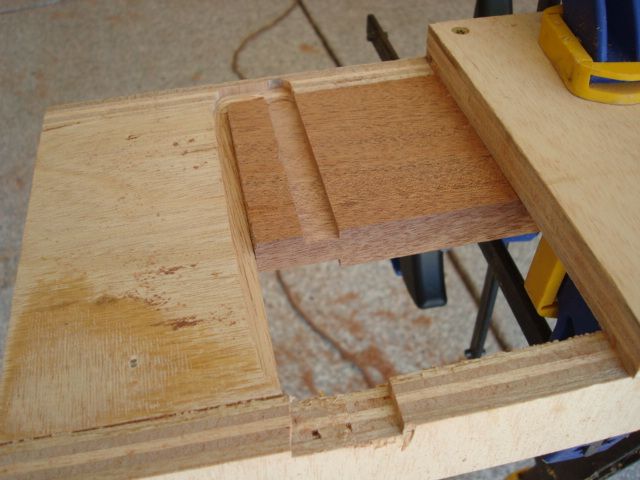
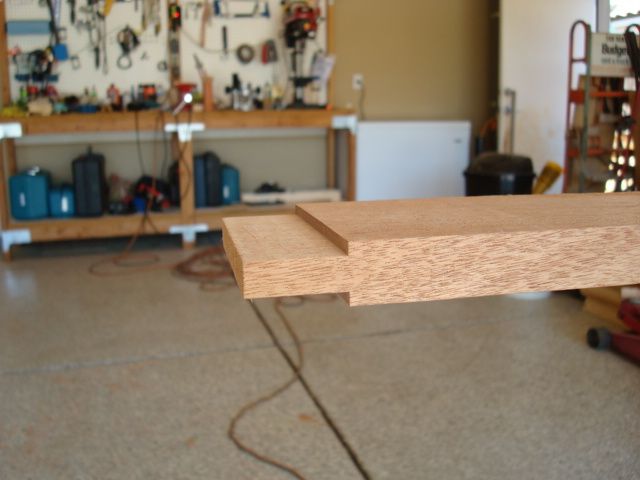
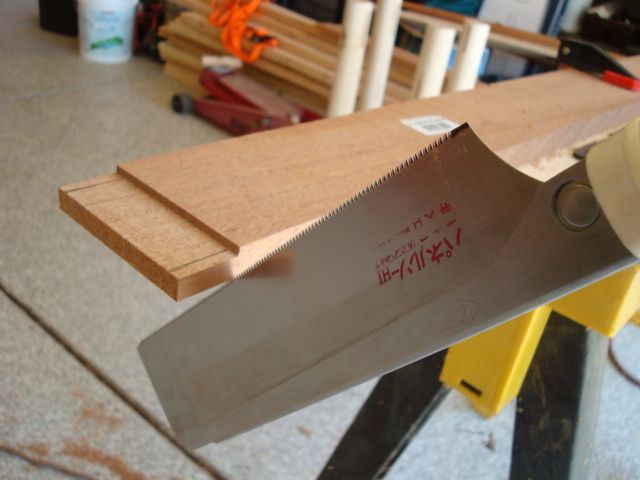
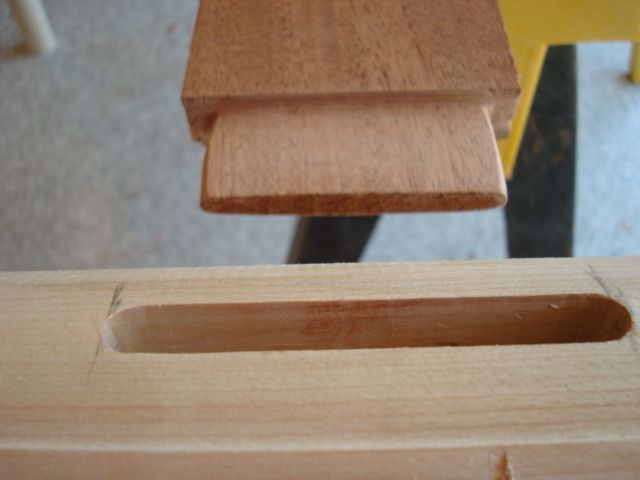
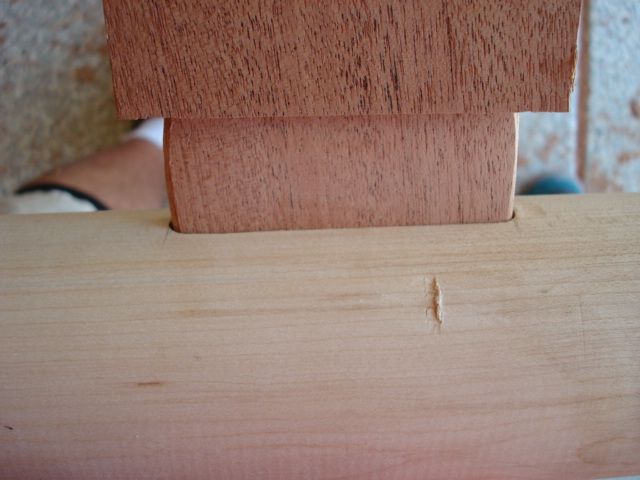
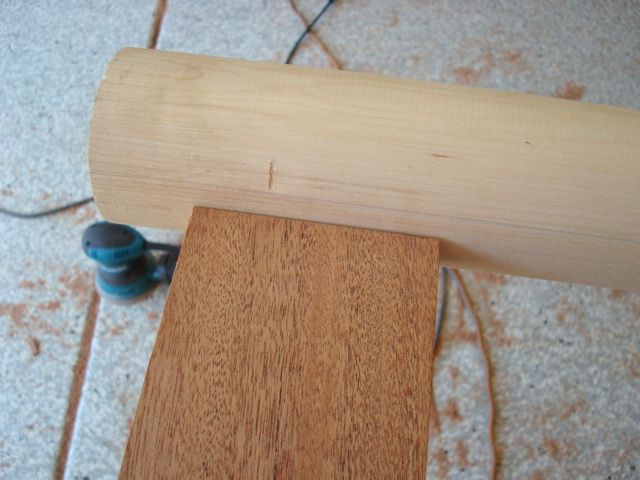
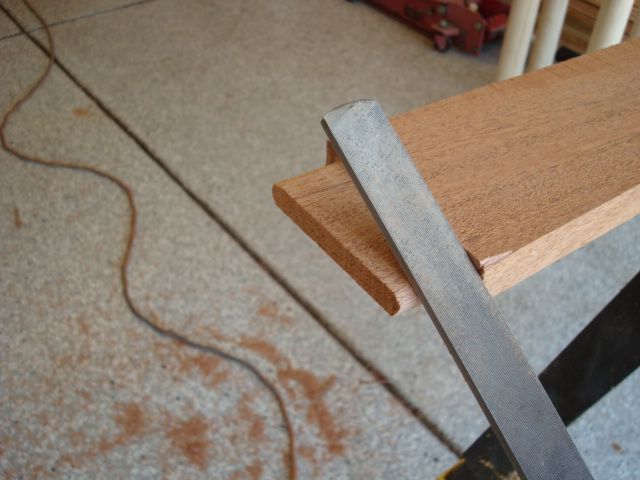
The bat blanks are mortise and the side boards have the tenons. I had to make two jigs, one for the bat blanks and one for the tenons. Here is the jig for the tenon. The stop board and top board create the distance needed for the length of the tenon. The top board is the fence for the router. I know between the fence and stop board my tenons will all come out the same from board to board. I then use a Japanese hand saw to cut out the ends of the tenon. My tenon were is wide as possible so I had a good glue joint. The length was limited since the bat blank is 2 3/4 inch diameter I couldn't go real deep. The tenon thickness is 3/8 inch. I used a 3/8 inch spiral up-cut router bit to cut the mortise in the bat blank.
The mortise was harder to create. Since I was cutting into a round piece of wood how do I know my cuts are 90 degrees apart around the blank. While talking with the representative at the Rockler wood working store he suggested cutting a square piece of wood that was the same diameter and screw it to the end of the bland. Now I could cut one mortise then rotate the blank 90 degrees using the square piece on the end to make sure it's 90 degrees apart. The key is to ensure your end piece is true and at 90 degrees. I did this step more than once and had to purchase another bat blank because I didn't get it right. Also it gave me one to practice on. Also the blanks were cut down to 29 inches. They come over 36 inches long so you will have to adjust for how tall you want your cart. Here are pics of the jig for mortise.
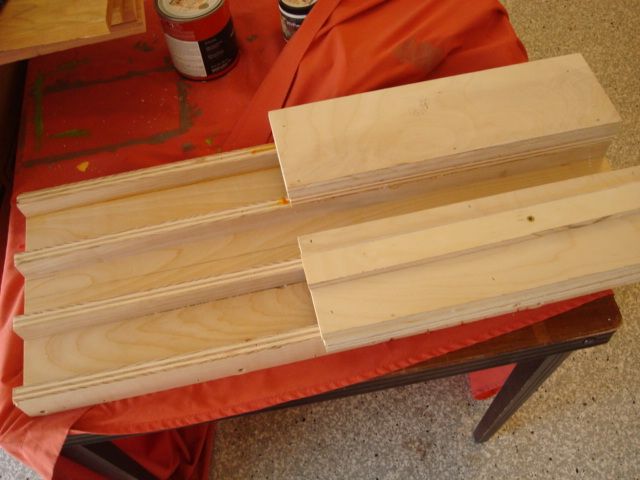
The platform on the right is where my router rested. The narrow board on the bottom is the fence for the router measured so the cut would be center on the bat blank. Once the tenons were done they were rounded off by using a file to match the mortise. I then used sandpaper to work down the tenon for a tight fit in the mortise.