You are using an out of date browser. It may not display this or other websites correctly.
You should upgrade or use an alternative browser.
You should upgrade or use an alternative browser.
I will just leave this here
- Thread starter Bruce
- Start date
HankBates
TVWBB Pro
Free 3000 redhead in Goffstown NH
wish I were closer...
JimK
TVWBB 1-Star Olympian
With cup holders!!!
John_NJ
TVWBB Wizard
Two of these and 4 nuts would solve that problem permanently. Just run the rods through the frame and connector to the other side and put on a washer and nut. Tighten it up and cut off the excess rod. They are $2.98 a piece at Home Depot. View attachment 57744
I had time last night and I did a thing…And if you want it to look fancy, after you cut off the rod, install stainless steel acorn nuts instead of regular ones. And put never seize on them so you can get it apart in ten years for the next refurb.
A little Sunday morning grill ****
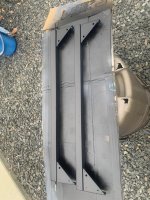
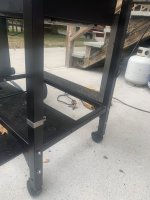
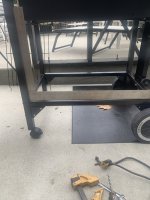
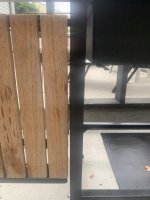
Thanks Steve and Richard- the threaded rods made the difference and the acorn nuts make it look great in my opinion.
She’s rock solid- no more rickets.
Cheers
John_NJ
TVWBB Wizard
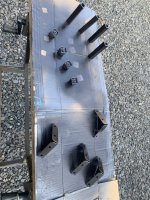
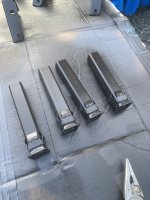
I had some 3/4” steel square tubing- about 1/8” side wall, so I cut them about 5” long. As luck would have it, the leveler inserts fit over the steel ( with a little coaxing), and the whole assembly fit inside the rusted/ compromised 1” Genesis steel cross members.In the second from top photo, those tube inserts are supposed to go "INSIDE" the tubes.
Are those short pieces of tubing used on your grill any where?
I drilled and tapped 1/4-20 threads into the 1/8” sidewall square tubing, and bolted the braces through the thin steel into the thick steel- it’s really solid once I tightened it all up.
And I trimmed the stock 1” Weber square tubing down to 23 7/8” to account for the flanges on the leveling inserts.
It worked out as well as I thought it would.
John_NJ
TVWBB Wizard
This is what I was dealing with- and why the leveling inserts probably weren’t 100% workingOK, it sounds like you went the extra mile in bracing up that frame.
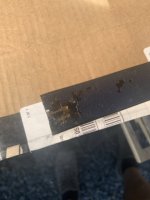
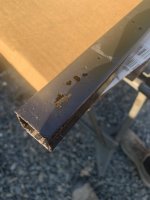
But regardless the grill was never really solid from the get go- there was a time I would move the grill into the yard/ lawn for parties and such, and I could tell I was stressing out the connection points “wheelbarrowing” the grill around.
Now that she’s at an advanced age, I have to be more gentle with the old girl.
Ralph
TVWBB Super Fan
Anyone near Framingham?
https://www.facebook.com/marketplac...place_top_picks&referral_story_type=top_picks
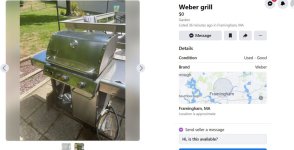
https://www.facebook.com/marketplac...place_top_picks&referral_story_type=top_picks

DanHoo
TVWBB 1-Star Olympian
Natural gas S330 special edition with SS rod grates.
Ralph
TVWBB Super Fan
Now goneNatural gas S330 special edition with SS rod grates.
Richard in NS
TVWBB Wizard
Gla

Glad to see it all worked out John. Looks good and sturdy and ready for another few years.I had time last night and I did a thing…
A little Sunday morning grill ****
View attachment 58326View attachment 58327View attachment 58328View attachment 58329View attachment 58330View attachment 58331
Thanks Steve and Richard- the threaded rods made the difference and the acorn nuts make it look great in my opinion.
She’s rock solid- no more rickets.
Cheers
Steve Hoch
TVWBB Olympian
Nice, solid repair John. I like it.I had some 3/4” steel square tubing- about 1/8” side wall, so I cut them about 5” long. As luck would have it, the leveler inserts fit over the steel ( with a little coaxing), and the whole assembly fit inside the rusted/ compromised 1” Genesis steel cross members.
I drilled and tapped 1/4-20 threads into the 1/8” sidewall square tubing, and bolted the braces through the thin steel into the thick steel- it’s really solid once I tightened it all up.
And I trimmed the stock 1” Weber square tubing down to 23 7/8” to account for the flanges on the leveling inserts.
It worked out as well as I thought it would.
DanHoo
TVWBB 1-Star Olympian
Nice.I had some 3/4” steel square tubing- about 1/8” side wall, so I cut them about 5” long.
I wonder if this approach would fix droopy side table extensions on a Silver C...
John_NJ
TVWBB Wizard
I primed and painted the raw steel with rust oleum, so that should help.Dan, it probably would. My concern, however, is that it might provide a breeding ground for rust with two pieces of steel so close in contact with each other.
I own a Toyota Tacoma- have you ever heard of Fluid Film?
It really does a good job.
I am actually thinking about coating the inside of all the steel tubing of this grill later this fall at the same time I do my twice annual wash and rust proof on my truck.
The legs on my grill have welded cross members, so I would drill a few holes around 3/4” diameter so I could fit the flex hose of my sprayer inside those areas too
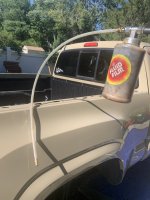
Here’s a photo from last fall when I popped off the bed rail covers so I could coat the insides of the bed sides


