HeaterMeter v4.0 for RaspberyPi / Standalone


I'll add one more to the list of soon to be Heatermeter makers. All parts ordered, most have arrived. RPi set up with WiFi and ready to go. Thanks again for all the hard work put in to make this easy for the rest of us.

One question? The 3D printed case is nice, but $$$. Bryan, do you have the plans for the Ponoko case you had made? I was going to design one but looks like you already did! I may order enough for 3 and sell the other 2 if anyone else is interested.
 
Dave,
Thanks for the tip! Much cheaper than having three made.

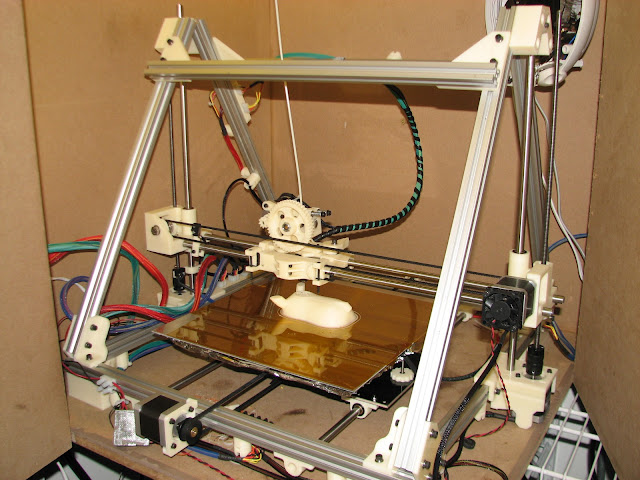
@ Greg P - I've got a 3D printer. If you can get me the .stl's (or point me to them) I'll see what I can do to print you off a case. Shouldn't be too expensive - plastic costs about $20/lb, and I can't see a case being too heavy.

IMG_3547.jpg


Matt
 
@ Greg P - I've got a 3D printer. If you can get me the .stl's (or point me to them) I'll see what I can do to print you off a case. Shouldn't be too expensive - plastic costs about $20/lb, and I can't see a case being too heavy.

Matt

Nice! Got to love this community! Which setup is that? I haven't convinced myself I need a 3D printer yet, but have been checking out the options. I'd be happy to pay for one or two. Be good to see if the stl's for the thick wall version are available.

HM4.0 mostly assembled today, just missing the connector for the RPi that's backordered and need a case to test fit most of the rest of the parts.

Great job on the board layout and instructions, very compact!

-Greg
 
Last edited:
Greg,

It's a relatively new update to an existing design. Prism Mendel 1.5. I reworked an existing design (Prism Mendel) to optimize the build volume. The files are in my github if you want to take a look.

I did a little work on the case this evening to get away from the tabs and moved to M3 hardware to secure the case. Probably adds a few bucks to the case cost, but not the end of the world.

Once the clearances are confirmed good (not sure about the inside corners) then I'll print some out.

Matt
 
1st post here, been lurking for awhile. A couple of things, I hope the board doesn't mind.

First thing I want to say is Bryan, you are amazing for doing all the work, then releasing it, then supporting it. Thanks so much.

I ordered my parts back in Sept/October. I have my unit soldered, but still deciding what to do about a case. I had a local guy print one with a Rap (?) 3d printer, and it didn't turn out at all. I haven't decided how to proceed. I have a hard time justifying the printing service here, but maybe I will break down and do it.

When I ordered from OSH Park I got a 3 pack of boards. I have two boards I can send someone for 12 bucks or so. PM me if interested. I am in NC, and can drop them in the mail immediately.

I have an auber fan I would like to use. I have seen other posts of people saying you need to get an adapter. Can someone help me out with the parts I would need to build the adapter? I soldered my board stock, so I would need to make an "aftermarket" adapter. Any help would be greatly appreciated.
 
Bryan, do you have the plans for the Ponoko case you had made? I was going to design one but looks like you already did! I may order enough for 3 and sell the other 2 if anyone else is interested.
My case sucked donkeys because it didn't fit together correctly. The actual dimensions I used were I believe based off a prototype rPi so everything juuuust wasn't quite right all around. If you think that might help you then here's my 2D laser-printed LinkMeter case on P2. The puzzle edges also aren't deep enough to hold the material thickness of the other piece.

If you want to talk more about 2D cases I suggest you start another thread to keep the discussion separate and easier to find.
 
I have an auber fan I would like to use. I have seen other posts of people saying you need to get an adapter. Can someone help me out with the parts I would need to build the adapter? I soldered my board stock, so I would need to make an "aftermarket" adapter.
Auber uses a 5.5 mm OD, 2.5 mm ID barrel jack, so the cheapest thing to do would be to take an old RCA cable (like a composite video, or L/R audio cable), cut the end off, and solder the two wires to a barrel jack like one of these. Instant adapter.

You can also make a more elegant solution by finding any other 2.5 inner 5.5 outer jack from Mouser's DC power connectors and wire it in place of the RCA jack on the HeaterMeter board.
 
Thanks. I will see if I can exchange the units.
Just got my case in the mail from http://www.okwenclosures.com/product...atec-mobil.htm. They were out of black and substituted the white case but sent all black accessories, I wish they would have waited for the black to be in stock or given all white accessories. The display lines up with the hole but the standoffs are not tall enough to reach the display circuit board ordered the screws from them on for the board mounting and now will have to find long screws and put in spacers. The display is fully visible but does not go though the hole. Cant beat it for a free sample!!!

Can ABS be painted and look good?
 
Last edited:
Ok, I've got my 4.0 board responding to the RPI, question though, is 20121224B the latest firmware? I tried flashing the one from 07-Jan-2013 and the rev says 20121224B.
 
Yup 20121224B is the latest. I didn't put it up on the site until January though because I was running it through some testing.
 
Thanks! Got it up and running thanks to the great instructions and the auto flash of the Atmel. Now to figure out a case and how i want to do a display.
So Bryan, how hard would it be to use a 4 line display? I've tried to look at the HM code but honestly, its beyond my understanding as to how the display formatting works.
You looked at any of the RPi DSI displays? Nevermind, bad idea on the DSI as the GPU is closed source. A small composite display might be interesting tho.
 
Last edited:
Ok, I got to try out my HM+rPi on a low-slow cook over the holiday break and am finally getting around to posting some results.
This was using the Nov 2012 firmware.

First, I was amazed at the HM's ability to regulate pit temperature.
From my photo below, you will notice I jumped right to extreme testing to make temp regulation difficult:
a. It was cold in Dallas
b. My gasket was fried and leaking smoke (and heat) like a sieve

i-cgmZDfK-M.jpg


Even with this, pit temperature was rarely more than 2-3 degrees off target.
However, there were a few issues along the way.

1. I lost 2 of the 4 Maverick ET-72 probes I ordered. One died within the first hour of testing, the second during the cook and without warning. When they died, I guess the connection opened or resistance jumped and they registered high temperature. You can see in the screenshot below at 11:45am, my pit temperature appears to jumps from 225 to 375 in under 2 minutes. I know the probes were dead because when I threw them on my Redi-Chek ET-72, the LCD just showed HHH. Luckily I had extra probes on hand, so lid goes open, probe is replaced, fan kicks on full, and I'm back in business. Maverick replaced the probes without question when I told them what the Redi-Chek was showing.

2. I've had multiple instances where the rPi WiFi connection goes offline. When this happens, the connection does not return unless I intervene. I've had some luck pulling the Edimax WiFi out and switching it to the other USB port. But, when I reconnect to the browser, all the graph history is reset and it really appears like the rPi has rebooted. I looked once after this happened and confirmed sys uptime had been reset. But if my system is rebooting, then the soft-reboot isn't enough to reset the wifi and let it reconnect. I am starting more testing now, but would appreciate some recommendations on how to capture logs to catch the WiFi going offline and system reboots.

i-z9qrtLG-M.jpg


BTW, screenshots are easy on a Android phone or tablet using Power+VolDown buttons simultaneously.
Gasket has now been replaced and I've updated to the 20121224B openwrt-rpi image.

Thanks!
Eric
 
Last edited:
I had the some problem with the connection dropping on my first cook. My wireless router is on one side of the house and the location where I do most of my cooking is on the other side. I didn't think it would be enough to cause problems, but I purchased and used an extender / booster for my second cook and it took care of the problem. The extender I'm using is:

http://www.newegg.com/Product/Product.aspx?Item=N82E16833315112

And I placed it half way between my cooker and router (at least as half ways as I could get and still plug into a normal outlet).
 
Thanks Alan ... I probably do need to boost my wifi to keep the signal strong.

I have confirmed that my attempts to hotswap the Edimax between USB ports is causing the board to reboot.
I need to see this fail a few more times, but then may try adding a watchdog for the wifi connection to an ifdown/ifup if network connection is lost.
 
So Bryan, how hard would it be to use a 4 line display? I've tried to look at the HM code but honestly, its beyond my understanding as to how the display formatting works.
You looked at any of the RPi DSI displays?
You can use a 4 line display (I actually have one on my device right now) but it still will only show the two lines of information. I've considered adding a 4-line mode that shows all 4 probes at once. The menus would still be just two lines. If you're into that, I can put it on the todo list. It isn't very difficult.

I haven't looked at any rPi-based displays at all. It would require a lot of changes if you wanted anything other than the default terminal display. OpenWrt doesn't have anything needed to do graphics, and then someone would have to write an app to pull information and display it as well.
 
2. I've had multiple instances where the rPi WiFi connection goes offline. When this happens, the connection does not return unless I intervene. ... I looked once after this happened and confirmed sys uptime had been reset. But if my system is rebooting, then the soft-reboot isn't enough to reset the wifi and let it reconnect.
Coincidentally, up until my cook yesterday I would have blamed your house for being infested with ghosts or a neighbor testing an EMP gun, but the same thing happened to me. I leave my HeaterMeter up and running all the time 24/7 and check on it frequently. I've never had any issues with the wifi stopping or the device rebooting itself. Yesterday though, after my BBQ was done, I checked on it and my uptime was an hour. This is extremely unusual because there was only one web browser connected to it, the fan was off and unplugged, and there was really nothing going on. My wifi signal was 53% so I think that's pretty good.

I'm going to keep my eye on it more than I normally do and see if I can figure out what happened. Maybe do some tests moving it to the edge of WiFi coverage and seeing if that has any effect. If you could maybe try plugging in the HeaterMeter near your wifi access point and leave it running to see if it works without rebooting from that location, that might help me hone in on the issue.
 
Awesome Bryan. I would like to look at 4 line display possibilities. If you can give me a rough idea as to how the display code works and where the settings for the screen layouts are in the HM code, I'd be more than happy to try and do the tweaking and layouts. I wonder is we could use the terminal? ASCII graphics maybe, it is a color terminal, right? Probably wouldn't look too bad on a 2 or 3" screen.
 
The display code is in hmcore.cpp updateDisplay() function. The easiest thing to do without adding a ton of progmem usage would be to just have it loop through the probes and use the existing formatting functions instead of just outputting the one probeIndex. I know a lot of 4 line displays are also 20 characters wide but having different formats for 16 vs 20 character widths means big changes all over the place to support it so keep that in mind.


Back
Top