HeaterMeter v4.0 for RaspberyPi / Standalone


Sorry, I guess I'm clueless but I'm having a hard time understanding how the code refreshes the display and how the menus and navigated. I'll start a separate thread for the 4 line display to see if there is any other interest or if I'm the only one that would like to see all 4 probes at the same time. i agree about the 16 char limit, I think that would suffice anyway.

Thanks again
 
Had something interesting happen. I saw the post about updating openwrt from Bryans repository and realized that my installation couldn't see anything outside of my network. I verified that ther was a default gateway listed on the interface configuration in Interfaces/WWAN. I then tried to add a static 0.0.0.0 route in static routs but still nothing. I ended up having to do an route add -net in the shell. Now it's working.
 
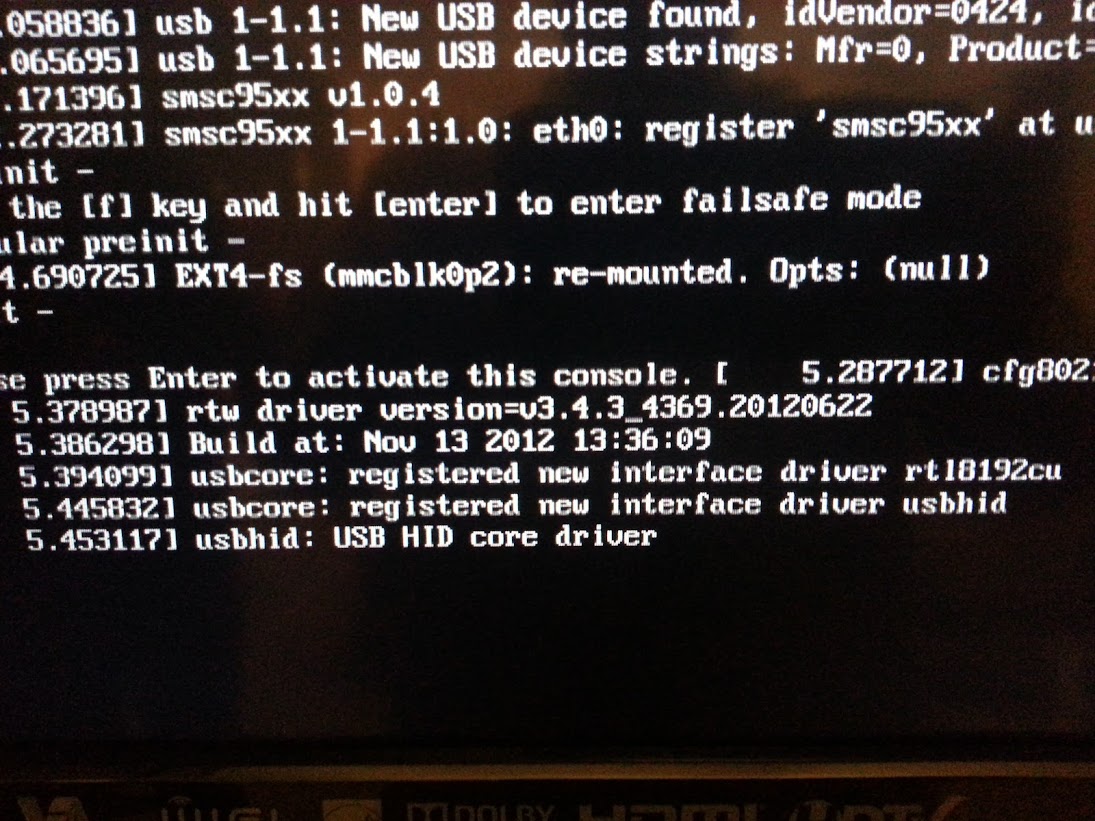
Well.... got it all put together (minus led thanks to this crappy case not being printed with holes big enough). Plugged it in for the first time using the image from Github and with the wireless adapter plugged in and it got stuck here for over 5 minutes:

20130207_211940.jpg


After 5 minutes of waiting, I pulled the plug. I took out the wireless adapter and tried again and I get stuck at:

20130207_212428.jpg


HeaterMeter LCD is blank but the back light is on.

I had booted the Raspberry Pi by itself using the Wheezy Raspbian to play around with it while I built the board. Would that have anything to do with it?
 
Don't think it would if you formatted the SD card and loaded the GITHub image. Just as a test, have you tried booting without the USB WiFi adapter?
 
It shouldn't matter what you booted it with before the OpenWrt image because everything is on the SD card. The second image doesn't appear to be locked up to me though. See how it says "Press enter to activate this console"? That's the "I'm finished booting" message and it just sits there unless you press enter on a keyboard. The first one I can't tell what happened though, and it should have flashed the HeaterMeter if it got through the boot process.

Try plugging in a keyboard and pressing enter and see what happens. If that works, type `avrupdate /lib/firmware/hm.hex` and see if it flashes the HeaterMeter.

Hooked up my Microsoft wired keyboard and a microsoft wireless keyboard. Pressing enter did not do anything. I am going to borrow a keyboard and see if it just doesn't like microsoft products or something.
 
How are you powering it? With 12V from the heatermeter side, or 5V from the rPi? Maybe disconnect the HeaterMeter board and run it with 5V going directly into the rPi and see if it works? I know it definitely doesn't like some keyboards, but it should at least give you USB logging messages when you plug and unplug the device, which will give you an indication of if it is locking up.
 
How are you powering it? With 12V from the heatermeter side, or 5V from the rPi? Maybe disconnect the HeaterMeter board and run it with 5V going directly into the rPi and see if it works? I know it definitely doesn't like some keyboards, but it should at least give you USB logging messages when you plug and unplug the device, which will give you an indication of if it is locking up.

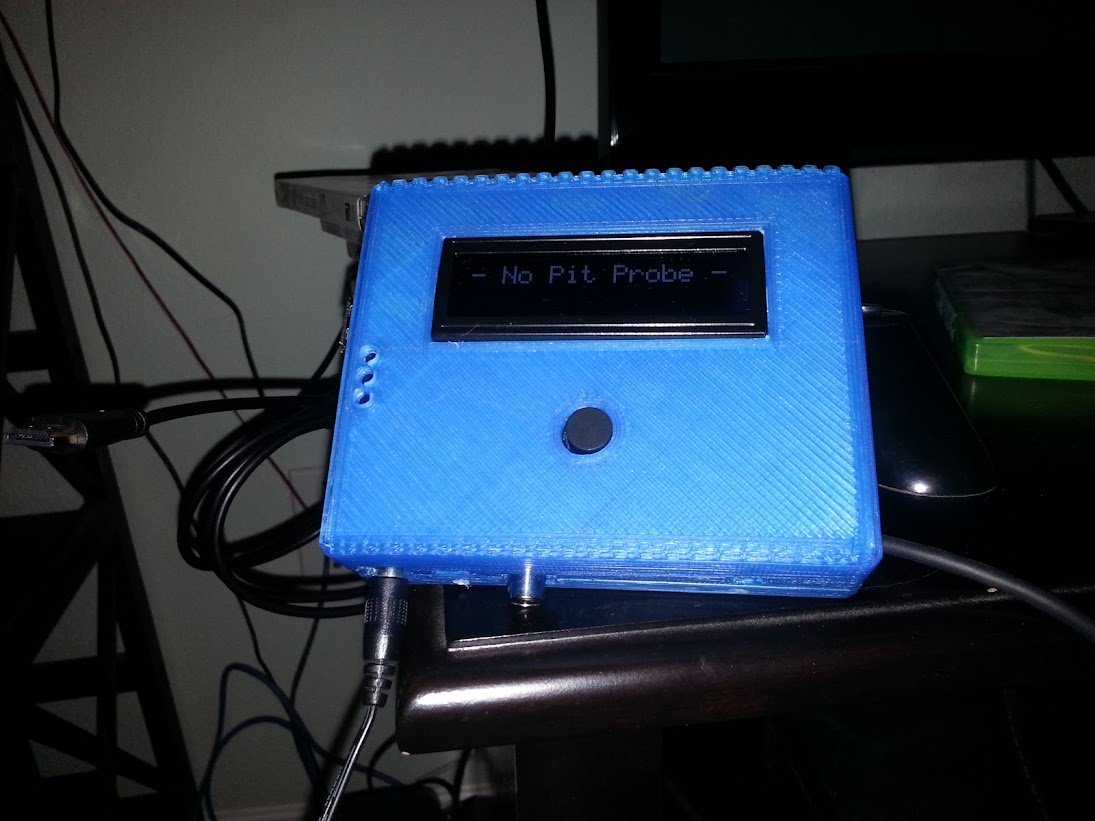
12v from the HeaterMeter side. Anyways, I bought a $9.99 keyboard from frys and that worked. I successfully flashed the image and then had to dial the contrast in to see the screen. It is possible that the first flash worked, but I had not adjusted the screen at that point.

20130208_125104.jpg


20130208_125510.jpg
 
Okay this may be silly but....I plugged in a et-732 pit probe. And I cannot figure out a way to turn probe 0 on in the configuration. I consistently get no pit probe on the lcd and in the browser configure, it shows Probe 0/1/2/3 off. I have set them to internal and used the presets for the Et-732. But for the life of me, I cannot figure out how to get the dang probes to be "on".
 
You don't have to do anything to turn them on.

For the ET-732 probe, they are a little longer than the jack, so you need to pull it out just a few mm. You will feel the indent as you pull it out slowly.

dave

Wellll that would do it!! I have a Et-72 probe and that one was working fine so I was very very perplexed. I can see this being an issue and accidentally pushing the probe in all the way. Maybe I can put a bumper on the probe to stop that from happening.

All in all, except for the odd wireless problem I posted in the wireless setup thread, I am up and running!!! Fan works and all!
 
For mine I made a little collar for the probes.

I took some plastic tubing for an ice maker, sliced to length, sliced out a small section so that it would compress around the probe nicely, then put it on with some heat shrink tubing. Works great.

dave

Great idea! Might have to borrow that one......
 
What is the maximum safe working voltage for the HM w/ Rpi attached? I want to build a solar panel array to charge a 12v battery and use the battery to run the board. I will have to charge the battery at around 13.5v, and the battery may discharge (run the board) while charging which will mean the battery terminals will be at the 13.5v which the board will then see. Sorry if this needs to be its own thread. Say the word and I will make one.
 
Input voltage max for running the HeaterMeater and rPi is roughly 35V via the barrel input jack. The blower is only rated to 13.8V so that's probably more the limiting factor. You should be "well inside" the safe range at 13.5V.
 
Good deal. A larger supply can be used as long as supply voltage times the maximum fan percentage is less than 13.8v? This gives me greater flexibility.

Input voltage max for running the HeaterMeater and rPi is roughly 35V via the barrel input jack. The blower is only rated to 13.8V so that's probably more the limiting factor. You should be "well inside" the safe range at 13.5V.
 
Eee nope. The fan always gets full voltage applied to the input jack, the power is just pulsed at [fan percentage]. If you need a little more wiggle room, you could put a diode on the incoming power, which would let your battery be another 0.5V-0.8V above the 13.8V max.
 
Hello Folks,

In the process of assembling my Heatmeter & PI setup, but I have a few questions I'm hoping you all can help with.

I need a power supply to run the heatmeter and Pi, can you show me what power supply I need to get? A link on Amazon or somewhere else would be fantastic!

As for the RCA Blower connection..... I purchased the blower which was on the parts list, can someone tell me if the blowers red or black wire goes to the center connection of the RCA jack?

Probes..... I already own a Maverick ET-732 wireless thermometer, can I use the probes from the ET-732 or should I order the other Maverick probes? If I have to order new probes, can you tell me which ones exactly to get?

Thanks and all the best....!

Jeff

Jeff,

I'm using a power supply from my old Linksys WRT54g, which is your run of the mill 12v 1a wall wart. Something like this should work.

As far as blowers are concerned, if you are using an old video cable or something, you're going to want to hook the positive (red) to the center pin, and the negative (black) to the outside. Once you have the heatermeter built, you can easily test to make sure you have the wiring right just by wiring it up temporarily before you solder it up.

People are using both ET-73 and ET-732 probes, but my understanding is that with the ET-732 you have to ensure you don't plug the probes in all the way or you won't make proper contact, so some people are making spacers or standoffs to make sure they don't plug them into the jacks too far.

Personally, I use the high temp ET-73 6' probes from here. You can pick up a snazzy new door for your WSM with cheap shipping too while you're at it. :)


Back
Top