Green Genesis 1000LX Build


Mark Is this the right stuff?
General Finishes Exterior 450 Water Based Topcoat, 1 Quart, Gloss https://a.co/d/0hrCSKfV
I like the semi-gloss sheen better than gloss, again love natural wood look
After the final coat cures for a few days, you can take a paper bag and polish off any dust nibs and make it super smooth and shiny. Kind of like rubbing old lacquer finishes, paper is just a bit abrasive.
 
I like the semi-gloss sheen better than gloss, again love natural wood look
After the final coat cures for a few days, you can take a paper bag and polish off any dust nibs and make it super smooth and shiny. Kind of like rubbing old lacquer finishes, paper is just a bit abrasive.

I think Ill try this too.

What about applying with a foam brush or rag vs spray. I dont have the space for a spray booth.
 
I think Ill try this too.

What about applying with a foam brush or rag vs spray. I dont have the space for a spray booth.
Yes, you can use a foam brush, which I did 6 years ago on Red Oak slats. Goes on too thick, so dries too slow to flip without waiting hours and dries a bit milky. These poly finishes are stronger when super thin coats. Brushing took days and lots of sanding, and just not happy on these small parts. I have brushed kitchen cabinet frames and sprayed the doors, but in my own home took a day to mask and sprayed the boxes 2 coats in less than 1 hour and came out perfect.

I don't have a garage or yard, so painting happens in my covered carport. I would risk death if I got paint on the house with my projects since sometimes spray colors.

I used 3/4" PVC and 3-way elbows from HD and painter's plastic. I made mine about 8' x 6' so I could fit household doors inside, as I sprayed mine different colors on each side to match the walls. Weird but I like white trim with doors to match the walls so they disappear.

These clips are for greenhouses and quick vs painter's tape to attach plastic. Assembles/disassembles in 10 minutes and becomes a bundle of PVC and a box of fittings.

Booth is not like painting a car where you need dust free just to protect your garage or house with this GF since it dries so damn fast. In less than 1 minute dust will not stick.
If I had a yard I would just make nail sticks and set on 2x4s on saw horses and paint all 40+ slats at one time and skip the booth. I use 1x4s and shoot 2" finish nails on 1/2" centers to support the slats. This way you can flip in 15 minutes to spray backside. Wait 1 hour spray 2nd coat, and repeat. 220 sand before finishing coat.

When painting things like the fireboxes or misc. I use the PVC angle so have a small point of contact on the finish.

GF allowed me to complete 3 coats on 40+ slats in 1 day, since time and drying space is premium
Why not just use carpet tack strips?
 
Why not just use carpet tack strip
Never thought of tack strips, but they would work if elevated on 2x4s on sawhorses.

Normally when I finish cabinet doors we setup booth, and dozens of 4' nail stips in driveway. And we are grabbing wet cabinet doors off lazy susan with fingers touching the bottom dry side. We needed the 1.5" nails to give us clearance from concrete to set doors down and without bumping the wet edges or top.

But with small things like these slats, I did not want to bend down 240 times so used the saw horse idea. So I grabbed a finish nail gun and shot a bunch of nails to work with narrow parts.

But for the rest of you guys, tack strip sounds like a great idea, and no tools needed
Love how we can all share and learn from each other
 
Last edited:
Been a busy day so not much progress so far. I planned on spending the whole day cleaning the green machine but that got sidelined first thing in the morning.

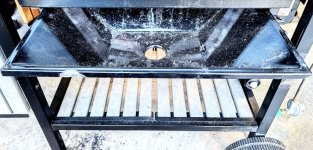
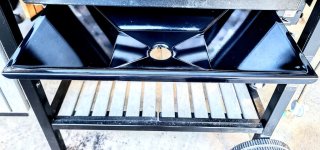
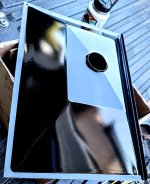
Something I didn't notice yesterday because it was in backwards is the grease pan was damaged on the front. Luckily I checked all my other grills and they all looked pretty good so I grabbed one and with some elbow grease brought it back to brand new looking. So that's a small victory.20240710_161946~2.jpg20240710_161537~2.jpg
20240710_163231~2.jpg
I'll see if I can chip away at some more small details before the sun goes down.
 
Been a busy day so not much progress so far. I planned on spending the whole day cleaning the green machine but that got sidelined first thing in the morning.

Something I didn't notice yesterday because it was in backwards is the grease pan was damaged on the front. Luckily I checked all my other grills and they all looked pretty good so I grabbed one and with some elbow grease brought it back to brand new looking. So that's a small victory.View attachment 95577View attachment 95578
View attachment 95579
I'll see if I can chip away at some more small details before the sun goes down.
If that's a used one and it cleaned up that well, you really do have a horseshoe up your ***.😄
 
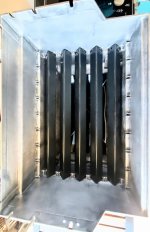
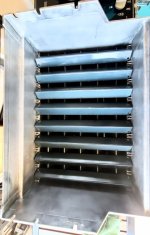
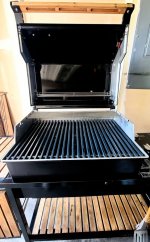
I cleaned up the original parts in the cook box. Flavorizer bars, grates and both warming racks. I already have the best SS I could source to replace these flavorizer bars and grates but I felt like they deserved to be cleaned up and preserved. I will photograph them in the Green Bbq when I finish getting it all detailed and cleaned up. For now here's a pic of the original parts inside my Red 2000. And yeah I might be losing my mind thinking barbecues have feelings and their parts deserve to be preserved.

Maybe I'm just procrastinating cleaning out the cook box on the green one. I seem to be leaving it for last.

20240711_115529~2.jpg20240711_115719~2.jpg20240711_121503~2.jpg
 
Last edited:
I cleaned up the original parts in the cook box. Flavorizer bars, grates and both warming racks. I already have the best SS I could source to replace these flavorizer bars and grates but I felt like they deserved to be cleaned up and preserved. I will photograph them in the Green Bbq when I finish getting it all detailed and cleaned up. For now here's a pic of the original parts inside my Red 2000. And yeah I might be losing my mind thinking barbecues have feelings and their parts deserve to be preserved.

View attachment 95632View attachment 95633View attachment 95634
That is STUNNING


Back
Top