Genesis 1000 project


I thought about that but it didn't look like he was interested in waiting and had already seemed well on his way to handling the problems. Now, if he catches Weberitis and this thing becomes a habit, then he will be well advised to show patience in acquiring grills and parts.

Justin: Do you still scour CL and FB MP a couple times a day even though you don't need a donor grill any more? If you do, you might have a problem. I would tell you that the first step in recovery from Weberitis is to admit you have a problem. But, that hasn't worked for me and I have not found anyone else that it works for either. Even when you become physically or situational unable to do rehabs, you will still look for deals on CL and FB MP and the the other buy-sell sites. I heard one buy from Oklahoma who lost his internet access, so he drove around his neighborhood twice a day looking for Curb Alerts.
 
Bruce,
I have been scouring Craigslist, Offerup and Next-door. I do not have Facebook. Even Next-door has too much drama for me, but there is some value there. I have setup a Weber search though so I can get emailed with every new listing.

Ed,
The summers in South Texas are brutal and the Hurricane that just passed has made the humidity even higher. I have been sweating buckets, but if I wait for cooler weather it will be November.

Hopefully tomorrow I can get it patched and all the pieces primed.
 
You guys are preaching to the choir.

Justin, I feel for ya, I really do. Don't be so driven is all I can say. The disease is not going to go away, so you have to live with it. Take time out for the special people in your life, the ones that make life so worth living, and they will support you in the years to come, until the disease runs out.

If it ever does. Time catches up with us all.
 
I have an 11 year old by my side helping me, so it gives me peace. I found one on craigslist that just posted. I cant get up there until Wednesday. I may end up with a spare :)
 
I forgot to mention I have an 11 year old helper on this project. This grill is 25 years old and I hope to get another 25 years out of it. We pulled it apart today. There was a little surface rust around the frame.
View attachment 10172


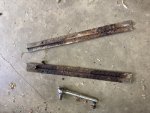
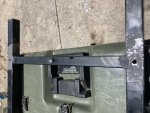
The bottom rails are toast. The issue I found now is the risers that they attached to are rusted out.
View attachment 10173

I hit them with a stripping wheel and this is what I found.
View attachment 10174View attachment 10175
At this point is this salvageable? Do I just replace the risers too? I am not much of a fabricator, I do have an oxygen/ acetylene rig and some RG45 but it probably won't look pretty. The metal is fairly cheap but I would like to salvage this if possible. I was thinking some primer and paint. If this will not last I will change out the metal and do my best.

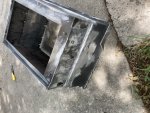
This drip pan is also rusted. I think these can be replaced?
View attachment 10171

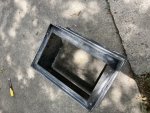
The rails on the bottom of the firebox look to be galvanized? I will hit with a wire wheel.
View attachment 10176
Replace the rails with new ones. They are about $12 online and the new ones are aluminum. Use liquid wrench and/or heat to get the screws out. Seems many suggest to use anti seize on bolts and screws when putting everything back together.
https://www.grillparts.com/weber/genesis.asp?product_id=97783
 
I ordered new rails. The other side was horrible
1E8F3F9B-F656-48A4-B2D9-53AF701E958A.jpegI
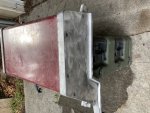
I hit the firebox with a grinder and wire cup. Do I need to strip it any further than this? I was going to hit with some brake cleaner and paint when dry
A20489A5-2AFB-4885-9923-4851CD552BF5.jpegF073526D-60A8-408B-8674-4055940BB6F0.jpeg
 
I hit the firebox with a grinder and wire cup. Do I need to strip it any further than this? I was going to hit with some brake cleaner and paint when dry

That depends. If you don't take it all down to bare metal, the transition from stripped to unstripped spots will be readily evident once you drop paint on it.
 
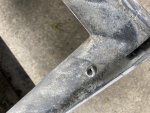
Yah, that looks like a slide rail mount. You might be able to sneak screw back in there, but if not you will have to find a slightly longer screw, but first make sure you drill it out a little deeper or you will surely strip it out and/or break away the rest of the mount.
 
I got a few hours in today to work on this project. I applied a layer of JB Weld over the pitted out areas after I cleaned all the rust off with a grinder. I will begin the painting process on these tomorrow.
19D628F6-DF8E-4C5D-80D5-5241502D8712.jpeg

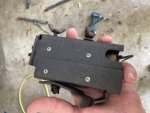
I removed this tank scale. I cannot find a thread on how to repair these? I put masking tape over the original decal so I can reuse this. I would like to keep this retro scale if possible.
28860DB5-13F1-4C70-BB3F-AC6EF0F5AFA7.jpeg
 
This is the one with the wire rod that points to the decal. The new ones have the graphic with the yellow indicating how full the thank is
 
Oh, ok, I didn't see the wire pointer so I assumed it was the newer style with the yellow graphics.
 
This is the one with the wire rod that points to the decal. The new ones have the graphic with the yellow indicating how full the thank is
From what I know, the early versions were calibrated by the user. If you read the updated manual, it glosses over that aspect and says not to worry about it, the factory already took care of it. I think the wing nut at the top sets the preload on the support spring, but I'm waiting for my tank to empty before I mess around with it...if it needs it. If it ain't broke, I ain't going to fix it. Too many times I've had to say that it used to work before I fixed it.

EDIT: If you are like me, I always keep a spare tank ready, anyway. Nothing like running out of gas during a cook. Just use the gauge for reference and run the tank out, swap in a new tank, and off you go.
 
The only thing any of those tank scales are good for is holding the tank. I never look at mine. If I feel the need to know how much fuel I have left, I just lift the tank a little. But, since I always have a spare tank, I figure the grill will tell me with 100% accuracy when it is empty and I need to switch it out.
 
I have a full one here for my griddle with the cap still on it. Once I get this bad boy fired up ill play with the adjustment. Ill post up anything I learn
 
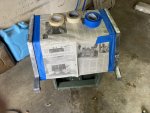
I made some additional progress today. I got the entire frame painted with two coats of ultra. I used Jb weld to patch the rust spots after they were wire wheeled. I used Rust-Oleum rust encapsulator on the legs where it won’t get hot. I cleaned the sides of the lid
BF873441-A51F-476D-A657-3635CDA4EC6A.jpeg
I am now ready to paint the sides tomorrow. It was too humid tonight. The paint says do not apply over 65% relative humidity
76F5C38D-0CE7-43E3-A307-72AC5F1C8107.jpeg
 
Justin: Please tell me you took the lid end caps off when working on them. I cannot imagine what you went through trying to strip those things still attached to the lid.


Back
Top