General 3D Printing Thread


In my experience with bed material nothing lasts forever... For one reason or another you will need to replace it at some point. Could be human error makes the extruder drag across the bed, or damage from removing a stuck part, or a tiny drop of lubricant from your rods or rails hits the bed and now you've got a spot where filament just wont stick. Any number of things could lead you to want to freshen up your bed surface.
It seems from the link above removing the PEI is pretty easy, getting the adhesive up is more of a sticky situation... But aside from being messy it seems like not that big of a deal.
What about getting the sheet stuck down perfectly with no bumps or bubbles or whatever. Does that go easy or is that a tricky deal?
 
No, nothing lasts forever. Like you said, driving the nozzle down and across the bed due to a machine (or operator) malfunction would certainly do it. However, I have been running my small printer for nearly a year and the bed is unchanged from new condition. Based on that, I wouldn't consider the PEI bed consumable the way PET or Kapton is. I have probably changed the PET sheet on my larger printer three times in that year.

I think the PEI installation is more difficult than PET or Kapton because you can't put it on with soapy water and squeegee it down. There is always a little air under the PEI that can be seen but it doesn't cause any problems with the print like bubbles under tape do.

It is also a good idea to bake the PEI before installation. Lulzbot had some problems with early PEI beds lifting when heated. The PEI absorbed moisture during storage and would create steam between the glass and PEI when heated the first few times. They now bake the material before installation to prevent that.
 
Couple Octoprint questions for those of you that use it:
I have a Da Vinci 1.0 running Repetier firmware, latest Octopi image on a B+. "medium' overclock via raspian settings (900mhz)
On small circles, the buffer gets empty/print goes slow. I'm using the same serial speed vs Repetier Host on a laptop which doesn't have this problem (only get low buffer when Windohs tries to do too much.
I hooked up a monitor to the Pi & it seems like it has pretty high CPU usage - the web server, webcam, etc. I haven't nailed it down to a specific cause (happens w/o webcam & any clients connected to webserver, but I think using the K-V-M is eating some clock running the desktop).
1 Does a Pi2 (quad core) work/better? - I think it works, but stupid Pi naming convention makes 'Pi 2' google-proof unless you want to sift through a bunch of bull**** to get a confusing answer.
2. Anybody have tips for repetier? seems the author complains that it doesn't follow standards at times. There are a few settings that are labeled 'repetier', I turned all them on, but have no idea what most do. There was 1 setting that I had to set to get it to connect. I get a lot of 'wait' responses & I suspect that is an issue. I also occasionally get a 'format error' when running the standard start-gcode nozzle-wipe & prime that I've used w/repetier & w/octoprint. It hangs, sometimes for 10-20 seconds, sometime for minutes before I reboot, then same gcode runs fine, so I think it's a comm error.
 
I think my Pi A with camera was set to 900MHz as well and I'd never run into any issues at all with small circles emptying the buffer. The CPU usage was pretty low too <50% all the time for sure unless it got into one of those things where the line numbers would get out of sync. That hasn't happened in a year though. I'm directly connected through the RPi UART though, not USB although if it didn't work well over USB, OctoPi distribution would never have been made because that's the majority. You're not running a USB camera and USB to the printer are you? The Pi's USB driver is awful so I could see there being a possible problem there even if noone is actively streaming (the camera is actually always on either way).

I upgraded to the Pi2 at some point and it works just as well. I actually pulled the SD card out (which was a micro in an adapter), stuck it in the Pi 2, and plugged it in. No changes necessary apart from being on the latest/greatest Raspbian patches before making the switch. I also have a Smoothieboard connected over USB to a Pi 2 running the other printer. I've never seen it stutter.
 
I have USB Webcam & USB connection to the printer (printer has a UART, might look into that). I considered USB->Serial being the problem, I'm going to try a shorter cable (had an A/C fan cord crossing the USB cable, turned in on & printer went offline).
I was concerned with the webcam, but I unplugged it to get keyboard & mouse w/no change.

Amazon had Pi2 for ~37.50, got another one on the way, things multiply like rabbits. 4x Pi2, 2x B+ 1x B
 
Having owned a Prusa i3 for about two years now and having replaced and modified almost every part of the original kit I'm finally able to use this printer without any tinkering and the print results are usually great without having to do any voodoo anymore. But what's the fun in that?

So, it was time for a new project. I have been looking around for a design that I really liked and stumbled upon the G&C printer made by Filipe Campos and his design ticked most of the boxes.

Although the print quality of the Prusa is fine after all the modifications, there are still a few things that I would like the new printer to do better that the old one;

1 - Speed while maintaining a high print quality.
2 - Repeatably and reliability, I will need to be able to do small production runs.
3 - Ease of use, so that my wife and kids can also print something when daddy isn't home.
4 - Less noise while printing.
5 - Look better (not like an explosion in a spaghetti factory).
6 - Have an enclosure to eliminate warping due to draft.

The name of my new printer is "Unobtanium" due to the fact that it will be almost impossible to reach all these goals. This is my buildlog on the Reprap forum.

I have followed Filipe's design as much as possible but I have made modifications where necessary.

The specs are;

- Original size according to Filipe's design
- Enclosed at 5 sides, the top will stay open
- MKS SBase 32bit contoller (Smoothieboard ripoff, yes, yes I know!)
- 3.2" color touchscreen
- Single Bowden hotend, maybe a second one in the future
- 200 x 200 mm Mk3 heated bed, with a glass build surface
- E3D V6 hotend

CoreXYBuild-34.jpg


The printer is almost complete and prints fine, the only things left are the front and side windows ans some small end caps for the exposed extrusions.

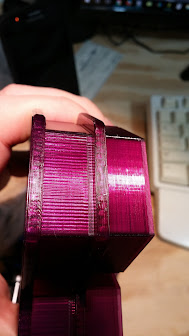
A few pictures of the build;

CoreXYBuild-1.jpg


CoreXYBuild-2.jpg


CoreXYBuild-3.jpg


CoreXYBuild-4.jpg


CoreXYBuild-6.jpg


CoreXYBuild-8.jpg


CoreXYBuild-9.jpg


CoreXYBuild-11.jpg
 
Although the print quality of the new printer wasn't bad at all I still wasn't happy with the reliability of the extruder, especially when using more than 2mm retraction or when using fast retraction. The extruder motor (and driver) couldn't handle the high torque and was causing the filament to get stuck inside the heatbreak.
The solution was to use a geared extruder so I bought the new E3D Titan. This little beasty can produce almost 5 times as much torque as the MK8. After upgrading to the Titan all my retraction issues have disappeared.

I also mounted the transparent side panels. I have used small (8mm) neodymium magnets to stick them to the frame. This makes it very easy to remove them for maintenance or easy access to the print bed.

CoreXYBuild-39.jpg


CoreXYBuild-40.jpg


So far I'm very happy with the print quality, the speed and the noise levels (much lower than with my trusty old Prusa).

I think that this project is finished, at least until I get infected with a bad case of upgraditis again.

CoreXYBuild-41.jpg


CoreXYBuild-43.jpg

Simply amazing. That is one beautiful beast!
 
Peter,
I'm kicking around a build & noise is probably the #1 consideration. Any experience with smooth rod vs V-slot? my DaVinci is loud, both the steppers & the linear bearings. I'm not sure if quieter steppers & CoreXY would be enough, but I don't know how rod vs V-wheels affects things.
That looks really slick. I like the chamber & finishing touches.
 
Last edited:
No experience with V-slot so I can't help you there but in hind sight I should have gone for bronze/graphite bearings instead of the linear ball bearings. I think that this will be the first mayor upgrade to this printer.

The 1/32 micro stepping helps a lot to reduce the sound of the stepper motors, more than I expected. Other drivers will even go to 1/128 so that will reduce the sound even more.
 
I upgraded one of my Taz machines to Openbuilds v-slot. It is very quiet and smooth. It also eliminated all of the axis wiggle and associated ripples that were caused by the slop in the old linear bearings.

Here is an example of before and after v-slot on that printer.

M4hpkVPceKJ__BxpODEjz58PLqQD0RwddWEAZaN5cWAxHnlzWpAGhvasBqY6IzZfCQPZ-zM8myHsGskjirBZ0d9jcUVSWE5nPrZI1hHGkvxzmstI5Y-hjCk4nNiT9JNaohcZstagamFHBmHQZ-G6DMXZ01I9fmaETMZrHL1kgWdhNAlSRsFsTEAGkVbbZYLWDdd0gwjaTgMcwO2aqnZSvjIpXWBHjFiE-r6Dr65RNuYt3ZJTVdjTHTP0YcMNfWRtDycQ7sE-dBX-eaDaaEpHZb1l4o-vAyuY6nXgbn7LW54a3ZBzA3WRJ1Q9MeqQ5cWHJNR-K_PnRabVwzfXa-BGecnQXbDniHU38z0GSGilY09oIPWHpd_lmPd1jv6oSLWi3N566IXtbP01M8WCF8BwVoRddU06SLnCLYRftQ_ZqxlIQEIf3AnMR4padOrPAgxhPXvx0CQOjbspyMgAUUxx0Kpx0-YIhekNPKgWqnqkHLrCMPRMO66gvyWmrghrE6xlnrabOlJaLvqGWY6m98_9CfcBujM8k7RSdei_ARXQupSj5fzJUyC5yCuG9lFTCcO5lnb4bg=w189-h336-no
 
Last edited:
So after seeing the deformed case thread and just finishing printing my HM case in PLA, albeit a light color, I'm wondering if anyone has tried PETG for any of the HM or damper parts? There's really poor ventilation in the area where my printer is so I'm a little hesitant to be printing ABS or other Styrene based filaments. PETG seems to be more heat resistant than PLA but is it heat resistant enough?
 
So after seeing the deformed case thread and just finishing printing my HM case in PLA, albeit a light color, I'm wondering if anyone has tried PETG for any of the HM or damper parts? There's really poor ventilation in the area where my printer is so I'm a little hesitant to be printing ABS or other Styrene based filaments. PETG seems to be more heat resistant than PLA but is it heat resistant enough?

I have not made a HM case from PETG but a part I did make survived a few trips through the dishwasher will not warping. PLA is destroyed in the dishwasher. I think it would be a fantastic material to make cases out of.


Back
Top