Community 3D Printer / Assembly / Trading Resources


Well, after I slept on it, I decided to take on the project of soldering it myself. Ordering the PCB's wasn't complicated when I did it directly from the link in the wiki from OSH, and to my surprise, they will deliver them with 0€ postage fee. Now I just hit another bump (which feels a bit like a roadblock to me) with ordering the components. Quite many of the parts on the BOM at Mouser are out of stock, and one part on the thermocoupler parts list is obsolete (https://www.mouser.fi/ProductDetail/77-VJ0805Y104MXXAC), but to my understanding this one would do the trick: https://www.mouser.fi/ProductDetail/77-VJ0805Y104MXXAT.

I haven't clicked through all of the items at digikey if they would be available better/sooner there, prolly gotta try that next. But if anyone reads this, it would be great to know if the cap linked above is a workable replacement to the obsolete one.
 
but to my understanding this one would do the trick: https://www.mouser.fi/ProductDetail/77-VJ0805Y104MXXAT.
See, you're already kicking butt on this because finding replacement parts is generally hard but that one is right on the money. The only difference between that and the recommended one is that the recommended one came packaged in a tape made from paper and the one you've linked comes in a tape made of plastic. The components are the same.
 
See, you're already kicking butt on this because finding replacement parts is generally hard but that one is right on the money. The only difference between that and the recommended one is that the recommended one came packaged in a tape made from paper and the one you've linked comes in a tape made of plastic. The components are the same.

Many thanks for your kind words of encouragement Bryan, and thank you for confirming that part would work. Perhaps I'd better just now order all of it from Mouser and get it all when it gets here. :) I tend to get anxious, wanting to have a project done immediately once I come up with it. Considering I won't have my Kamander until next week, there isn't actually a huge hurry - maybe it's even better for me to get to know the grill "organically" while I wait a month for the parts to arrive before bolting on a digital control.

Having looked at all you have done on this project, I have to say it's pretty damn impressive, and a much appreciated effort you have done for the community. I can't even start to think what it takes to design a device like this - given that for someone like me it's challenging to implement it even with a clear and comprehensive set of instructions. Ofcourse I understand it's not your first venture into design of electric devices, but still, it's very impressive.
 
I really appreciate hearing that! Actually this was my first electronics project and it was the right mix of wanting to learn embedded programming (I was a big fat server and client application developer), learning how circuits work, and being too lazy to go up and down a flight of stairs to make a tiny vent adjustment to the egg. It really shows its age to me and I've started full rewrites of the main UI no less than 3 times now and got discouraged after a few days that it didn't have a better more polished look to it. There's a certain art to web design I'm just not that great at.

I'm very happy with the community that has grown around the project, sharing new ideas and enthusiasm that really keeps it interesting.
 
Wow, this is decades more amazing for a first electronics project. I don't think a project like this needs a super-fancy UI, although I do agree that it does add a nice touch. Wonder if there's no UI-guys in the community that could help? Myself I am unfortunately just a bizdev-guy, so all of my related talent is very hobbyist-level. Although I am proud of some of the things that I have been able to design and make with Tinkercad since I bought my first 3D-printer a year ago. The most elaborate 3D design project I did so far was a wind simulator design for my simracing rig, with frames, airflow straighteners, inlet funnels and mounts all designed by myself.

Anyway, I ordered all of the parts from mouser. In the end I ended up replacing multiple out-of-stock parts, after gaining confidence with your feedback. Mouser was able to send all parts yesterday except for two, and those are the IC1 from OKI, and the Ethernet socket. I did not find any replacements for those, so right now I am wondering if I could come up with anything else interesting to order from Digikey to get the total order up to 50€ as the delivery cost of 18€ is a bit much for components worth 6€... But waiting for mouser for those two will take until mid-June, and given how my first boston butt turned out without a controller, I would rather have it soon. :D
 
Last edited:
Not sure this is the right place to continue the discussion, but I don't want to spam the forum with topics, so I will just continue here as it follows to the previous message. So I actually received my order from Mouser today, and even the OSH order is shipped, so I imagine within couple of weeks I will have everything except the OKI IC that was out of stock at Mouser, as well as the Ethernet connector. Considering ordering those from digikey to speed things up, so I thought it's better for me to double check whether the other components I replaced are suitable, or if I should try and order the actual ones from digikey.

-I replaced this: https://www.mouser.fi/ProductDetail/604-WP710A10SGD with this: https://www.mouser.fi/ProductDetail...GAEpiMZZMtmwHDZQCdlqWhiJI8EJc7%2BNo9BWg2wx9I= (not too worried for this LED though)
-I replaced this: https://eu.mouser.com/ProductDetail/594-K104K15X7RF53L2 with this: https://www.mouser.fi/ProductDetail/594-K104K15X7RF53K2 (bit more worried about that one)
-I replaced this: https://www.mouser.fi/ProductDetail/763-0216K1Z-FL-YBW with this: https://www.mouser.fi/ProductDetail/763-0216K1Z-FSW-GBW (to me it seems most properties except color are similar, although this was not on the list of alternatives for LCD, I think)
-I replaced this: https://www.mouser.fi/ProductDetail/660-MF1-4DC1002F with this: https://www.mouser.fi/ProductDetail/660-MF1-4DCT52R1002F

And the parts that I am missing (Mouser won't ship them until mid-June) are:
The IC: https://www.mouser.fi/ProductDetail/580-OKI78SR51.5W36HC
And the Ethernet connector: https://www.mouser.fi/ProductDetail...GAEpiMZZMvQhAhQbXdbBuidMRPVpG5q%2bZ1tFY96Whg=

I thought it was quite curious that I couldn't find a replacement for the ethernet connector, as to me it would seem feasible for the hole locations for through-pcb-ones to be standard.
 
You probably could have created a new thread since this isn't a thread about replacement parts, it is a thread about people who will build HeaterMeters for others.

-- The LEDs are fine, same forward voltage and current rating in spec.
-- The 0.1uF capacitors should be fine, they just have leads with little bends in them so they'll sit up above the PCB a bit, can't think how this would be an issue
-- The LCD is fine, same pinout. I've used this one before but found the FSTN+ version to be slightly clearer (NHD-0216K1Z-FSW-FBW-L). Usually the FSTN version is more expensive but it looks way cheaper now for some reason, that's odd because I always have paid the 10-20 cents more for it.
-- The resistors are identical except one is cut from a reel instead of being just in a pile
 
Thanks Bryan once again. (y) I will refrain from spamming this topic with unrelated messages in the future.
 
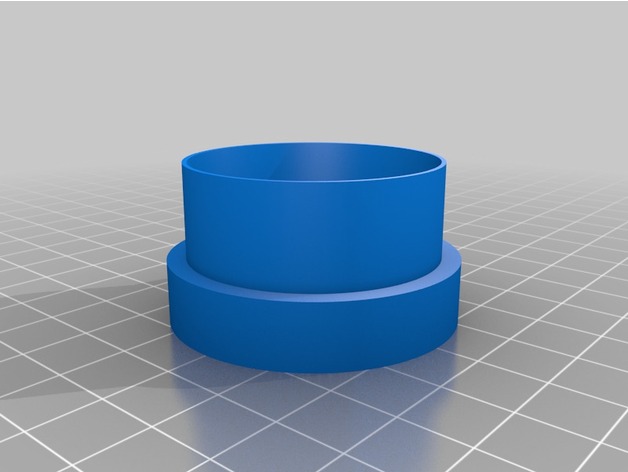
Hey guys - any chance I can get someone to 3D print a few of @WBegg’s BBQ Guru MicroDamper Adapters for me?
I have 3 MicroDampers in various states of assembly but only have BBQ Guru adapters on my smokers. I don’t have a 3D printer or I’d try myself. Otherwise, can anyone point me to a resource for 3D printing stuff like this? I’d consider buying my own printer but have no idea where to start. Any help / guidance is much appreciated!

@ChrisB in Miami , just those adapters? I could print them in PLA+ for you.
 
@ChrisB in Miami , just those adapters? I could print them in PLA+ for you.
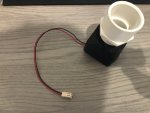
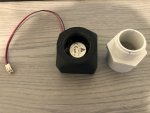
Hey @J Halvo - thanks! Yes just those adapters. @WBegg, I don't know what version the MicroDampers are - I got them from another forum user already printed. I do have a threaded PVC connector that came with a water heater drain pan, and the threads from that fit the MicroDamper threads (see pics). The other end of this PVC thing is too small to fit the BBQ Guru ceramic adapter though. @WBegg - do you think you adapter will fit these threads?

I was about to go down the path of using copper pipes as @Kiaikai B described here:

But a 3D printed one would be great instead. Assuming @WBegg 's design will fit, I'd love to get a few. @J Halvo - I'll follow up in PM.

Thanks!!
 

Attachments

  • IMG_8651.jpg
    IMG_8651.jpg
    110.4 KB · Views: 16
  • IMG_8650.jpg
    IMG_8650.jpg
    114.9 KB · Views: 15
Hello Everyone,

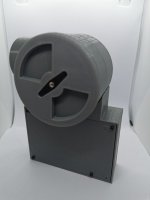
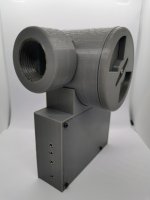
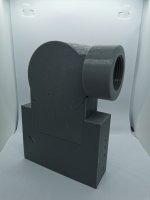
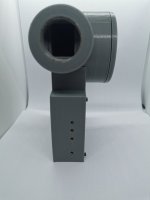
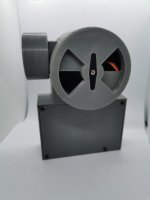
I recently designed an all in one headless and buttonless case which attaches to an existing Adapt-A-Damper. It uses the heatermeter base board with 4 thermistors and a pi Zero. No room for an LCD screen or buttons.
I have put the files on thingiverse: https://www.thingiverse.com/thing:4708654

can also print you the complete case for you and ship. Just send me a message and we can work out the details.

Current design is for 4 thermistors. I have not done one with a thermocouple yet.

See this thread for how to modify your wiring to make this work: https://tvwbb.com/threads/adapt-a-damper-and-hm-in-one.83063/
 

Attachments

  • IMG_20210102_125002.jpg
    IMG_20210102_125002.jpg
    46.4 KB · Views: 6
  • IMG_20210102_125010.jpg
    IMG_20210102_125010.jpg
    54.6 KB · Views: 6
  • IMG_20210102_125024.jpg
    IMG_20210102_125024.jpg
    42.1 KB · Views: 6
  • IMG_20210102_125031.jpg
    IMG_20210102_125031.jpg
    39.5 KB · Views: 5
  • IMG_20210102_125319.jpg
    IMG_20210102_125319.jpg
    48.6 KB · Views: 5


Back
Top