CHRIS R. Genesis 1000/1100 Redhead Restoration


Chris-Epyegghead

New member
Hello all,
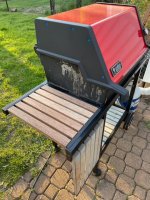
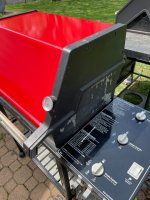
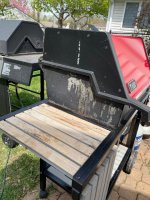
I'm joining the church of Genesis as a convert from lowly Dynaglo maddness. I've been ogling all these mid-90s restoration threads while looking out for a good candidate to give a face lift. A redhead Genesis ~97 1000/1100 popped and I was quick enough to pick it up Sunday.

Starting point:
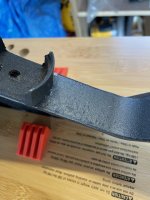
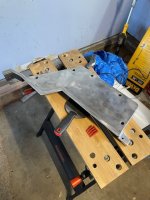
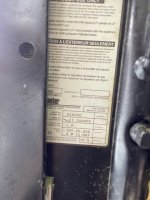
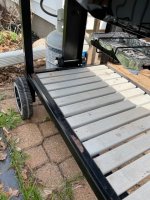
Minimal Rust on frame
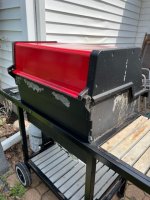
LOTS of carbonation on the interior
All burners work
Ignition switch works
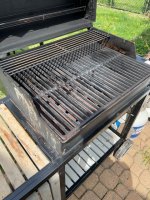
Cast Iron grates are in good shape
Flavorizer bars are in good shape.
Warming tray and warmer are very carbonized but salvageable.
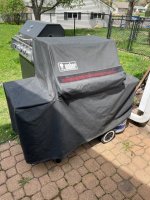
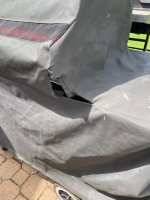
Came with cover though there is a hole in it.

This will be a keeper so I'll most likely focus on a general interior clean up (already started) and an exterior overhaul.

Check list:
Sand/prep/Repaint hood caps
Clean Hood
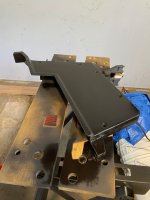
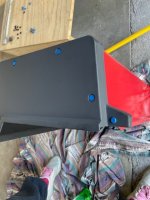
Sand/prep/Repaint firebox exterior
Deep Clean Interior
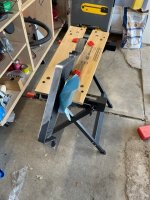
Deep clean frame and repaint the frame or at least touch up as needed?
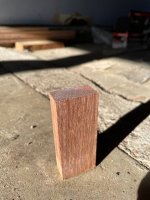
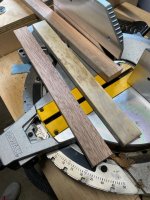
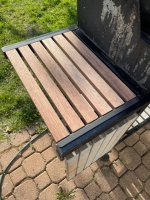
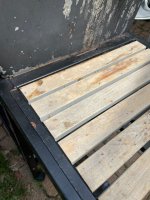
Refinish wood or replace with something decent (teak/ipe decking ect.) if i can find a good deal.
Repair cover - any advice on restitching/ fabic cover glue.
 

Attachments

  • IMG_4693.jpg
    IMG_4693.jpg
    52.5 KB · Views: 79
  • IMG_4699.jpg
    IMG_4699.jpg
    72.3 KB · Views: 75
  • IMG_4700.jpg
    IMG_4700.jpg
    105.9 KB · Views: 73
  • IMG_4701.jpg
    IMG_4701.jpg
    72.3 KB · Views: 72
  • IMG_4702.jpg
    IMG_4702.jpg
    89.2 KB · Views: 70
  • IMG_4703.jpg
    IMG_4703.jpg
    71.1 KB · Views: 76
  • IMG_4694.jpg
    IMG_4694.jpg
    90.2 KB · Views: 70
  • IMG_4695.jpg
    IMG_4695.jpg
    55.2 KB · Views: 78
  • IMG_4696.jpg
    IMG_4696.jpg
    100.5 KB · Views: 69
  • IMG_4697.jpg
    IMG_4697.jpg
    90.8 KB · Views: 72
  • IMG_4698.jpg
    IMG_4698.jpg
    74 KB · Views: 73
Last edited:
You got a great candidate to work with there. You will find a ton of great information on this forum to help you through your rehab on this grill. Keep up with documenting your progress through photos.

I bought some cedar dog earred fence slats from Menards when i redid mine. But you will need a table saw to rip them into the proper width slats. The cedar is naturally rot resistant which makes it a great choice for these grills. You can use some more decorative woods as well. I am sure you have seen pictures of some of these grills all completed.
I think pretty much that once a grill cover is torn, it is pretty much toast. But that is probably the original cover for that grill. Too bad.
 
I think pretty much that once a grill cover is torn, it is pretty much toast. But that is probably the original cover for that grill. Too bad.
After taking the cover on and off a couple times, I can tell why it ripped. They made them very form fitting which looks good but definitely makes the rip factor higher.

Also, I'll have to look into the cedar fence posts looks to be a pretty economical choice.

Thanks for the invite, we have a new born so I have very limited free time these days :) I'll holler if things change though!
 
Last edited:
Welcome, Chris and let me also extend a big welcome to you to join us for the TVWBB Upper Midwest. It should be a really fun Saturday with good people, good food and a good opportunity to learn and share!

You started out with a winner there! I am glad your cast iron grates look good, because I think they add to the charm of an old Weber. It is certainly true that REALLY GOOD stainless bars will cook about as well and require a lot less care, but to me there is still something special about cooking on cast iron. As Bruce said very well, there are a lot of resources here for you to get some good ideas before you dive in too deep. We have all made plenty of mistakes, but sharing here helps us all get better at this hobby.

That cover is pretty rare these days. I think as a "daily driver" it might ultimately prove to be a hassle, but you can't beat it for having a classic Weber original! For sure, if you give up on it, DON'T toss it! Instead, bring it to the TVWBB and see what you can trade it for:coolkettle:. I know this idiot in Indiana :sneaky: who will be there who would probably trade some good parts to add that to his "museum!"
 
Yep that looks like a winner, it's going to be a beauty when your done.
You wont be able to stop after this one believe me. I too was only going to do one keeper for myself. 11 or 12 later I'm not sure why I can't stop. This is your best resource for advice and they are glad to share their knowledge. Welcome to the addiction.
 
I have accumulated some supplies : HF angle grinder/4in cup brush, 0000 steel wool, steel brushes, 2000° matte black paint, other misc. cleaning
I was able to pick up some 2"x1"x1"@6' mahogany at menards for about $40 which didnt seems too bad and quite the upgrade from the gray painted wood that already there.

Slow start but there is a little progress: I removed the main left wood assembly, sanded the Z-brackets down to bare metal and repainted with 2000° matte black. I also was able to cut new slats and am testing a waterproofing finish to see how it looks.
 

Attachments

  • IMG_4744.jpg
    IMG_4744.jpg
    59.4 KB · Views: 39
  • IMG_4742.jpg
    IMG_4742.jpg
    84.5 KB · Views: 38
  • IMG_4741.jpg
    IMG_4741.jpg
    71.4 KB · Views: 39
Question for the masses: I started grinding off the paint on the endcaps and the smaller faces and edges were easy enough with the 4" cup brush. Do you guys salvage any of the main large face paint or strip it all off? I was thinking of scuffing it up and then painting over the main flat areas.

I'm also a bit hesitant to clean the thermometer, is it pretty hearty?
 

Attachments

  • IMG_4763.jpg
    IMG_4763.jpg
    71.4 KB · Views: 34
  • IMG_4762.jpg
    IMG_4762.jpg
    61.4 KB · Views: 33
  • IMG_4760.jpg
    IMG_4760.jpg
    83.9 KB · Views: 33
SAM: The angle grinder with wire brush will leave swirl marks, but they are superficial and won't show with a fresh coat of paint.

Chris: No, if you strip any of the paint on the end caps, you should strip it all. The factory finish is textured and if you paint over a partially stripped end cap, it will look horrible.
Thanks Bruce, I figured as much but thought I'd ask! I'll keep on, keepin' on :D
 
Chris,
That's a great candidate. You are beating me to the idea of getting mahogany at Menards. I have never seen mahogany at Home Depot or Lowes; Menards is new to me since I moved. I am pretty impressed with the hard woods they carry. I am very much looking forward to seeing how it turns out when you have your table done! :cool:
 
Progress:
Finished removing paint and painted one endcap. Seems doing 60grit on the large flat areas and coming back around with the wire brush is the way to go. I was also able to finish and assemble the first slat set.
 

Attachments

  • IMG_4767.jpg
    IMG_4767.jpg
    67.7 KB · Views: 53
  • IMG_4768.jpg
    IMG_4768.jpg
    47.1 KB · Views: 52
  • IMG_4772.jpg
    IMG_4772.jpg
    104.2 KB · Views: 52
Hey Chris,

Thanks for checking in on my yet to start rehab. Been following your work...looks great! Love your choice of mahogany. Weather resistant and beautiful. Wish I could find it near me.
 
Probably not everyone's cup'o'tea but I cleaned and de-greased the heads of all the endcapflat heads and sprayed them with 500° blue engine paint. Looks great for now but it might burn off. Only time will tell :D

Also looking for the best firebox removal vid/walk through. Thanks!
 

Attachments

  • IMG_4779.jpg
    IMG_4779.jpg
    48.6 KB · Views: 43
  • IMG_4782.jpg
    IMG_4782.jpg
    58 KB · Views: 44
  • IMG_4783.jpg
    IMG_4783.jpg
    102.5 KB · Views: 40
Last edited:


Back
Top