You are using an out of date browser. It may not display this or other websites correctly.
You should upgrade or use an alternative browser.
You should upgrade or use an alternative browser.
Summit 420 repair attempt
- Thread starter Eric-NH
- Start date
Fred Smith
TVWBB Super Fan
Very nice find hope it's in good quick fix shape. I hate watching paint dry or holding up the process.
Eric-NH
TVWBB All-Star
I was able to get some very cheap stainless yesterday. It's thinner than I'd like, but I think it may very well work fine as a patch, but not for a full replacement. Hoping to get things cleaned up and prepped on it so I can get it bent up and give it some testing!Very nice find hope it's in good quick fix shape. I hate watching paint dry or holding up the process.
Jon Tofte
TVWBB 1-Star Olympian
That's a great product to know aboutJust had another thought... POR15 makes a high heat (1200*) version. Could the rust be treated, then covered up with the patch plate? This should, in theory, keep any fumes out of the cooking space and, also in theory, stop the rust dead. Then the lower panel isn't needed to be completely replaced and the patch becomes more permanent rather than simply allowing a little more time before it eventually rots to the point of being structurally unsound. Thoughts? The patch might be seam sealed around the edges for high temp for grade rtv to further protect from possible off gas fumes
") . I had understood that the "high heat" version o fPOR 15 was still only good up to a few hundred degrees. If I had known about the 1200-degree product, I would have used it on my 1998 1st generation Summit, still covering with the stainless panels that I had made.
. I had understood that the "high heat" version o fPOR 15 was still only good up to a few hundred degrees. If I had known about the 1200-degree product, I would have used it on my 1998 1st generation Summit, still covering with the stainless panels that I had made.Eric-NH
TVWBB All-Star
The moment I have something bent up I'll be posting pictures and reporting, I promiseOne positive is that it will be easier to work with than thicker stainless. Keep us posted. Pictures!!!

Eric-NH
TVWBB All-Star
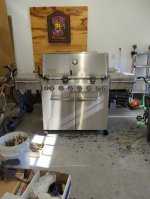
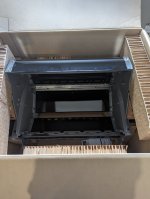
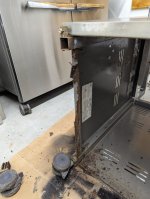
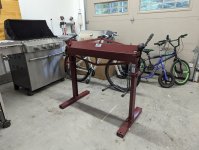
Well, this arrived yesterday. It's a thing of beauty. Hoping to start the disassembly process tonight so I can see about cleaning up and patching the rusted box. I'll use the new box as a template for the openings so it matches perfect, no guesswork in
Attachments
Eric-NH
TVWBB All-Star
I just got a confirmation email, they are shipping a replacement cookbox for this one as well! Now I can begin some worry free prepping of the original cookbox on both of them knowing that I'll have new ones in case anything goes wrong. I know others have had issues, but man I've had fantastic luck with the warranty process on theseVery nice find hope it's in good quick fix shape. I hate watching paint dry or holding up the process.
From what I've read here about these Summits, your luck is beyond fantastic - it is Powerball ticket buying worthy good. Looking forward to watching these builds progress. Way more grill than I'll ever need, but great to see people that know how to do stuff - do it.I just got a confirmation email, they are shipping a replacement cookbox for this one as well! Now I can begin some worry free prepping of the original cookbox on both of them knowing that I'll have new ones in case anything goes wrong. I know others have had issues, but man I've had fantastic luck with the warranty process on these
Eric-NH
TVWBB All-Star
The first time around was super easy, they just said yes. The second time the guy replied that it was covered. Then another email saying that after looking at the details of the warranty it wasn't covered. I he invited a picture of the new, shorter warranty. I went to the online manual for my model year, took a screenshot of the 25 year warranty and asked if this was enough to show that this one was old enough to still have the longer warranty. Next email was him saying I was approved. I think people should take a picture of their owners manual, or screenshot the digital version that is right on the Weber site and include it in the pictures you send. Worth a shot, seemed to work for me! My original inquiry was trying to find if the part was available and what the cost was, to try and gauge the feasibility of making replacements. I was over the moon when they said it was warrantied!From what I've read here about these Summits, your luck is beyond fantastic - it is Powerball ticket buying worthy good. Looking forward to watching these builds progress. Way more grill than I'll ever need, but great to see people that know how to do stuff - do it.
Eric-NH
TVWBB All-Star
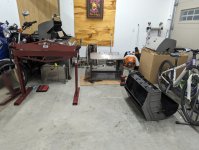
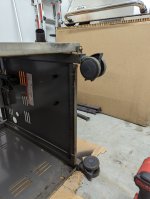
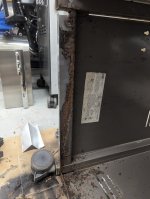
Made a little progress tonight. Mostly just disassembly and started some rust removal. Coming up with a plan for a custom floor pan replacement. Picked up the metal brake tonight as well, trying to get a feel for that. Seems to work well, looking forward to making up some pieces!
Attachments
Eric-NH
TVWBB All-Star
Thanks! Feeling good about it as my father in law has done a good deal of fabrication before. I might end up making it usable for now and really going a lot deeper over the winter as my work is mostly plowing snow at that point. I have far more free time then and it's not really grilling weather here in NH at that point. I'm anxious to try this grill out!Wishing you success.
Eric-NH
TVWBB All-Star
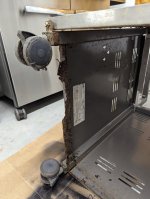
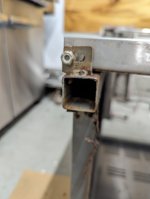
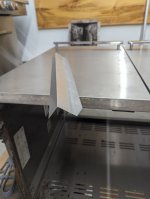
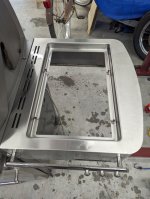
Well, I'm an early riser and my add makes me focus hard on something when it interests me, soooo... I thought of this last night and just bent it up this morning. I'll trim off the rusted portion, hit it with rust converter, and then probably use steel rivets to hold it in place. I'll repair the floor in a similar manner for now, but I've got a really neat idea for a total for replacement that I'll be working on.
Attachments
Last edited:
Eric-NH
TVWBB All-Star
Shoot. Maybe I'll find one that's close and it won't be noticable with the way those hoods mountI do not know of a High Heat gray to match the original color of those end caps.
Eric-NH
TVWBB All-Star
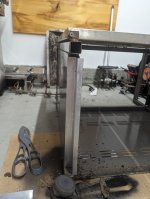
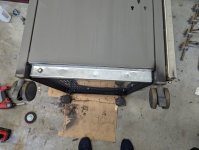
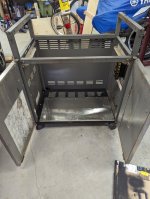
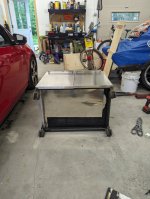
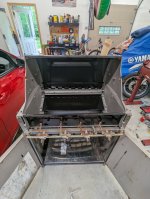
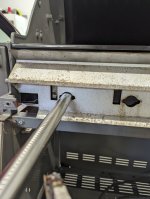
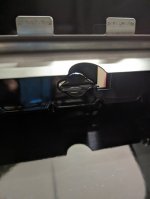
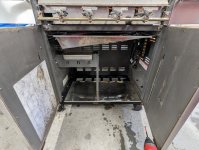
Made some more progress this afternoon. Decided to just get the grill usable and concentrate on a full restoration this winter. Made the bottom panel solid, but plan a completely custom panel this winter using different sheet metal and some welded supports. I'll sandblast the entire frame etc and repaint so it's all consistent. Overall, it's a fantastic grill in usable shape for the time being. Only thing that was as bit of a hangup is the new burners from Weber simply don't fit. Anyway have an email into Weber asking for help. The new burners seem to be just simply too large. Anyone else have this issue before? By getting this into usable shape and out of the garage will leave more space (which is at a premium) available to year down the 650 **** and go through that. More to follow on that build!
Attachments
-
 PXL_20230818_173526255.jpg101.2 KB · Views: 17
 -
 PXL_20230818_174937331.jpg164.1 KB · Views: 16
 -
 PXL_20230818_175017245.jpg160.4 KB · Views: 16
 -
 PXL_20230818_180356036.jpg156.4 KB · Views: 17
 -
 PXL_20230818_180358870.jpg169 KB · Views: 16
 -
 PXL_20230818_184355929.jpg131.3 KB · Views: 17
 -
 PXL_20230818_184406879.jpg56.9 KB · Views: 16
 -
 PXL_20230818_194410832.jpg148.6 KB · Views: 17
 -
 PXL_20230818_195726418.jpg156.2 KB · Views: 18