Smoke Shack


I did notice that I put all the latches going one direction, why does the orientation matter?

The roof is what holds the whole thing together. The opposing latches create structural stability. It's really all about torque. Think of it this way. Pull on one side (left or right) of the enclosure(basically what's happening when you open the door). In your configuration, if there is any play in the latches, both latches will relase upward. In my configuration, the opposing latch will not allow that to happen. The same concept applies front to back. If you change your roof latches to match my configuration, it will make the whole thing much more stable and it won't go out of square when the door is open.
 
Thanks Greg!

the vertical latches between the roof and side-walls have no play - they're pretty snug. The latches between the back wall and side walls however are a little loose.
 
Hey Greg,
sorry about the slow reply on the measurements you wanted - here they are

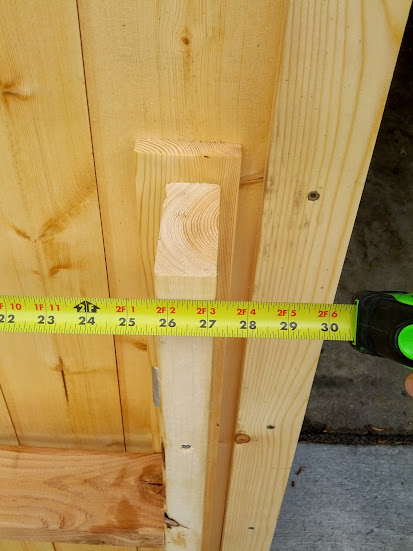
This is the distance between the edge of the roof and one of the roof joists
IMG_20130518_162509.jpg


This is the distance between the two roof joists
IMG_20130518_162533.jpg
 
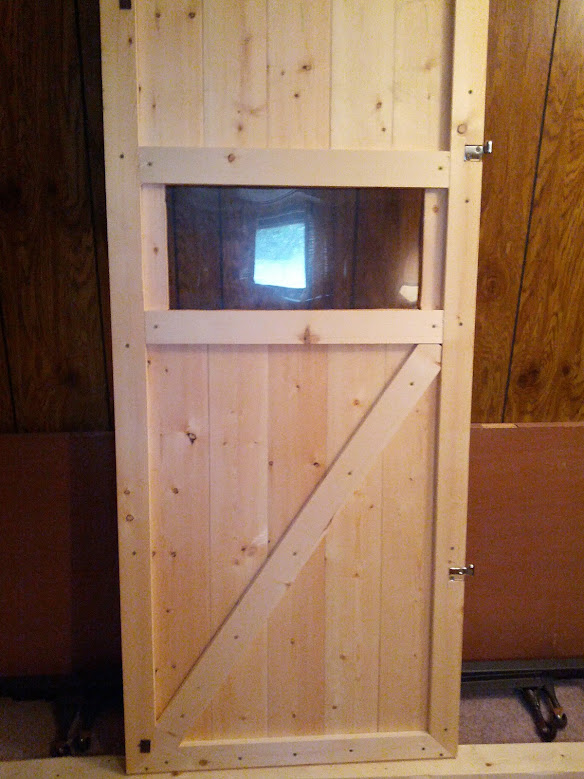
Just a little FYI.. If you need to add diagonal support to keep a built up door from sagging, your brace should always run at an angle that uses the lowest butt.
IMG_20130511_153535.jpg

In this scenario you are relaying on the top butt screws to support that weight.
If you reversed the diagonal the weight would be transfer d toward the base, which seems solid..

Tim
 
I can see on the PDF file where Matt got a little off.
Front and rear panels are 2' 6"
But the roof plan shows the spreaders (Or Joists) @ 2' 2 1/2 "

Tim
 
I can see on the PDF file where Matt got a little off.
Front and rear panels are 2' 6"
But the roof plan shows the spreaders (Or Joists) @ 2' 2 1/2 "

Tim

I agree. Based on pure measurements the spreaders should be 2' 3". 2' 6" minus 1 1/2" per side (left and right). The plans are "for the most" part "as built". I can see where there could be some slight variation.

Nice catch Tim!
 
Yep. I can agree where there can be some slight variation. Dimensional lumber is always a actual size on all thicknesses, but can vary on widths when you go above a 1x or 2x 6"
Layout is the key when going " out to out or out to in "
The thickness of a pencil and how well it's sharpened can add to that and also if you cover the layout line or leave it.
I hope you both don't think I'm criticizing you're most excellent work..
I do this for a living and when I notice something that doesn't jive I like to point it out.:)
Tim

No offense taken Tim. I actaully appreciate someone with your background looking at it in such detail.

As I stated in the plans ... "I am an Electrical Engineer by trade. I am neither a Mechanical Engineer nor a Carpenter."

To be honest, I was happy to see someone actually reproduced my results from the plans only and without any help from me.

To be honest, I'm not sure that the back wall is exactly 2' 6" on my build. It's probably close though. In order to create a "clean face" on the edges, I needed to remove the "tongue" on one side and the "groove" on the other.

You're right, an 1/8" here and an 1/8" there can add up. "Theoretical" is almost always different than "actual". I originally drafted the plans before the build, to make sure it would "theoretically" work and no doubt changes were made along the way. The plans I posted were as close to "as built" as I could get.

I think the important thing here is the final results. Bottom line ... Matts "shack" looks awesome! Great job Matt!
 
To be honest, I was happy to see someone actually reproduced my results from the plans only and without any help from me.

I think the important thing here is the final results. Bottom line ... Matts "shack" looks awesome! Great job Matt!

Totally agree! And I got you're PM.:)

Tim
 
WSM Smoke Shack

Hi Matt & Greg,

I have been looking at both your designs and I am wanting to build a similar model to house my 22" WSM. I live in Scotland so to actually get any use out of it I think I need a wee storage/smoke shack.

I did like the design that Bren had especially since he's just across the water with similar weather. But I like the idea of lifting the lid up and keeping dry whilst tending to food etc.

I was wondering why you guys used roof flashing on the base? Is it to deflect heat? and is it fully necessary? if so could I get away with using Flash band tape?
And also Would it be beneficial for me to put some foil insulation around the inside of the shack to help keep the heat in.

Any help and guidance would be appreciated as I have only so far managed one smoke due to the weather.:mad:

Many thanks

Del
 
Del,

The only reason I used flashing on the base was due to the fact that a wooden structure and charcoal are not a good mix. I was concerned about hot coals landing on the base and setting the whole thing on fire. It wouldn't take long for all that hard work to go up in flames. You can take your chances if you wish, but I would highly recommend making the base as fire resistant as possible.

As far as foil insulation on the inside. It is not necessary. The main purpose of the "Smoke Shack" is to act as a wind screen. The WSM will have no problems on it's own maintaining it's temperature when it's out of the wind, even on the coldest of days.

Please post pictures of you build. I would love to see them!

Greg

Hi Matt & Greg,

I have been looking at both your designs and I am wanting to build a similar model to house my 22" WSM. I live in Scotland so to actually get any use out of it I think I need a wee storage/smoke shack.

I did like the design that Bren had especially since he's just across the water with similar weather. But I like the idea of lifting the lid up and keeping dry whilst tending to food etc.

I was wondering why you guys used roof flashing on the base? Is it to deflect heat? and is it fully necessary? if so could I get away with using Flash band tape?
And also Would it be beneficial for me to put some foil insulation around the inside of the shack to help keep the heat in.

Any help and guidance would be appreciated as I have only so far managed one smoke due to the weather.:mad:

Many thanks

Del
 
Hi Greg, Thanks for replying, sorry for my late reply. I finished my shack a few weeks ago. I'll link some pics from its build and a smoke in a couple days.

At the moment I am cheating without a base. I have it sitting on concrete slabs but I am planning on putting a wooden floor down with some metal I am salvaging from the side of a washing machine.

I am doing a smoke on Thursday for about 30-40 people. Making pulled pork and possibly going to throw in some chicken wings on the bottom rack. Ill take pics and upload after. I also just got some new woods Currently using apple but I have picked up cherry, hickory and whisky oak. Think I'm going to use a cherry/apple mix on Thursday.

Many thanks

Del


Back
Top