RalphTrimble
TVWBB Diamond Member
I like the idea to cut a slot for the servo in the PVC tube, nice job!Got v2 of my servo damper complete tonight.
Won't really be able to test it till Saturday or Sunday.

I like the idea to cut a slot for the servo in the PVC tube, nice job!Got v2 of my servo damper complete tonight.
Won't really be able to test it till Saturday or Sunday.
Hey that's the exact seller I bought my metal geared servos from. One of the four I believe was DOA but no biggie, I have 3 backups.


I think with the metal plate and gasket material between the vent and the servo parts you should be fine as long as you stick to low and slow cooking... Well done!
I like the direct drive idea, been throwing around the idea of direct drive myself, not sure yet which method I prefer. While direct drive has a clean look and would be impossible for something to interfere with the moving link, I actually like seeing the link, it tells me what the damper position is at a glance and I like watching the HM work the damper.... Makes for good conversation around the smoker... So I am on the fence as to go for the clean direct drive look or stick with the link as I have it....
At any rate, congrats on the good ideas and nice execution....

Very nice! I like the position indicator as well.... Would be nice to print that indicator part with a different color plastic...
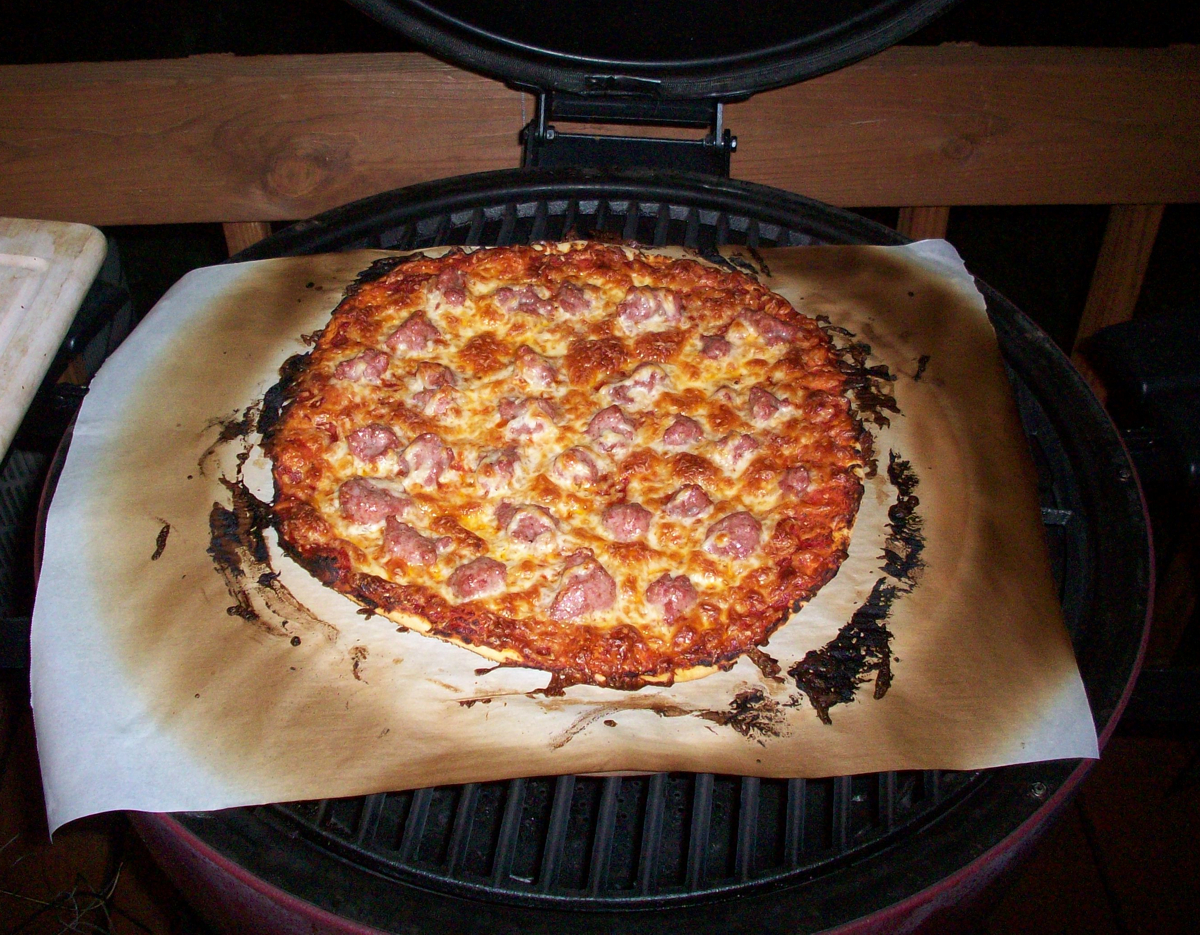
I cook pizza's between 600-700 degrees, I tend to shoot for mid 600's cause the high heat maverick probes are only good up to 716... I've already melted two of them, so I've had the FauxMado well above that... Judging from how fast the pizza's cooked that night I would say it was around 800.
BTW, I just noticed it looks like you are running a "FauxMado" grill too... AKA Char-Griller Akorn Kamado Kooker... You should get yourself a pizza stone.....
I had to use parchment paper on the stone at the time I shot the picture cause i didnt have a pizza peel yet... It worked really well actually, pizza comes out just like when I cook directly on the stone....
") I've just been too busy on my meat chamber curing project. I need to smoke some ribs this weekend so I'll have to setup my servo and give it a shot.
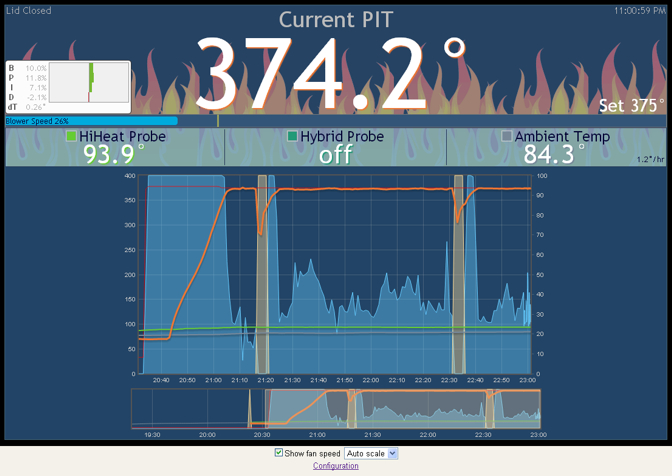
I've just been too busy on my meat chamber curing project. I need to smoke some ribs this weekend so I'll have to setup my servo and give it a shot.I did some chicken on my FauxMado this evening at 375 with the servo damper + fan, fan set to run at max only. Here is the graph.
It's roughly a two hour period from where the pit first hit temp to the end of the graph....
if you look closely you can see an arrow. This tells you where the damper is

Maybe we could make the the servo control the OEM egg air intake vent? That would give you the full air intake range and the fine control. I'm thinking make a mount that attaches to the two screws on the right so we count mount the servo to a bracket and then push/pull the original intake.
I'm also working on a direct drive servo + blower system.
The fan mount is a removable piece, both for ease of printing and for flexibility in use. Overall assembled height would be 60mm, same as the blower. I figure the larger damper chamber would reduce the airflow restriction, and I might experiment with using a venturi to draw in secondary airflow to increase the effective input area because I've found that 1140mm^2 (1.5" PVC pipe) is too small for much more than 250F without a blower. This 20x25mm input (500mm^2) might struggle to keep 225F if it could at all.
I like this concept, but couldn't you get a one piece design if you went with something like this...
Do you have a source for the direct drive servo damper and/or instructions on how you created this whole set-up?
that's awesome jbond, thanks so much. I think everyone should use this service with us getting so much into 3d printing.
