Replacing Burner Tubes in a 2008 Genesis E-310 LP (No Side Burner)


Greg Part

TVWBB Fan
Hello All,

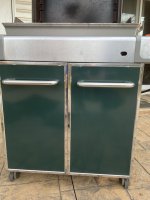
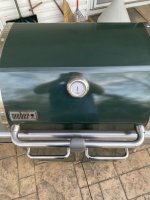
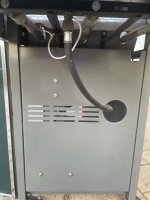
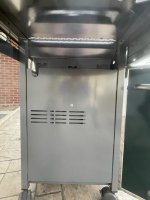
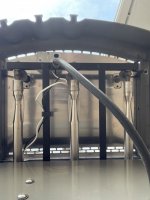
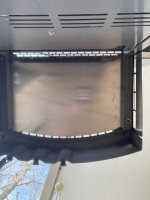
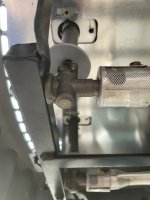
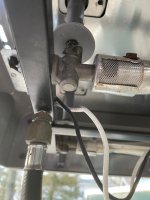
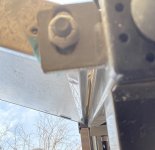
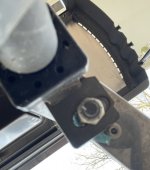
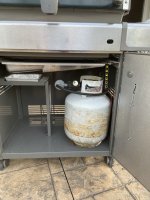
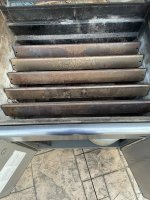
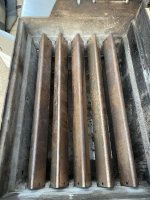
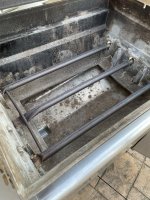
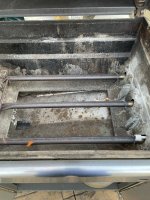
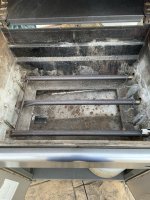
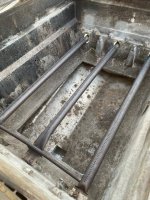
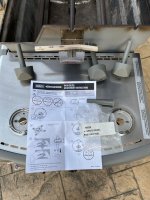
I'm going to replace the original burner tubes on my 2008 Genesis E-310 this week as the flame appeared quite "orange-ey" when doing my seasonal check a couple of weeks ago. I purchased this Genesis new in 2008 (it IS a 2008 model - verified through SN info provided here on tvwbb as well as Weber). I purchased new burner tubes 2 weeks ago (3 tubes and the cross-over tube) from grillparts.com (part # 67820). As I'm not much of a DIYer, I thought I'd ask if there is anything I need to be particularly aware of that is either hard, tricky or requires a lot of attention during disassembly / assembly? I did check the screws / bolts inside the fire box that the burner tubes slide under (opposite of the manifold) and they're NOT frozen in place. I do have the original owner manual which includes instructions for inspecting / cleaning and testing the burners (and maybe replacing?).

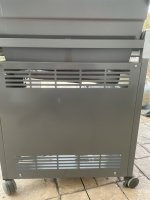
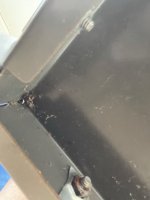
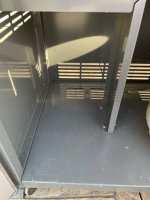
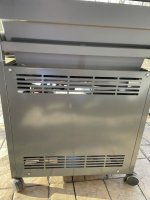
Everything on the grill is original except for "Grill Grates" brand grates (5 years ago - I still have the original cast iron grates), Weber starter module (2 years ago - forgot to take the battery out, it leaked and froze in the plastic battery holder which broke when attempting removal of the battery), a cotter pin (rusted & broke) for a lid hinge-pin and new Weber SS flavorizer bars. I've always kept it out of the elements under an eave on the patio during Spring, Summer and early Fall and covered during late Fall and Winter with its cover under the eave or in the patio storage. I really do take great pride in owning this grill and try to take really good care of it. BTW, I followed tvwbb guide for cleaning and lubricating the gas valves last year and it worked GREAT (although I will need to re-center the valve stems with the plastic tool that was included with the grill).

Any advice, guidance or help with my planned burner tube would sure be appreciated.

Thanks in advance.

G
 
Greg:

I'm sure others will chime in, but your burner tubes may just need a good cleaning unless you've got burned out areas on your burners. You DO NOT need to mess with the screws on the left side of the firebox. The biggest issue you may or may not face is unbolting the manifold from the firebox on the right side. Since you've already done the valve lube, you know about removing the stainless cover over the manifold. Also, your manifold should have wings that sit in the frame rails. Once you've got the manifold loose, just pull it back so you can remove the burner tubes if you decide to replace them. If you just want to try cleaning your current burners, you can do that in place with a wire brush or screwdriver.
 
Yeah second that. LEAVE THE SCREWS ALONE. Even if you took them off you still cannot get the burners out without removing the manifold anyway.
 
Greg:

I'm sure others will chime in, but your burner tubes may just need a good cleaning unless you've got burned out areas on your burners. You DO NOT need to mess with the screws on the left side of the firebox. The biggest issue you may or may not face is unbolting the manifold from the firebox on the right side. Since you've already done the valve lube, you know about removing the stainless cover over the manifold. Also, your manifold should have wings that sit in the frame rails. Once you've got the manifold loose, just pull it back so you can remove the burner tubes if you decide to replace them. If you just want to try cleaning your current burners, you can do that in place with a wire brush or screwdriver.
Yeah second that. LEAVE THE SCREWS ALONE. Even if you took them off you still cannot get the burners out without removing the manifold anyway.

Thank you both for replying. I’ll go ahead and brush the existing burners to see if that’ll help, as I hadn’t done that, yet. I just figured after 13 years of use (this April), it might‘ve been time to change the burners, in particular, since the grill seemed to take15 to 20 minutes to reach 500 F this past year, which was noticeably longer than the accustomed-to 10 minutes in previous years (I usually brush them every year).

Regarding the screws opposite the manifold, as they look rusty, should I spray some WD40 on them or brush them with a little oil to (hopefully) prevent them from becoming “seized”?
 
Last edited:
Just leave them alone. There is no need to do anything as they never have to be removed nor should they ever be removed. It was just cheaper for Weber to put 2 screws there as place holders than make the casting with it
 
Hey Greg something to keep in mind sometimes the burners that came with the grills were better quality then the current replacements. Specially on the older grills. I always like to check them with a magnet. If they lasted you 13 years I’m betting a magnet won’t stick.

I made the mistake once changed them out cause they were “old” and then the replacement actually rusted through quicker.

The Florida weather isn’t good on these grills and since we never put them away and use them year round they get abused.
Hi Leandro,

Thanks for the heads-up. I’m going to brush the burners today and see if that helps, as well as complete the rest of my annual pre-season checks and re-center the bezels . I’ve got to say, though, this model Genesis is built like a tank! I love this grill!
 
As long as you can keep the rust at bay in the cabinet bottom and caster tubes, you are absolutely correct. Plus this is the last generation of E-W burners (sidewinders) that you can use a rotisserie effectively on. Happy grilling!
 
As long as you can keep the rust at bay in the cabinet bottom and caster tubes, you are absolutely correct. Plus this is the last generation of E-W burners (sidewinders) that you can use a rotisserie effectively on. Happy grilling!
Just checked for rust yesterday evening and happy to say there doesn’t appear much, if any. I’ll take a few pics this weekend and post them in the thread.
 
Last edited:
Hey Greg something to keep in mind sometimes the burners that came with the grills were better quality then the current replacements. Specially on the older grills. I always like to check them with a magnet. If they lasted you 13 years I’m betting a magnet won’t stick.

I made the mistake once changed them out cause they were “old” and then the replacement actually rusted through quicker.

The Florida weather isn’t good on these grills and since we never put them away and use them year round they get abused.
Hey Leandro,

Good to hear from you; I hope things are well in South Florida! I am learning to adjust to seasons and am excited to see Spring beginning to happen. After tax season I hope to get going on putting together a bunch of these grill parts I dragged up here :coolkettle: .

I agree with you that if you have useable EARLY Weber burner tubes that are 304/non-magnetic, they are absolutely worth saving. They are getting hard to find. The ones Weber makes now, as far as I know, are NOT 304. I am not sure there ever were 304 stainless burners for the 300 series grills: sidewinder or front to back. So, pretty much you get to pick from various 430 options. Some feel the Weber burners are still better, others see no difference. I think you have to look at the "knock-off" brands on a case by case basis and then make your best decision.
 
Thanks Jon. I’ve saved these to my Amazon Weber wish list. My current burners are original to my Genesis. Just got done cleaning the grill, pics below.
 

Attachments

  • BF870757-652A-42BD-AE88-8307E606973B.jpeg
    BF870757-652A-42BD-AE88-8307E606973B.jpeg
    108.4 KB · Views: 27
  • EBE81D3C-082C-4978-A11A-315CAEF4E7EE.jpeg
    EBE81D3C-082C-4978-A11A-315CAEF4E7EE.jpeg
    137.3 KB · Views: 21
  • 097D6B50-6677-47E3-B7AB-58E88CD71944.jpeg
    097D6B50-6677-47E3-B7AB-58E88CD71944.jpeg
    86.8 KB · Views: 21
  • 0CA0DC90-C5CD-4583-A315-214BF47BDA24.jpeg
    0CA0DC90-C5CD-4583-A315-214BF47BDA24.jpeg
    115.1 KB · Views: 26
  • 4746D5E9-CB38-4CC5-B432-B2D515E1433D.jpeg
    4746D5E9-CB38-4CC5-B432-B2D515E1433D.jpeg
    105.1 KB · Views: 26
  • F835E519-7E53-4430-9CD8-AC9DCF87B8A2.jpeg
    F835E519-7E53-4430-9CD8-AC9DCF87B8A2.jpeg
    119.7 KB · Views: 25
  • 4A51B2C5-42E5-49DE-BF27-D4E0A3C57E6D.jpeg
    4A51B2C5-42E5-49DE-BF27-D4E0A3C57E6D.jpeg
    93.4 KB · Views: 23
  • 15A42A18-B79A-4F47-B1BA-A22FA4C66080.jpeg
    15A42A18-B79A-4F47-B1BA-A22FA4C66080.jpeg
    89.7 KB · Views: 22
  • 8E4FC702-EE41-4E8B-80B1-79AE4AED0B8C.jpeg
    8E4FC702-EE41-4E8B-80B1-79AE4AED0B8C.jpeg
    64.1 KB · Views: 22
  • C8B25F2C-0989-49E4-8525-2CDAAA6C954D.jpeg
    C8B25F2C-0989-49E4-8525-2CDAAA6C954D.jpeg
    87.9 KB · Views: 22
  • A988457F-06F4-4021-895F-1E1973059136.jpeg
    A988457F-06F4-4021-895F-1E1973059136.jpeg
    103.8 KB · Views: 22
  • 1D50785C-8C84-4CEB-9C28-472B66D2937D.jpeg
    1D50785C-8C84-4CEB-9C28-472B66D2937D.jpeg
    85.4 KB · Views: 19
  • 5E5B49B2-741B-4431-9F29-A2D97753828C.jpeg
    5E5B49B2-741B-4431-9F29-A2D97753828C.jpeg
    74.8 KB · Views: 19
  • F5389BA6-A044-4ECB-8583-9CB79F2A8DA9.jpeg
    F5389BA6-A044-4ECB-8583-9CB79F2A8DA9.jpeg
    145.6 KB · Views: 16
  • 4F00B2F8-AE6B-4BB3-9D27-F976DFB6C81F.jpeg
    4F00B2F8-AE6B-4BB3-9D27-F976DFB6C81F.jpeg
    112.7 KB · Views: 16
  • EB5CBFAB-2396-456B-A347-98FBC98FDEA7.jpeg
    EB5CBFAB-2396-456B-A347-98FBC98FDEA7.jpeg
    99 KB · Views: 16
  • 86DC8689-9673-4C1C-B379-286AE2E22A24.jpeg
    86DC8689-9673-4C1C-B379-286AE2E22A24.jpeg
    106 KB · Views: 17
  • 46984D2D-92D9-45FC-97DB-7DFBCE8D5D9B.jpeg
    46984D2D-92D9-45FC-97DB-7DFBCE8D5D9B.jpeg
    150.4 KB · Views: 22
Last edited:
More pics. All 3 burner tubes are lit in the 4 pics below.

Link to short video of flame pattern. Sorry for the (seemingly) poor video quality. No idea why it’s so bright. Shows this way on Dropbox and Amazon but shows perfectly on my iPad and desktop computer.
 

Attachments

  • 835C6ACF-20DA-454D-9E5B-0136B0F98418.jpeg
    835C6ACF-20DA-454D-9E5B-0136B0F98418.jpeg
    219.5 KB · Views: 23
  • 70D36FC2-F56C-42AD-954F-1D5916FAC25A.jpeg
    70D36FC2-F56C-42AD-954F-1D5916FAC25A.jpeg
    201.3 KB · Views: 26
  • C3AC673E-AD37-44F0-A012-ACBBF3462D72.jpeg
    C3AC673E-AD37-44F0-A012-ACBBF3462D72.jpeg
    215.1 KB · Views: 28
  • 3AED8512-5B99-49F2-B90B-EB67D75CC9FC.jpeg
    3AED8512-5B99-49F2-B90B-EB67D75CC9FC.jpeg
    225.3 KB · Views: 27
  • 6A6B9F9E-5C64-4B8B-BB9F-AB8AE60B57D0.jpeg
    6A6B9F9E-5C64-4B8B-BB9F-AB8AE60B57D0.jpeg
    222.1 KB · Views: 26
  • 2C76EA00-745B-48D1-A825-F895AABF1B87.jpeg
    2C76EA00-745B-48D1-A825-F895AABF1B87.jpeg
    224.2 KB · Views: 25
  • BAE61D65-AC60-4485-94F3-C4955E135165.jpeg
    BAE61D65-AC60-4485-94F3-C4955E135165.jpeg
    65.9 KB · Views: 28
  • 62B3F324-CC69-4969-936D-9111EB0C1815.jpeg
    62B3F324-CC69-4969-936D-9111EB0C1815.jpeg
    160.6 KB · Views: 22
  • 26460592-CE36-4CD1-98B2-51B9F6C661AB.jpeg
    26460592-CE36-4CD1-98B2-51B9F6C661AB.jpeg
    116.1 KB · Views: 20
Last edited:
Yep, it will take video. I upload to hosting site and post the link and it usually automatically embeds the video.

I take it that is going to be a keeper grill. The rehab isn't done until you drop the 1.5 lb ribeye on it.
 
Yep, it will take video. I upload to hosting site and post the link and it usually automatically embeds the video.

I take it that is going to be a keeper grill. The rehab isn't done until you drop the 1.5 lb ribeye on it.
I’ve definitely treated it like a keeper. I bought it new in April 2008. I’ve either always kept it covered in the enclosed patio storage or covered under the eave late Fall through early Spring. There hasn’t been anything to rehab, thus far, but, as mentioned, I’m not sure about the burners. Last season I noticed it was taking about 15 to 20 minutes to get up to 500 F. I’m going to cook up a couple of things over the next few weeks and see what happens.
 
Last edited:
Oh, OK , I assumed you got it used. You have taken very good care of that grill. I expect you will get another 15 years of great service out of it now. The burners actually look pretty good to me, but it is hard to tell in broad daylight.
 
I am sure those will work perfectly being OEM Weber, but I doubt they are 304 stainless, just 430 like all the off-brand ones. Next time around you might want to look at something like this:

https://www.amazon.com/dp/B07MGFN7S5/?tag=tvwb-20
Thank you for your suggestion of these burner tubes. I ordered a set, just installed them, and they worked well! Like a new grill again. I have the same green Genesis pictured above, vintage 2007-08. A wonderful set up! Hope it will last another decade!


Back
Top