Lowering the charcoal grate for smoking in a 26er


Joel H in Brat City

TVWBB Member
Ever since I saw the Master Touch Premium with the charcoal ring and diffuser I've wanted to figure out a way to adapt something similar to my 26er - as I was searching for diffuser options I came across the Hunsaker Vortex charcoal basket for the WSM, but at 12" tall it just wasn't going to work for the space available in a 26er. But that did lead me to another thought - there seems to be a lot of dead space under the charcoal grate on a 26.

I grabbed the 17" charcoal grate from a 22 and dropped it into the bottom of my 26 and it sits just above the one touch blades - it also sits a little over 3" lower than the standard 22" charcoal grate. So I grabbed some grates from a 22 and some expanded metal and went to work. What I have come up with I will call the SCG "Submarine Charcoal Grate".

I removed the grates from an old standard 22" cooking grate
PXL_20210311_025238320.jpg

Traced out some 13 gauge 1/2" expanded metal
PXL_20210311_025256635.jpg

Welded it to the 22" ring
PXL_20210311_033742380.jpg

I then removed the center grates from an old 17" charcoal grate, welded the section I cut out of the 22" ring and made a "basket" out of another piece of expanded steel
PXL_20210311_060039242.jpg

It came out just as I was hoping
PXL_20210311_060056538.jpg

I did purchase the Vortex plate from Hunsaker, it's the plate for the 22" WSM - 18" in diamter
PXL_20210311_061056628.jpg

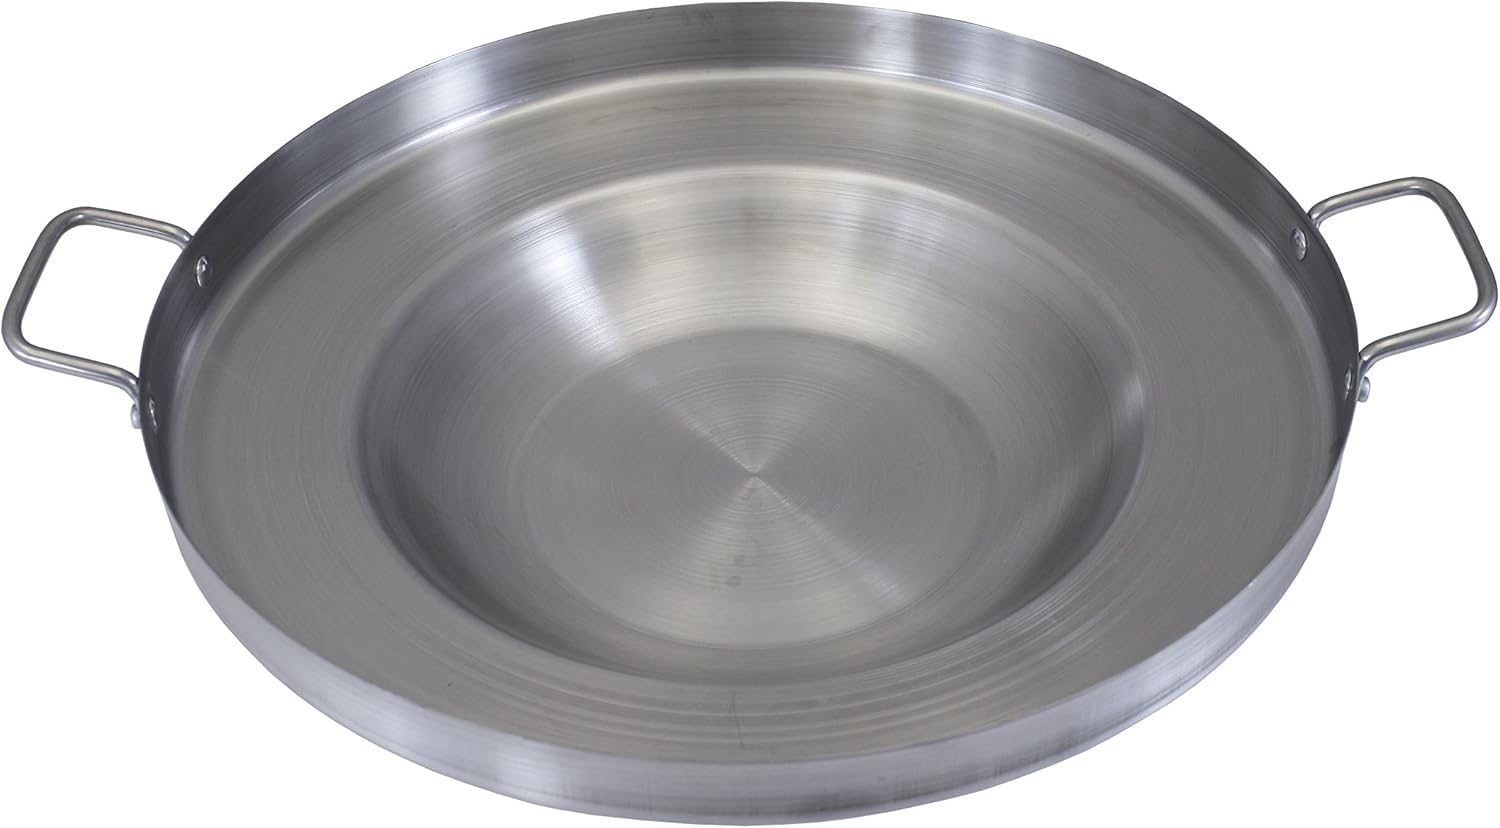
I also picked up a 22" comal from Amazon as a more traditional diffuser, I like how it's tapered to help the smoke/heat rise. I'll have to make some kind of standoff to raise it up from the basket, and modify the handles so it fits.
71t4U3L37dL._AC_SL1500_.jpg
 
That's great engineering, but you might find yourself manually cleaning out the ashes more for long smokes (as there's less space for accumulation and airflow will be more restricted).
 
My thought is that if you can lower the fire/charcoal grate, there is going to be more room between the diffuser and the meat allowing for smoke to encircle more of the meat (as opposed to the meat being directly over the diffuser). The vortex plate is more of a mix between direct/indirect cooking where the meat juice will drip onto the plate and vaporize giving the meat more of a grilled flavor.

I may end up having to sweep more often but I don't think there is much less room than on a traditional 22" kettle.

For mounting the comal I added a couple of stand-offs
PXL_20210311_233658329.jpg

I removed the handles on the comal and set it in place

PXL_20210311_233718883.jpg

I think with a little tweaking this is going to be a really good diffuser, the whole thing is tapered - but the top edge is almost 2" tall, I think I will trim it down to about 1/2" to give me more mounting options.
 
Very cool idea. I just made a small charcoal basket using expanded metal from Lowe's, looks just like the stuff you used. Just make sure you are not using the galvanized stuff, that's not safe around food.

I haven't had an issue with ashes falling through the charcoal grate using that material, but I haven't tried a long cook with it.

Keep us updated with how it works for you
 
Joel,
I am not sure if you have seen this post or not, but I wanted to add it here. I think everything you are doing is amazing. I got an aftermarket diffuser kit for my 22 in kettle and I can not believe how amazing it is doing on low and slow cooks.


What I am learning with doing low and slow with the diffuser system with the kettle is that air control is different than in the WSM. With the kettle I am learning that once the temps start to climb to shut down the bottom vent to just a touch open and then to manage the temps with the top vent. I am also learning that it better to just place two weber starter cubes in the charcoal and let it start that way verses a minion method.

Good luck and keep us updated on your amazing craftsmanship.
 
Very similar to using the "Slow N Sear' once temps hit 175 degrees you almost close the bottom vent, then tweak the top vent to obtain the desired temperature.
 
Very similar to using the "Slow N Sear' once temps hit 175 degrees you almost close the bottom vent, then tweak the top vent to obtain the desired temperature.
Cool, I have never used the SnS, but after trail and error and some reading of others experience, I have learned this also. Yep that is cool to know because the last three cooks, I have shut down the bottom at 180, so that is nice to hear that this is so close to the practice of others.
 
I'm going to put the finishing touches on things tonight

Kyle - thanks for mentioning the galvanized stuff - so far everything is either SS or bare steel but some of the fasteners I was going to use were zinc plated, I've revised my plan for all SS or steel.

MR thanks for the link on the Glen Blue Smoker some good info there, when I saw how nice a 17" charcoal grate fit above the ash sweeps I figured someone else figured this out as well - I can't help but overcomplicate things. I like having different options and this will give me a bunch.
 
Once again your work is really impressive, Joel! By any chance do you work for one of the shipbuilders in the area?
 
Great minds think alike! I am the one that set up the Glen Blue Smoker referenced above. Joel and I saw the same problem to make the 26 a good smoker--more distance between coals and cooking grate but we solved it in different ways. I took the quick and cheap way by dropping in a charcoal grate from a WSM to lower the coals about 2.5 inches below the cooking grate for the 26 incher. Joel designed a very elegant way to solve the problem and I wish I had thought of his first. We both identified the next problem which was to come up with a heat diffuser. My original solution to that was to flip a cooking grate from a 22 inch kettle upside down, add brackets on each side and stand it on the cooking grate pegs built into the 26 incher. I then cut a circular piece of sheet metal to sit on top of the 22 inch cooking grate. Again, quick and cheap. Joel again took a more elegant approach and used a stainless-steel-comal he found on Amazon. Now, you won't believe this. About 2 months ago I was in Academy and I noticed the stainless-steel-comal that they had. It was 22 inches in diameter, had a 2 inch side, and was about $40. I bought it and brought it home. The unit from Academy has a different shape than the one from Amazon so I used mine flipped upside down and sitting on the cooking grate pegs on the grill. However, the unit fit so well that I didn't think that there was enough space around it for heat to flow through effectively. So I cut away about half the side except for the the places the unit would sit on the pegs of the grill. I also drilled holes around the perimeter of the unit so heat could come out that way.
IMG_1281.jpg
Now when I sit the unit on the cooking grate pegs, I have about 5 inches between the charcoal grate and the diffuser. This allows me to set up charcoal snakes that are 2 briquettes high with the briquettes standing on edge. I also have enough clearance between the diffuser and the cooking grate to set in pans on top of the diffuser for water and to catch drippings.
IMG_1284.jpg
I have to say that this set up is remarkably trouble free. Last weekend I did a low and slow cook on a Boston Butt for almost 9 hours. For the first 5 hours the grill temperature stayed between 225 and 240 without me touching it. After that, I only made some changes about once an hour. I have to give a lot of credit for the stable temperatures to the peg system that I wrote about in my original post. If you have a kettle of any size, you need to cut a set of pegs to plug the top vents because that lets you control the temperature much more precisely. You don't have to guess that the top vent is open 1/4, 1/2, or 3/4--you know exactly using the pegs. Why Weber has never come out with a set of these is beyond me. In short, Joel and I solved the same problems--distance and heat diffusion--to make the 26 inch grill a mini-WSCG. His solutions were much more elegant than mine but both get the job done. Joel, I wish you many wonderful cooks on your 26 incher. I think that you will love it! Keep us updated.
 
Last edited:
Thank for the compliments everyone! Walt, it looks like you are partial to the snake method for you cooks have you tried the minion method at all? Also have noticed any hot or cold spots with the diffuser set-up? My concern is that the center of the grill area is going to be colder than the outside edges.

I really can't wait for the weather to warm up a little more so I can get my 26er out and start to do some smoking - I've been grilling on it every weekend but it just hasn't been nice enough in WI to do a long cook. I'm going to do a few burn off cooks to verify some temps/settings - the "problem" is I have so many different options on how to set things up.

I finished most of my tweaks, cut down the sides of the comal so instead a 2" tall lip it's now closer to 1/2"
PXL_20210313_060930347.jpg

I welded the mounting nuts for the stand offs for the comal
PXL_20210313_070130469.jpg

This gives me a pretty good range of adjustment on where I want to put the diffuser
PXL_20210313_070241807.jpg

Lastly I made up some stand offs for the cooking grate - this raises the cooking grate about 1 1/2"
PXL_20210313_060133152.jpg

PXL_20210318_033028959.jpg

With the cooking grate risers and the lower charcoal grate I have a 10" gap between the charcoal grate and the cooking surface
PXL_20210318_032940863.jpg

I like Walt learned or was inspired by things I saw on this forum and the WKC, especially Robert R and Jules V - if any of you like the stuff I have done take a look at Jules V's creations on the WKC - he makes some really cool stuff.
 
Joel, you did a fantastic job with your setup. I like the shape of your diffuser better than mine, I think. It's weird that they are completely different shapes. So far, my diffuser has done the job. I have not noticed any hot or cold spots in my set up so I would not expect any in yours. I think the distance from the coals to the cooking grate helps to mix the air currents in the grill so cold and hot spots don't happen. I also have a 22 inch Performer and I have noticed in the past when I have done a long cook that there seemed to be some hot and cold spots on it even using the indirect method with the Weber charcoal baskets. My 26 inch set up is much better for low and slow. As far as charcoal method, I use the snake method as well as the minion method. For cooks on things like ribs or smoked steak I use the minion method because a 5 hour burn is about all I can get out of this method. For longer cooks, I usually use the snake method with briquettes arranged 3 wide on their edges and then another row on top of the first row. I have them go about 3/4 of the way around the grill using the charcoal grate pegs to measure. This allows me to dump hot coals on one end of the charcoal and then burn to the end. I have gotten 10 hours out of this arrangement and the temperature stays relatively stable. I have marks on the lower damper and I use them to set the air coming in and then put in the pegs on the top damper to effectively control the air going out. Having tried out a number of bottom/top damper combinations, I can now pretty much set the 26 incher for whatever I am cooking and the temperature will remain fairly stable. As I said, for my last cook of about 9 hours, I didn't have to touch the grill for the first 5 hours and then only had to adjust once or twice an hour to keep the temperature in the 225 - 250 range. I now do all of my smoking on the Glen Blue and use the Performer for things like burgers, fish, chicken. Best of all, I have about $500 invested in the Glen Blue setup and I really feel that it performs almost as well as the $1500 Weber Summit Charcoal. You have invested more thought and effort in your setup so it should work even better than mine. I congratulate you on what you have accomplished and I wish you many happy cooks on your 26 incher. I do not think you will regret anything you have done once you see how well it works. Best regards!
 
So I'm pretty much set on doing a simplified version of this. My idea is to use a regular 22" charcoal grate in combination with a Cajun Bandit 18" WSM charcoal chamber (15.5" diameter x 5" tall), and a pizza stone big enough to cover the chamber without falling in. I'd still have enough space to put a water/drip pan on top of the stone, even with the cooking grate at stock height. That chamber would give me 300 cubic inches for charcoal, or a shade under two full-size chimneys worth.

Does anybody have any suggestions for low-cost improvements on my idea? My biggest concern is with the contact between the charcoal grate and the inside surface of the bowl - I was thinking of maybe making four 'cushions' out of aluminum foil that would keep the bare steel off the enamel surface.
 
Like I said - it's a little less than two chimneys. I don't feel like getting into heavy math, but I'd guess that the interior volume of a 26" would fall somewhere between an 18" and 22" WSM. I figure if I get the air flow and the starter fire right, it should be good for at least 12 hours of cook time.
 
Lee, I may be wrong but my memory tells me that it is only about 5 - 5.5 inches from the cooking grate to the charcoal grate on both the 22" and 26" kettle. You need to check that distance because if I am right that charcoal chamber won't leave any room for the drip pan. You have a good idea so I hope that I am wrong.
 
Lee, I may be wrong but my memory tells me that it is only about 5 - 5.5 inches from the cooking grate to the charcoal grate on both the 22" and 26" kettle. You need to check that distance because if I am right that charcoal chamber won't leave any room for the drip pan. You have a good idea so I hope that I am wrong.
The stock height is ~5” between grates. I went by the published height of a Slow N’ Sear - 4.75”. According to my tape, the position where a 17”-diameter grate sits in the bowl buys another 3.25”. Even if the pizza stone is 3/4” thick, I’d still have room for a 2” deep water pan on top.


Back
Top