Last year, my local grill store got in a Weber Summit Charcoal and I looked it over as possibly being my barbecue machine. However, it was $1500 and I just didn’t think that I could justify that kind of expense for something that I would use two or three times a month. I have a Performer that I absolutely love, and Weber says the WSC could replace my Performer, which would have made such a large expense easier to justify, but I just couldn’t see spending the money to find out. My cheapness won out, I guess.
So, I began to read through the forums on here and I saw a lot of posts that talked about ways to make a 26 inch kettle into a cheaper Summit Charcoal. When Weber came out with the Glen Blue 26 inch kettle, I ordered one and began to implement some of the ideas I had gleaned from this forum.
One of the disadvantages of the 22’ kettle is how close the charcoal grate is to the cooking grate. The WSC solved this by putting more distance between the two grates. Someone on here had used a charcoal grate from a WSM to gain some distance on the 26 inch. So, I got a charcoal grate from a WSM to use in the Glen Blue and that grate drops the charcoal about 2 and a half inches below the normal 26 inch charcoal grate. So, distance gained between fire and cooking grate.

Another feature of the WSC is that it has a heat diffuser located about half way between the charcoal and the cooking grate to prevent the infrared of the lit charcoal from causing hot spots in the meat being cooked. Several people on here had made diffusers out of pizza pans. I decided to try a different approach. I bought a thin sheet of metal to use as a heat diffuser but it needed a base to support it. So, I took an old cooking grate I had from my Performer, flipped it upside down, and placed the handles of the grate on the pegs on the side of the kettle that normally hold the cooking grate. I added a couple of “L” shaped brackets on two sides so they would rest on the other two metal grate straps. This would let the old cooking grate be stable and not tip.

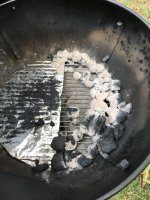
Then I cut the metal sheet in a circle of 23” diameter and laid it on top of the upside down cooking grate. Now my diffuser was about 4 inches above the WSM charcoal grate which is closer to half way between the coals and the cooking grate.
I can then put my drip pan and water pan on top of the diffuser plate. This diffuser set up will also allow me to use the standard Weber charcoal baskets if I wish.

The one defect in my Glen Blue was the top damper. When it came, the top half of the top damper didn’t follow the curve of the top so it stuck up about 1/8th of an inch from the top. It was enough that the top two vent holes could not be closed. So, I employed another idea I had learned here. I cut a dowel into 4 pieces and I use them to plug the holes on the top vent. Not only does it solve the problem with the defective damper, but it is a much more precise way to determine how much of the top vent is open. When I put in 3 plugs, it is 1/4 open and I don’t have to guess. I also put marks for 1/4, 1/2, etc. on the bottom damper.

Controlling temperature on the Glen Blue is not a problem. I can pretty much set it and forget it. Saturday I set up the Glen Blue to barbecue some ribs. I put in my coals and opened the top and bottom vents to get the cook going. I got distracted and it was 30 minutes before I got back to the grill. The cooking grate temperature was 260 degrees with both vents open so I closed the bottom vent to 1/4 and put three pegs in the top vent. In about 15 minutes the temperature was down to 227 degrees and it stayed around 230 degrees for the next 2 hours and 15 minutes without me having to touch the kettle. Then I opened the bottom to 1/2 and took out one peg to open the top to 1/2. The kettle stayed close to 250 degrees for the remaining two hours of the cook.
Probably the most surprising smoke to me was a couple of prime strip steaks I did a couple of weeks ago. I smoked the two strip steaks for about an hour and 15 minutes at around 225 degrees. The Glen Blue had no trouble holding a consistent temperature around that mark. After smoking, I took the two steaks and used my Performer to sear them for about a minute on each side. For years, I have grilled steaks on my Performer and they were delicious, but my wife and I both agreed that the two strips smoked on the Glen Blue were the most tender and most flavorful steaks we have ever had. I can’t wait to try that again.
The Glen Blue has succeeded as a smoking machine beyond my wildest expectations. The pegs in the top vent and the markings of the bottom vent let me be fairly precise in setting up the grill for smoking. The ideas I have gotten from this forum have helped have many very successful smokes of Boston Butts and ribs on the Glen Blue.
So, I began to read through the forums on here and I saw a lot of posts that talked about ways to make a 26 inch kettle into a cheaper Summit Charcoal. When Weber came out with the Glen Blue 26 inch kettle, I ordered one and began to implement some of the ideas I had gleaned from this forum.
One of the disadvantages of the 22’ kettle is how close the charcoal grate is to the cooking grate. The WSC solved this by putting more distance between the two grates. Someone on here had used a charcoal grate from a WSM to gain some distance on the 26 inch. So, I got a charcoal grate from a WSM to use in the Glen Blue and that grate drops the charcoal about 2 and a half inches below the normal 26 inch charcoal grate. So, distance gained between fire and cooking grate.
Another feature of the WSC is that it has a heat diffuser located about half way between the charcoal and the cooking grate to prevent the infrared of the lit charcoal from causing hot spots in the meat being cooked. Several people on here had made diffusers out of pizza pans. I decided to try a different approach. I bought a thin sheet of metal to use as a heat diffuser but it needed a base to support it. So, I took an old cooking grate I had from my Performer, flipped it upside down, and placed the handles of the grate on the pegs on the side of the kettle that normally hold the cooking grate. I added a couple of “L” shaped brackets on two sides so they would rest on the other two metal grate straps. This would let the old cooking grate be stable and not tip.
Then I cut the metal sheet in a circle of 23” diameter and laid it on top of the upside down cooking grate. Now my diffuser was about 4 inches above the WSM charcoal grate which is closer to half way between the coals and the cooking grate.
I can then put my drip pan and water pan on top of the diffuser plate. This diffuser set up will also allow me to use the standard Weber charcoal baskets if I wish.
The one defect in my Glen Blue was the top damper. When it came, the top half of the top damper didn’t follow the curve of the top so it stuck up about 1/8th of an inch from the top. It was enough that the top two vent holes could not be closed. So, I employed another idea I had learned here. I cut a dowel into 4 pieces and I use them to plug the holes on the top vent. Not only does it solve the problem with the defective damper, but it is a much more precise way to determine how much of the top vent is open. When I put in 3 plugs, it is 1/4 open and I don’t have to guess. I also put marks for 1/4, 1/2, etc. on the bottom damper.
Controlling temperature on the Glen Blue is not a problem. I can pretty much set it and forget it. Saturday I set up the Glen Blue to barbecue some ribs. I put in my coals and opened the top and bottom vents to get the cook going. I got distracted and it was 30 minutes before I got back to the grill. The cooking grate temperature was 260 degrees with both vents open so I closed the bottom vent to 1/4 and put three pegs in the top vent. In about 15 minutes the temperature was down to 227 degrees and it stayed around 230 degrees for the next 2 hours and 15 minutes without me having to touch the kettle. Then I opened the bottom to 1/2 and took out one peg to open the top to 1/2. The kettle stayed close to 250 degrees for the remaining two hours of the cook.
Probably the most surprising smoke to me was a couple of prime strip steaks I did a couple of weeks ago. I smoked the two strip steaks for about an hour and 15 minutes at around 225 degrees. The Glen Blue had no trouble holding a consistent temperature around that mark. After smoking, I took the two steaks and used my Performer to sear them for about a minute on each side. For years, I have grilled steaks on my Performer and they were delicious, but my wife and I both agreed that the two strips smoked on the Glen Blue were the most tender and most flavorful steaks we have ever had. I can’t wait to try that again.
The Glen Blue has succeeded as a smoking machine beyond my wildest expectations. The pegs in the top vent and the markings of the bottom vent let me be fairly precise in setting up the grill for smoking. The ideas I have gotten from this forum have helped have many very successful smokes of Boston Butts and ribs on the Glen Blue.
")