Rich G
TVWBB Honor Circle
Hey, VWB'ers! I just put up another batch of loin bacon (Canadian Bacon, if you prefer), and used the Hunsaker Rack with meat hooks for my WSM22, so thought I'd share.
I procured a whole, boneless loin from CostCo, and cut it into thirds. After weighing each third, I used the dry cure calculator at diggingdogfarms.com to come up with my cure ingredients. I usually drop the salt to 1.8, or 1.6%, and it works out well for me. I rubbed each loin third with its appropriate cure amount, then popped them in the fridge. Flipped every morning (mostly) for 10 days, then pulled out of the bags for a thorough rinse and dry.
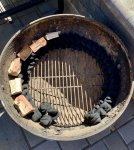
Set up the WSM22 with a two briquette snake stack (2x2 head) with hickory and apple on top (alternating):
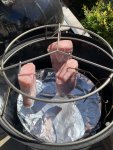
I lit the snake head, and after about 30 minutes, with the vents half open, the WSM was hovering nicely at about 145F. So, I put the loin pieces in the smoke, using the hooks and my Hunsaker Rack for the first time (easy, peasy!):
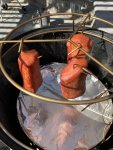
I had to open the vents up all the way, but the WSM ran for four hours settled in at 140F or so. At that point, I lit the tail of the snake to bump the heat up to about 190F so I could get the loin to 150-155F. After about 8 hours on the WSM, my briquette snake petered out, so I moved the loin to the oven at 200F to finish off. The loins pieces looked like this before heading to the oven:
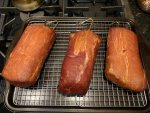
Once the loins hit my target temp, I pulled them to cool:
Once cool, they went into the fridge overnight, and were sliced up for packaging the next day:
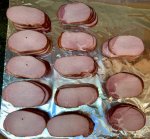
Each stack is 8 slices, and I'll put two stacks in a package. I also ended up with about 8oz of ends that I diced up to save for soups and stuff. Knowing my kids (and me), this won't last very long at all.....
I really liked the ease of hanging the loin pieces on the Hunsaker Rack with the included meat hooks. I don't perceive any difference in the finish product, but I didn't really expect I would. I got the rack with the primary goal of using it to hang sausages for smoking (used it for that once), and am looking forward to dialing in my stuffing/hanging process with 10" sausage rings.
If you like Loin/Canadian bacon, and haven't tried making your own yet, I highly recommend it. It's super easy, and tastes great!
R
I procured a whole, boneless loin from CostCo, and cut it into thirds. After weighing each third, I used the dry cure calculator at diggingdogfarms.com to come up with my cure ingredients. I usually drop the salt to 1.8, or 1.6%, and it works out well for me. I rubbed each loin third with its appropriate cure amount, then popped them in the fridge. Flipped every morning (mostly) for 10 days, then pulled out of the bags for a thorough rinse and dry.
Set up the WSM22 with a two briquette snake stack (2x2 head) with hickory and apple on top (alternating):

I lit the snake head, and after about 30 minutes, with the vents half open, the WSM was hovering nicely at about 145F. So, I put the loin pieces in the smoke, using the hooks and my Hunsaker Rack for the first time (easy, peasy!):

I had to open the vents up all the way, but the WSM ran for four hours settled in at 140F or so. At that point, I lit the tail of the snake to bump the heat up to about 190F so I could get the loin to 150-155F. After about 8 hours on the WSM, my briquette snake petered out, so I moved the loin to the oven at 200F to finish off. The loins pieces looked like this before heading to the oven:

Once the loins hit my target temp, I pulled them to cool:

Once cool, they went into the fridge overnight, and were sliced up for packaging the next day:

Each stack is 8 slices, and I'll put two stacks in a package. I also ended up with about 8oz of ends that I diced up to save for soups and stuff. Knowing my kids (and me), this won't last very long at all.....
I really liked the ease of hanging the loin pieces on the Hunsaker Rack with the included meat hooks. I don't perceive any difference in the finish product, but I didn't really expect I would. I got the rack with the primary goal of using it to hang sausages for smoking (used it for that once), and am looking forward to dialing in my stuffing/hanging process with 10" sausage rings.
If you like Loin/Canadian bacon, and haven't tried making your own yet, I highly recommend it. It's super easy, and tastes great!
R
