INTRODUCING: the "Roto Damper"


That's super impressive, Ralph! The fact that the RD3 can do 700F at 50% power is a real testament to it's effectiveness. Your previous RD I couldn't get above 400F without opening the vent a little manually. I still haven't tried a high heat cook with the RD3 you sent me plans for. I broke the top off thanks to poor printing lamination of the HIPS material (suuuucks) and too much force by yours truly. I need to print another one to give it a try.

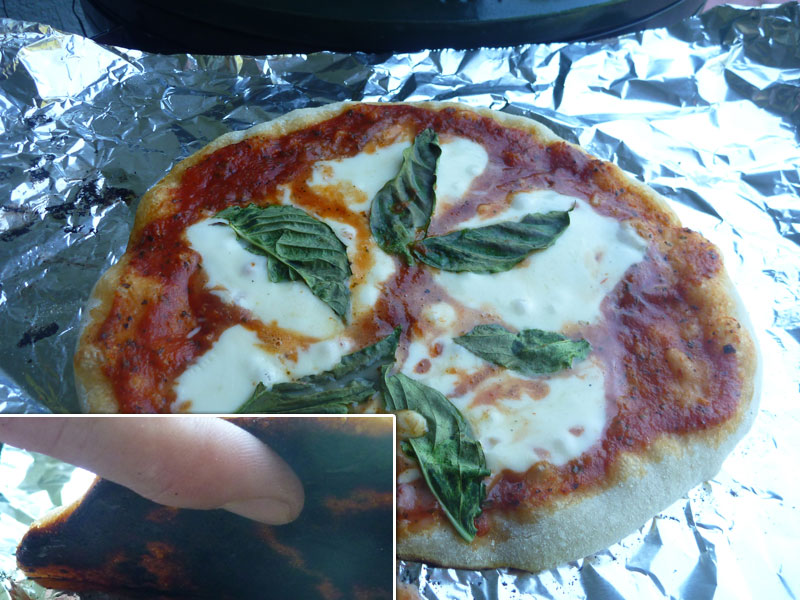
As far as pizza in the egg, I had some fun a few years ago with some friends who said "Oh you gotta get the pizza oven up to 800F to get a good pizza. Forget about it!" and found that that's way way too hot to cook pizza with the heat coming from below. Full report I'd say depending on your crust thickness, 600F might be about right. Here is 625F on the diffuser stone:
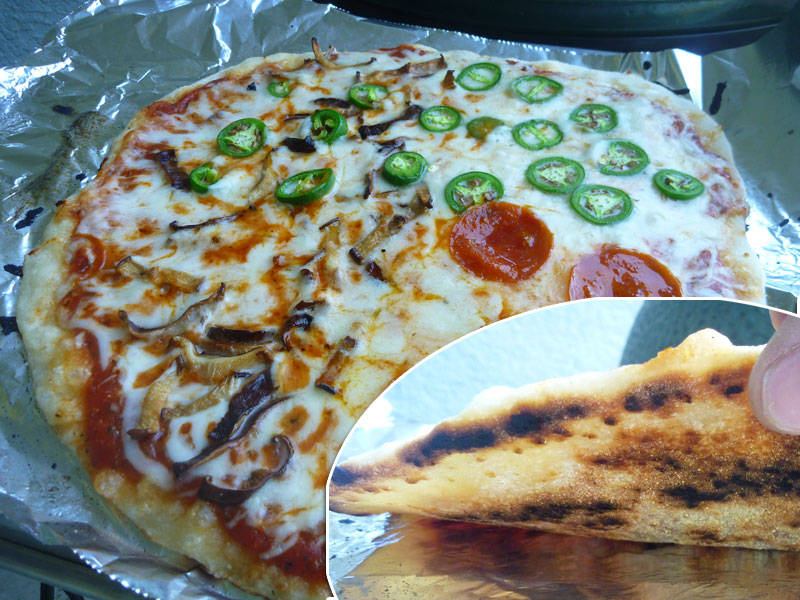
pizza12.jpg


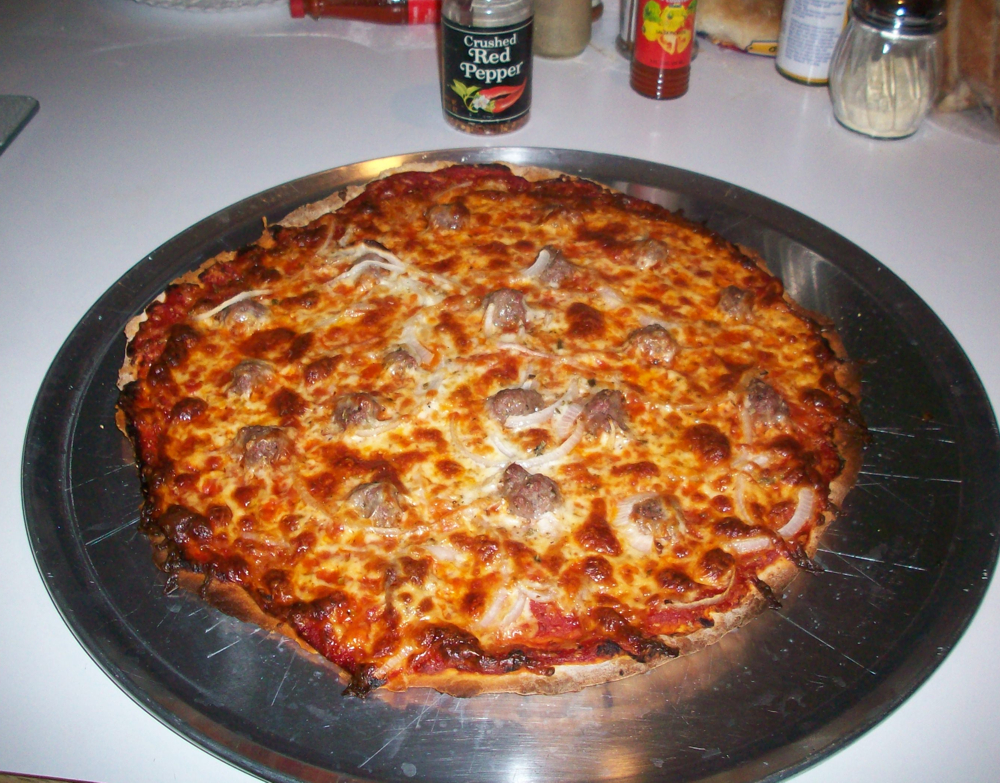
And 750F on a cast iron skillet:
pizza17.jpg
 
Yah, when I designed the original roto damper I just had a bullet smoker and the HM didn't have thermocouple support yet, so high heat cooking wasn't on the agenda at all. So I designed the original roto damper to control low and slow cooking as tight as possible with a valve opening about the size of the blower output. It works great for low and slow and the valve is extremely tight, it puts the fire out well etc, but it is not an ideal design for high air flow.

Since then I have gotten a (fake) kamado AKA "fauxmado" (akorn) that can do pizza cooks and added the thermocouple that can measure a couple thousand degrees... So when I set out to design the RD3 my focus was to maximize the impact of the air flow for high heat while still managing low and slow, and to reduce moving parts and external wiring. As a result of the blower output shooting straight through the grill adapter and the valve opening being much larger the RD3 can move a LOT more air than the original RD. At 100% it was too much and I was getting overshoot even on high heat cooks, I found 50% was about right to hit pizza and searing temps on my grill. (about 10% Max and on at Max Only for low and slow)

As for pizza... in an egg with the fire right below the pizza stone gets WAY too hot if you try to cook at wood fired pizza oven temps... It's a bit more tricky to pull off in an egg for that reason, you have to balance the stone temp VS the dome temp. Depending on how thick the crust and how much toppings you have on the pizza you might want the pit a little higher or lower in temp. I think somewhere between 500-600F is about right, because 650F was still too hot for a pizza with a super thin crust and not much toppings, a thicker pizza would take longer and would have burned the crust before the top was done. For the thin crust 550F worked just right.

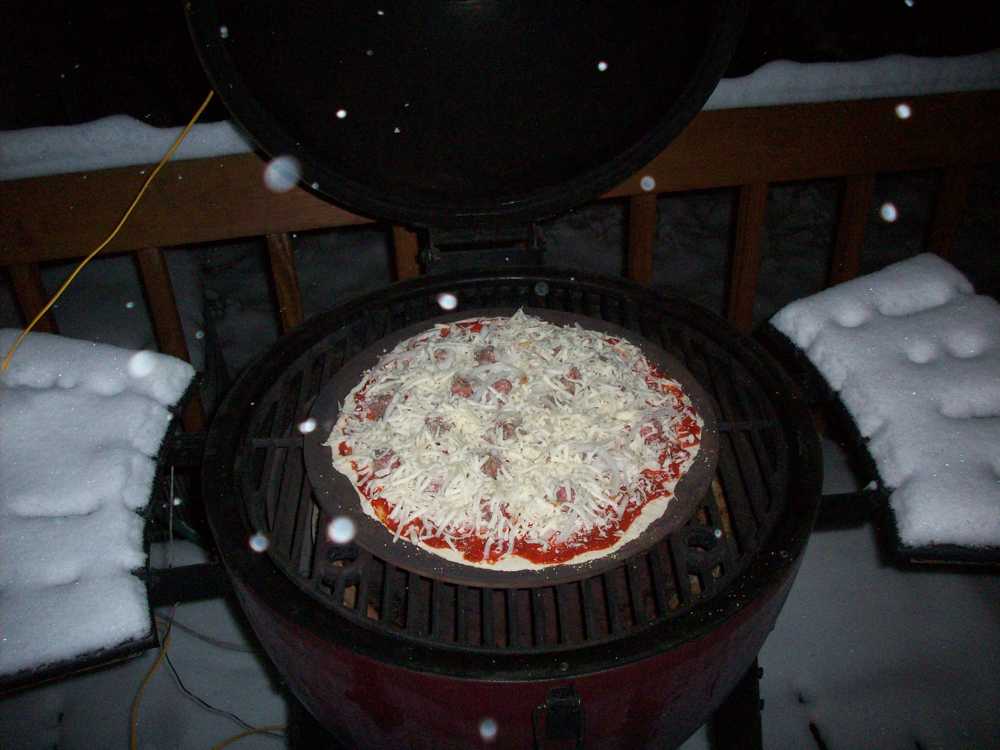
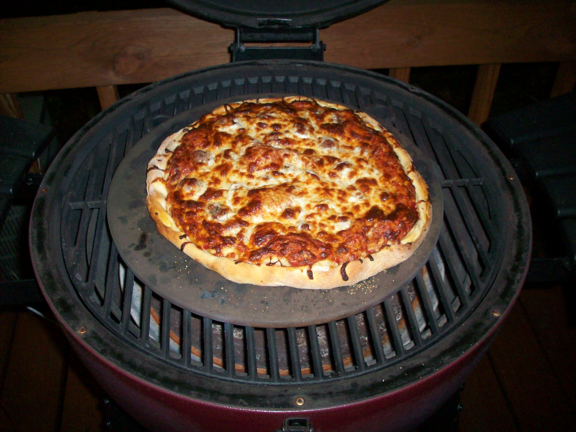
Here's a nice shot of a pizza I cooked...

WinterPizza.jpg


...in the dead of winter!

WinterPizzaRaw.jpg


How about a double decker (double crust) pizza?

DDPizza.jpg
 
Last edited:
Ralph,

RD you made for me is great.
Slight problem with it occasionally getting stuck in the closed position.
I think I may need to take it apart and clean but not sure if that is the cure.
 
Glad you like it....
On the sticking, couple things...
First, make sure your servo is fitting into the RD barrel comfortably, if the fit is tight so you have to force it then the servo will struggle.
Second, when you tighten down the screw on the servo that holds the whole thing together, make sure it's not too tight. Before you tighten the screw rotate the barrel and feel how (easy) it moves, after you tighten the screw make sure it still moves about as easy. If not, then loosen up the screw a tiny bit until things move smoothly again. When you have the right tension on the valve it shouldn't stick...
 
Recently I was contacted by John B about a gentleman that has a commercial size smoker that requires a 25CFM blower and wanted a roto damper. Although you can actually mount a 25CFM blower under the original RD the valve is a bit small for a commercial sized cooker IMHO, so I decided to take a shot at a RD3 designed around the 25CFM blower John B uses....

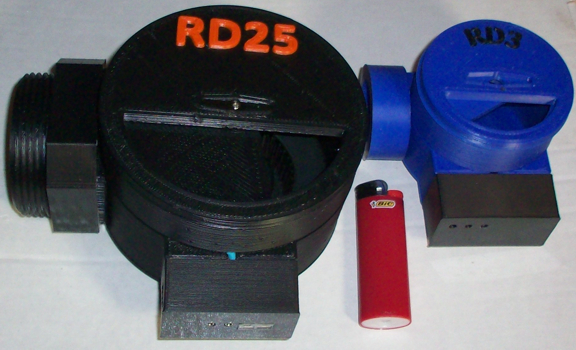
Introducing: The RD25

RD25+RD3.jpg


The unit is quite large, having to fit around that huge blower, the round portion is about 5" diameter. I pictured it next to a RD3 and a Bic lighter for some reference of scale.

I designed it to use the same control box as the original RD and the RD3, so it can be hand wired or it can run the RDTC board, it also uses the same servo.

I've wanted to take a stab at 3D printing threads for a while now so I took a stab at that as well. The output adapter pictured has a 2.5" threaded output that should screw right into a 2.5" ball valve. The threads printed really great, I am gonna take it over to Home Depot this week to make sure it threads into the valve, but from the way it looks and feels it should work well.

I really have no way to test this unit because this unit provides about 5 times the amount of flow I would need in any of my grills, but it functions as planned and so I am confident it will work as well as the RD3 when running a pit of the appropriate size.
 
I know you said he had a 2.25" ball valve, but I seem to see pipes and ball valves jump from 2 to 2.5", not showing 2.25" in between? So I did 2.5" pipe threads on the output... I'm not really sure about the thread pitch either, I think it might be different for a water pipe VS a gas or steam pipe? IDK, I should have a better understanding of that after I take the part to home depot for a test fit....
 
Ralph,

RD you made for me is great.
Slight problem with it occasionally getting stuck in the closed position.
I think I may need to take it apart and clean but not sure if that is the cure.

Hey Dale, working with the RD25 brought something to mind that I didn't think to mention at first. The 1A power supply that is recomended for the HM isn't really up to par for running the blower and servo properly IMHO. With the RD25 I used a nice solid 1A power supply at first and the servo was very weak and didn't want to move some of the times, when I put resistance on the servo I could litterally hear the blower slow down. Once I plugged in a beefier power supply the servo was strong and had no effect on the blower speed even when I forced it to struggle moving.

So perhaps you might try a better power supply if you haven't already, that might give your servo the extra ooomph to get going.... It stands to reason it would be from the closed position it would would stick (if the PS was weak) because the HM gives the blower a brief boost of power when it first turns on to get it spinning, so that demand might leave the servo a little weak at that moment in time if the PS is weak.
 
Ralph,
checked the power supply I was using, I always use a 12v 2 amp switching supply, but grabbed my 15 volt 1 amp heavy duty wallwart power supply by mistake. This may answer a lot of questions and solve why I recently started seeing noise.


Hey Dale, working with the RD25 brought something to mind that I didn't think to mention at first. The 1A power supply that is recomended for the HM isn't really up to par for running the blower and servo properly IMHO. With the RD25 I used a nice solid 1A power supply at first and the servo was very weak and didn't want to move some of the times, when I put resistance on the servo I could litterally hear the blower slow down. Once I plugged in a beefier power supply the servo was strong and had no effect on the blower speed even when I forced it to struggle moving.

So perhaps you might try a better power supply if you haven't already, that might give your servo the extra ooomph to get going.... It stands to reason it would be from the closed position it would would stick (if the PS was weak) because the HM gives the blower a brief boost of power when it first turns on to get it spinning, so that demand might leave the servo a little weak at that moment in time if the PS is weak.
 
So, as it turns out you were using the 1A power supply and that is why you servo was weak? I tend to shy away from switching mode PS's for my HM, particularly the cheap ones, I seem to get more noise from them...
 
Last edited:
Hey Ralph, this looks great. I have not had a chance to read through this entire thread yet, so I apologize if this is already answered, but are you selling these, if so, how much? Otherwise, is there a link to the stl files in this thread?

Thanks,
Richard

Email was sent yesterday.
 
As far as pizza in the egg, I had some fun a few years ago with some friends who said "Oh you gotta get the pizza oven up to 800F to get a good pizza. Forget about it!" and found that that's way way too hot to cook pizza with the heat coming from below.

What if you put an additional stone beneath the pizza stone, so that you get high heat but not directly on the stone the pizza cooks on?

I haven't tried this yet but on my Vision, I have an adjustable rig/spider combo from Ceramic Grill Store: http://shop.ceramicgrillstore.com/vision-classic-adjustable-rig/

I figure I could put my 13" stone down at the bottom or maybe up a little higher for more air circulation, then the 16" on a rack up closer to the dome.
 
I use metal pizza pans as a heat deflector between the fire and the grill grate/pizza stone. My rig works great for me, have you seen my pizza's? LOL If you look at the pic I posted of the pizza on the grill (the winter pic) you can kinda see the deflector pans under the pizza stone. A stone would work the same way, might delay the heating of the actually pizza stone a bit longer to allow higher temp pizza cooking, but sooner than later everything will equalize and the pizza stone would rise in temp as well... You have to balance the stone temp VS the grill temp when cooking pizza, if one or the other is too high or low you may get a burned crust and toppings not done or the other way around... When I pull pizza's off the grill the top and crust are both done perfect when I run the pit at about 550-600F with my setup.
 
Yep, I am the guy who got the big RD25!

A big thanks to Ralph and John!

It threads right into my ball valve, and shoukd work great as soon as my servo and blower shows up in the next 2 weeks!

Will post more when I get it all hooked up in a few weeks!
 
Glad to hear the threads worked out for you, I didn't have anything that large to thread into for a test but was confident after looking at it. You are the first guy to get an actual threaded output cap for any Roto Damper...
 
The threads look great, have to be careful when starting to screw in initially, but works like a charm!

I may get an adapter to put in between so I don't have to screw/unscrew every time. I would hate to cross thread even once!
 
I wonder if you can get one of those quick release deals like they have on compressor lines in a big size like this? That would be the easiest solution for installation/removal.


Back
Top