John K from NJ
New member
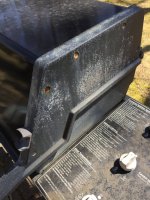
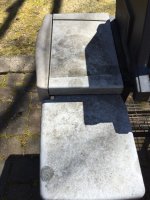
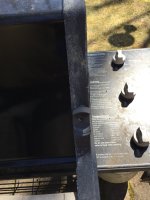
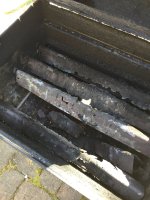
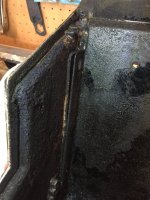
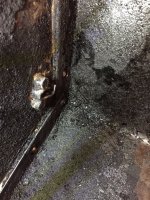
Hello all - Just want to first thank everyone here for all the great advice, photos, videos etc. I'm a new member and have replaced basic parts like flavor bars, burner tubes in the past but decided to try and go further this time (after seeing current prices of new Webers - yikes!!) plus I love my old Silver B which brought me here So down the Weber rabbit hole I went. First here are some photos of the before state of my grill (early 2000's Silver B):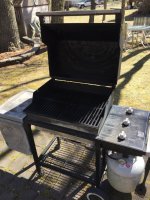
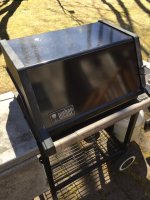
And now the after pics:
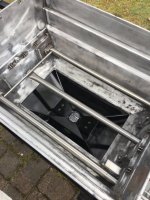
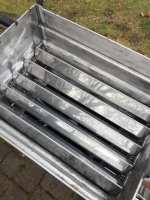
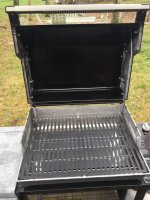
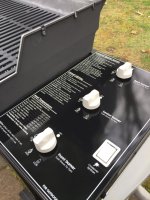
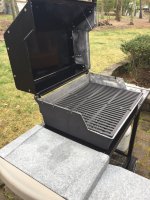
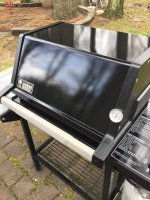
The details and what I learned- First off this takes patience and some hard work but in the end it pays off. This grill is 20+ years old and hopefully can go for another 20. Parts replaced were the flavor bars, burner tubes, grates, igniter, thermometer and pullout grease tray which kept going in and out of stock at grill parts.com but was finally able to get one.
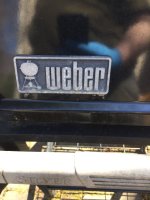
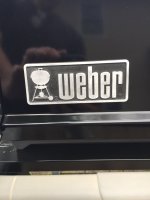
The lid - used the tips here on removing the years of carbon buildup from inside of the lid with a razor blade, simple green and 0000 steel wool. One piece of new advice I haven't seen here that I can offer is that I ended up using a 4" wide wallpaper scraper with 4" razor ( I had this but should be available at any paint store) as it gave me much more leverage and did NO damage to the porcelain coated surface. For the super tough areas I actually used a twisting motion while scraping and it worked wonders. All depends on how much and how long the crud has been there as to ease of removal I guess. Tried using some Crud Cutter oven cleaner to loosen stuff up but it was pretty much worthless. Outside of lid was same procedure then finished with an auto polishing compound and 2 coats of paste wax as recommended in the forum. Sides of lid were removed (which was a slow process to get the bolts off) then wire cup brush used on the insides, and to remove anything loose on outsides. Degreased with Simple Green and then sprayed with brake cleaner, painted with High Heat Rustoleom Ultra and got replacement SS tapered bolts and nuts as recommended on forum from Bolt Depot. One thing to note when painting is to be sure to catch the front inside edge of the side pieces that lay over the porcelain lid top as these will be seen when finished. Also painted the tops of the stud bolts that hold the handle on with the Ultra. Badge carefully removed by gently prying off push nuts. These were cleaned up and reused. (PB blaster and Brake Kleen and my newest best friends through this project). Badge painted with Ultra and then sanded as recommended in the forums to get the silver back to life.
Firebox base - the bolt on the left that holds it to the frame came off pretty easy as it was rusted and broke off but luckily not frozen in the hole. 2" SS replacement from Bolt Depot as well. Could not get the aluminum rails that hold the grease tray off the bottom as the bolts were rusted on. Tried the impact gun trick and was patient but the heads were stripping off. Rather than drill them out and messing up the threads on the cast aluminum box I just let them go and masked them off for painting. Started the cleanup of inside of firebox with a wire cup brush on a drill but wasn't getting anywhere so picked up a cheap angle grinder and braided wire cup brush at Harbor Freight which did the job much better but getting into tight corners was tough so I did my best. You can see in the photos some of the darker areas just would not come out and are kind of part of the metal at this point but mostly won't be seen. Outside wire brushed, soaked with Brake cleaner prior to painting (evaporates pretty quickly), then applied a few coats of Rustoleum High Heat Flat.
Frame - thoroughly cleaned and rust scraped off in the usual spots. Wasn't going to go further but decided I went this far so may as well paint. One problem is I couldn't get the plastic side pieces off for anything. PB blaster for days, even disassembled frame and tried to pound them out by hammering a piece of rebar down through the tube from the inside. Same on both sides noting the right side has clips underneath that need to be pushed in. Still no joy. So rather than break the pieces which I saw someone else here did and have to go hunting for replacements, I masked them off with blue painters tape and the hit the frame with Brake Cleaner and painted with Ultra. I even removed cleaned up and painted the propane scale on the frame by masking off the stickers and carefully trimming around them with an X-acto knife.
Plastic parts and side tables - removed what I could and soaked in bleach, scrubbed with some fine steel wool and then hit with a couple coats of the 303 protectant which gives it a nice finish. One thing I'm not happy with is a stubborn stain on the left side table that still shows in the photos. May try again to sand the table down with 400 grit sandpaper and an orbital sander to see if I can get that out better then hit with 303 again.
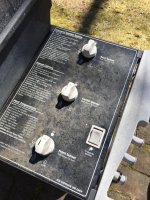
Manifold valves - the bracket that holds my valves to the firebox had a small hole rusted through it on one arm is so I was careful handling it. Followed the tips on Chris's video to carefully open, clean and lubricate the valves (couldn't believe I was going this far but I was all in at this point) and they now operate super smoothly. My new burner tubes actually came with 2 new bolts to hold the manifold to the firebox (not exactly sure why as they are not need for burner tube replacement) so those were replaced as well. Old school igniter with screw on nut was sourced on Amazon but these go all the time.
Even cleaned up and hit the wheels with 303 and used 400 sandpaper to get the axle back to shiny new appearance.
My best advice is to be patient and persistent and you will get there. Use this forum to gather as much info as you need before you start. Thanks again for everyones help, this is a great community to be a part of.


And now the after pics:


The details and what I learned- First off this takes patience and some hard work but in the end it pays off. This grill is 20+ years old and hopefully can go for another 20. Parts replaced were the flavor bars, burner tubes, grates, igniter, thermometer and pullout grease tray which kept going in and out of stock at grill parts.com but was finally able to get one.
The lid - used the tips here on removing the years of carbon buildup from inside of the lid with a razor blade, simple green and 0000 steel wool. One piece of new advice I haven't seen here that I can offer is that I ended up using a 4" wide wallpaper scraper with 4" razor ( I had this but should be available at any paint store) as it gave me much more leverage and did NO damage to the porcelain coated surface. For the super tough areas I actually used a twisting motion while scraping and it worked wonders. All depends on how much and how long the crud has been there as to ease of removal I guess. Tried using some Crud Cutter oven cleaner to loosen stuff up but it was pretty much worthless. Outside of lid was same procedure then finished with an auto polishing compound and 2 coats of paste wax as recommended in the forum. Sides of lid were removed (which was a slow process to get the bolts off) then wire cup brush used on the insides, and to remove anything loose on outsides. Degreased with Simple Green and then sprayed with brake cleaner, painted with High Heat Rustoleom Ultra and got replacement SS tapered bolts and nuts as recommended on forum from Bolt Depot. One thing to note when painting is to be sure to catch the front inside edge of the side pieces that lay over the porcelain lid top as these will be seen when finished. Also painted the tops of the stud bolts that hold the handle on with the Ultra. Badge carefully removed by gently prying off push nuts. These were cleaned up and reused. (PB blaster and Brake Kleen and my newest best friends through this project). Badge painted with Ultra and then sanded as recommended in the forums to get the silver back to life.
Firebox base - the bolt on the left that holds it to the frame came off pretty easy as it was rusted and broke off but luckily not frozen in the hole. 2" SS replacement from Bolt Depot as well. Could not get the aluminum rails that hold the grease tray off the bottom as the bolts were rusted on. Tried the impact gun trick and was patient but the heads were stripping off. Rather than drill them out and messing up the threads on the cast aluminum box I just let them go and masked them off for painting. Started the cleanup of inside of firebox with a wire cup brush on a drill but wasn't getting anywhere so picked up a cheap angle grinder and braided wire cup brush at Harbor Freight which did the job much better but getting into tight corners was tough so I did my best. You can see in the photos some of the darker areas just would not come out and are kind of part of the metal at this point but mostly won't be seen. Outside wire brushed, soaked with Brake cleaner prior to painting (evaporates pretty quickly), then applied a few coats of Rustoleum High Heat Flat.
Frame - thoroughly cleaned and rust scraped off in the usual spots. Wasn't going to go further but decided I went this far so may as well paint. One problem is I couldn't get the plastic side pieces off for anything. PB blaster for days, even disassembled frame and tried to pound them out by hammering a piece of rebar down through the tube from the inside. Same on both sides noting the right side has clips underneath that need to be pushed in. Still no joy. So rather than break the pieces which I saw someone else here did and have to go hunting for replacements, I masked them off with blue painters tape and the hit the frame with Brake Cleaner and painted with Ultra. I even removed cleaned up and painted the propane scale on the frame by masking off the stickers and carefully trimming around them with an X-acto knife.
Plastic parts and side tables - removed what I could and soaked in bleach, scrubbed with some fine steel wool and then hit with a couple coats of the 303 protectant which gives it a nice finish. One thing I'm not happy with is a stubborn stain on the left side table that still shows in the photos. May try again to sand the table down with 400 grit sandpaper and an orbital sander to see if I can get that out better then hit with 303 again.
Manifold valves - the bracket that holds my valves to the firebox had a small hole rusted through it on one arm is so I was careful handling it. Followed the tips on Chris's video to carefully open, clean and lubricate the valves (couldn't believe I was going this far but I was all in at this point) and they now operate super smoothly. My new burner tubes actually came with 2 new bolts to hold the manifold to the firebox (not exactly sure why as they are not need for burner tube replacement) so those were replaced as well. Old school igniter with screw on nut was sourced on Amazon but these go all the time.
Even cleaned up and hit the wheels with 303 and used 400 sandpaper to get the axle back to shiny new appearance.
My best advice is to be patient and persistent and you will get there. Use this forum to gather as much info as you need before you start. Thanks again for everyones help, this is a great community to be a part of.
Last edited:


