Genesis Gold Part 2


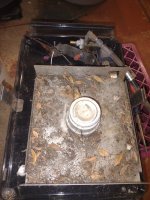
Bowed out cook box. I had this fixed before I even realized it so I don't have a before picture. The grates were sitting right on the edge of the cook box in the middle where it had somehow become bowed out or warped. I used a pipe clamp to bend it back into shape using the grates as a stop. I did it in the middle and then to the left and right of center. It was fast and easy to do and now the gap is nice and even across the length of the cook box.
Steve, I got around to trying the pipe clamp on the cook box. I am starting a new thread to keep from trashing this thread any more.

 
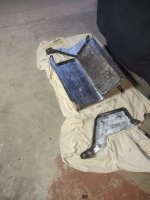
I spent some time today on the lid and finished wire wheeling the inside clean as well as the end caps. Then it was time to disassemble it for further cleaning and to prep the end caps and lid badge for painting. I made a couple of interesting observations on this type of lid since it was the first time taking one apart. I can usually use a small socket wrench to get the speed nuts off of the end caps and I've always been able to clean and reuse them. On this lid there was no room for that and I had to use a 7/16 wrench and I don't think those nuts are going to be any good again so I'll need to buy some new stainless steel nuts. The other thing I found was that when I took the lid badge off, one of the places where the inner liner is pressed or spot welded to the lid was loose or broken. The badge being on the grill was keeping it tight in that area. No big deal, the lid is still useable IMG_20250416_193955943.jpg
 
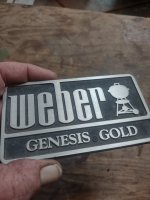
I need it to warm up so I can get the pressure washer out and clean up everything so I can get the painting done. I like to sand the face of these badges before I paint them, I think it speeds up the process after it's painted because I don't think the new paint sticks to the to the clean shiny surface as well.IMG_20250416_194103574_HDR.jpg
 
I spent some time today on the lid and finished wire wheeling the inside clean as well as the end caps. Then it was time to disassemble it for further cleaning and to prep the end caps and lid badge for painting. I made a couple of interesting observations on this type of lid since it was the first time taking one apart. I can usually use a small socket wrench to get the speed nuts off of the end caps and I've always been able to clean and reuse them. On this lid there was no room for that and I had to use a 7/16 wrench and I don't think those nuts are going to be any good again so I'll need to buy some new stainless steel nuts. The other thing I found was that when I took the lid badge off, one of the places where the inner liner is pressed or spot welded to the lid was loose or broken. The badge being on the grill was keeping it tight in that area. No big deal, the lid is still useable View attachment 110989
Nice work Steve!👌🏽
 
Thanks, I can't wait to see how I'm going to get the scratches out on the outside of the lid.
Only thing that comes to mind is very fine grit sand paper on a sanding block strokes with the grain going over the entire lid until scratches are gone. This could take a very long time though and your hand motion has to be very steady and straight.

I'll be interested in what you come up with.
 
My wife asked me tonight if I was almost done working on this grill, I wanted to cry.
Only thing that comes to mind is very fine grit sand paper on a sanding block strokes with the grain going over the entire lid until scratches are gone. This could take a very long time though and your hand motion has to be very steady and straight.

I'll be interested in what you come up with.
I'm going to clean the whole lid with bar keepers friend and a green scrubbie being careful to go with the grain. I used this on the side burner cover and it made a huge improvement in its appearance. I am prepared to do some sanding on it though. I imagine I can find a helpful YouTube video on the subject.
 
I need it to warm up so I can get the pressure washer out and clean up everything so I can get the painting done. I like to sand the face of these badges before I paint them, I think it speeds up the process after it's painted because I don't think the new paint sticks to the to the clean shiny surface as well.View attachment 110990
I do that as well. After I blast it I sand the face of it. I also feel like if you get the face flatter prior to painting I am less likely to mar up the fresh paint in the recessed areas.
Only thing that comes to mind is very fine grit sand paper on a sanding block strokes with the grain going over the entire lid until scratches are gone.
All while going the entire length of the lid. I’ll be giving that a try on a couple of super rough cabinet doors I have.
 
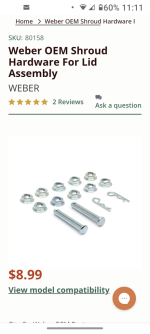
Does anybody know what size nut fits on the end cap studs of this grill? I know it's not 1/4-20, I just tried that. That size is too small. Weber sells a replacement kit that they claim will work on this grill, but it only has ten speed nuts and this grill takes twelve.Screenshot_20250416-231148.png
 
Those look just like the factory ones. Looking closely at the studs on these end caps, they don't actually appear to be threaded for a nut to begin with.

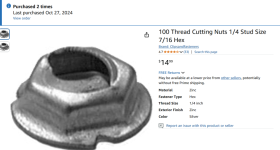
That is part of why I like the old style end caps. The thread cutting nuts aren't ideal for removing and reinstalling. I lot of auto makers used to attach emblems and trim with them and often times they were single use (unless you are able to get it to follow the first "cut" threads. When they went away from pop-metal for plastic, it was almost a guarantee that you would have to replace them. Ford Blue Ovals were the worst!

I think they are just 1/4" thread cutting nuts (for replacing them)
 
Thanks, just another example of how every part of an old grill is a separate project within a project. I've also got the lid end caps and manifold prepped for paint, so that's next.
I love to that about these old classic grills. The more projects in a project the better! I just don't like to hurry when I'm working on those side projects. Keeps it fun for me.
 
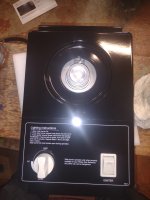
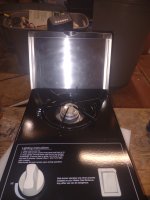
And a shout out to @Cody Bratton for sending me a new igniter bracket to replace the rusted out one I had. It's a little detail but it makes me happy. Cody, I'll be sending you one of my goodies in return.
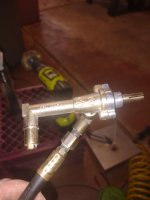
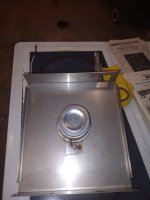
I love the little details and they all add up! The porcelain on that sideburner looks to be in great shape, and great work on shining up the valve.


Back
Top