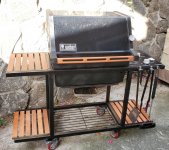
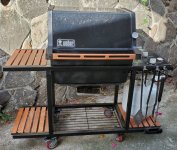
time for my once a decade post, and this one is fitting because it goes all the way back to the origins of my connection to this bulletin board! Chris and I worked together many, many years ago, and during the earliest days of the Virtual Weber Bullet and the bulletin board, I got a brand new Weber Genesis 1000 - probably one of my first extravagant purchases. For almost 25 years, this grill has fed me, my family, and friends, and has traveled with me as I moved around northern California, then back to Hawaii, where it has lived outside in the elements for the last 16 years. I think I've replaced most of the parts on it during its life; grill grates, flavorizer bars, burners, and starter. I've even rebuilt the side tray at least once.
sadly, she finally signaled she might need a break, when the back arm holding the side table rusted through, and she dropped an entire tray of grilled meat!
I hadn't looked at new grills in forever, and I was a little shocked at both the price of a new grill, and how the materials didn't seem to be as sturdy as the OG Genesis at home, so I picked up $80 worth of square steel tubing, a set of casters, and went about rebuilding my grill frame.
so ashamed I let it get to this. covered in weather and dried bird poop, still working hard to feed us!
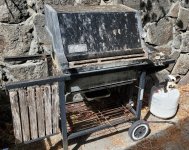
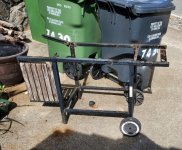
the cross bar had rusted off a long time ago, and you can see where the rear arm rusted away where it meets the vertical support. the weight of the food on the table caused the whole thing to give way.
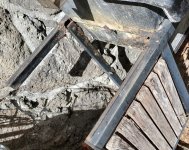
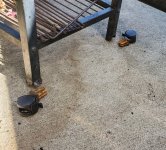
I don't move the grill around too much, so when I tried rolling it to the front of the house, the two small wheels fell off where the legs were rusted through also!
pulled the box and pieces out of the frame. all square tubing except for the plate that holds the starter - will need to fab that piece.
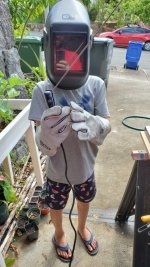
hired the best welder in the house to work on the new frame. turned out to be a fun project with the boy!
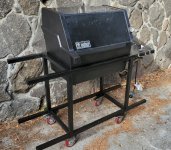
after a bunch of welding and grinding, we have our new frame. I wasn't planning on using the propane tank hanger anymore (never used it before really), so I extended the lower frame so I could add a couple shelves below. also added rotating, locking casters instead of the standard wheels so it's easier to roll around. I never used the extended table, so I didn't bother setting the frame up to use it.
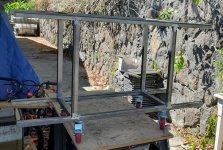
test fitting the side table, control panel, and lower shelf.
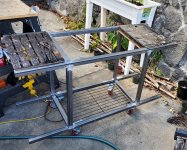
test fitting the box. it was at this point I realized the upper frame wasn't symmetrical, so I had to cut out the right side cross bar and weld it back in 1/2" over.
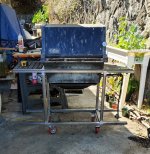
I thought I was going to need a combination of matte and semi gloss paint, but it turn out everything is best done in gloss.
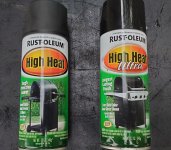
frame was painted in gloss, and I disassembled the lid and box for cleaning and painting. as you can see, matte looks gray, so I repainted in gloss. this was a bigger mistake than I thought, since it took a bunch of matte paint to cover the box, and then after I decided to repaint with gloss, it had the effect of sucking up the gloss so I probably used 2x as much gloss paint to cover up the matte! you can't really tell from this picture, but the lid finish is still perfectly smooth, but it does have the speckled fading the black lids seem to suffer from. 25 years, and the cook box is solid enough to last another 25. I did have a frozen hinge pin that I could not get off. I just cut the end off on one side and it works perfectly fine.
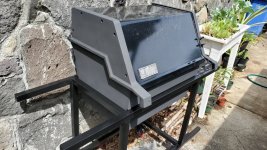
box repainted in semi-gloss. much better.
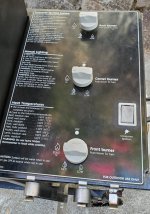
my knobs were in rough shape - cracked and a little crumbly. the replacements I ordered had the same part number, but were much bigger than the original. starter switch was fine. I noticed that the gas hose wasn't very flexible anymore, and had a permanent kink where it hung down from the tubes (didn't seem to affect performance), but I used it as an excuse to replace it with a standard screw on adapter, vs the quick connect that wasn't very quick to change. the one I found has 90 degree fittings so there is no more bending in the hose.
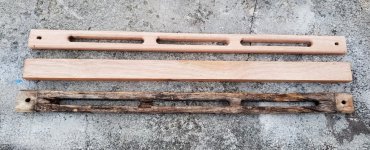
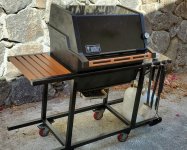
the handle was in rough shape, and about to disintegrate. I picked up some dimensional mahogany lumber from the big orange store, and milled out a pretty good facsimile. was thinking about some kind of oil finish, but ended up just brushing on some matte spar. used the same lumber to rebuild the side table. this is the second time I've rebuilt the side table with this wood, and that was still in decent shape goin 10 years uncovered.
cleaned up the name plate, and she looks good!
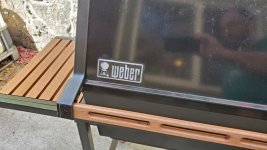
still trying to figure out if I should add some perforated plate for the lower tables, or just lay some wood across it knowing I'll have to replace it occasionally due to drips, weathering, etc. finally sprung for a new cover, so hopefully this will last much longer! side paint looks a little splotchy in this photo, but could be the light since it doesn't appear that way irl.


so proud of myself for saving the Genesis, I bought a new 18.5" smoker as a reward (too good of a deal to pass up)!
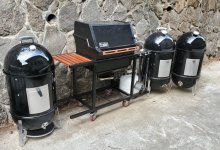
see everyone in 2030!
Aloha,
Kevin
sadly, she finally signaled she might need a break, when the back arm holding the side table rusted through, and she dropped an entire tray of grilled meat!
I hadn't looked at new grills in forever, and I was a little shocked at both the price of a new grill, and how the materials didn't seem to be as sturdy as the OG Genesis at home, so I picked up $80 worth of square steel tubing, a set of casters, and went about rebuilding my grill frame.
so ashamed I let it get to this. covered in weather and dried bird poop, still working hard to feed us!

the cross bar had rusted off a long time ago, and you can see where the rear arm rusted away where it meets the vertical support. the weight of the food on the table caused the whole thing to give way.

I don't move the grill around too much, so when I tried rolling it to the front of the house, the two small wheels fell off where the legs were rusted through also!

pulled the box and pieces out of the frame. all square tubing except for the plate that holds the starter - will need to fab that piece.

hired the best welder in the house to work on the new frame. turned out to be a fun project with the boy!

after a bunch of welding and grinding, we have our new frame. I wasn't planning on using the propane tank hanger anymore (never used it before really), so I extended the lower frame so I could add a couple shelves below. also added rotating, locking casters instead of the standard wheels so it's easier to roll around. I never used the extended table, so I didn't bother setting the frame up to use it.

test fitting the side table, control panel, and lower shelf.

test fitting the box. it was at this point I realized the upper frame wasn't symmetrical, so I had to cut out the right side cross bar and weld it back in 1/2" over.

I thought I was going to need a combination of matte and semi gloss paint, but it turn out everything is best done in gloss.

frame was painted in gloss, and I disassembled the lid and box for cleaning and painting. as you can see, matte looks gray, so I repainted in gloss. this was a bigger mistake than I thought, since it took a bunch of matte paint to cover the box, and then after I decided to repaint with gloss, it had the effect of sucking up the gloss so I probably used 2x as much gloss paint to cover up the matte! you can't really tell from this picture, but the lid finish is still perfectly smooth, but it does have the speckled fading the black lids seem to suffer from. 25 years, and the cook box is solid enough to last another 25. I did have a frozen hinge pin that I could not get off. I just cut the end off on one side and it works perfectly fine.

box repainted in semi-gloss. much better.

my knobs were in rough shape - cracked and a little crumbly. the replacements I ordered had the same part number, but were much bigger than the original. starter switch was fine. I noticed that the gas hose wasn't very flexible anymore, and had a permanent kink where it hung down from the tubes (didn't seem to affect performance), but I used it as an excuse to replace it with a standard screw on adapter, vs the quick connect that wasn't very quick to change. the one I found has 90 degree fittings so there is no more bending in the hose.

the handle was in rough shape, and about to disintegrate. I picked up some dimensional mahogany lumber from the big orange store, and milled out a pretty good facsimile. was thinking about some kind of oil finish, but ended up just brushing on some matte spar. used the same lumber to rebuild the side table. this is the second time I've rebuilt the side table with this wood, and that was still in decent shape goin 10 years uncovered.

cleaned up the name plate, and she looks good!

still trying to figure out if I should add some perforated plate for the lower tables, or just lay some wood across it knowing I'll have to replace it occasionally due to drips, weathering, etc. finally sprung for a new cover, so hopefully this will last much longer! side paint looks a little splotchy in this photo, but could be the light since it doesn't appear that way irl.


so proud of myself for saving the Genesis, I bought a new 18.5" smoker as a reward (too good of a deal to pass up)!

see everyone in 2030!
Aloha,
Kevin

