'95 Genesis 1000 LX Build - Not a Keeper


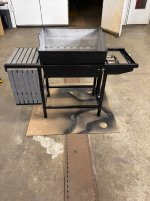
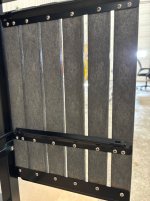
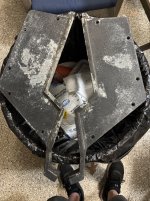
Getting there. I used my full foul language vocabulary with the durawood. I was today years old when I learned about the size differences in the Z bars. Not from the bottom shelf but as in how far it wraps under the slats. The one piece I stole from my work grill was different from what was on this originally. Having figured that out I have one more piece to blast and paint. Used all new SS screws. Hopefully tank scale can get wrapped up tomorrow.

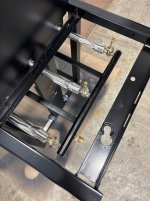
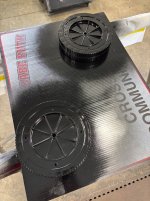
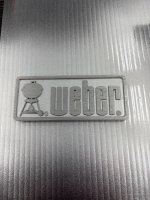
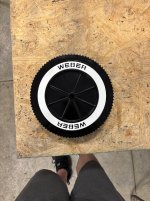
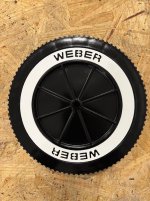
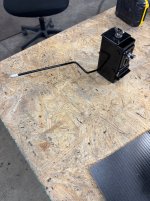
But got the wheels sprayed. Burners in and manifold put on this afternoon. Tried 40grit on an emblem with silver and clear. In person it looks awesome! (It’s not going on this grill). Trying my best to keep this as original as possible.

Hoping to do final assembly At home Friday evening. Stay tuned.
 

Attachments

  • IMG_8903.jpeg
    IMG_8903.jpeg
    248.8 KB · Views: 7
  • IMG_8905.jpeg
    IMG_8905.jpeg
    300.7 KB · Views: 4
  • IMG_8906.jpeg
    IMG_8906.jpeg
    335.1 KB · Views: 5
  • IMG_8907.jpeg
    IMG_8907.jpeg
    243.5 KB · Views: 6
  • IMG_8900.jpeg
    IMG_8900.jpeg
    403.8 KB · Views: 6
Something else I did today. Redid the tank scale. I got it done and something just seemed off. Like something was missing. Then it hit me! I needed the stickers that @Jon Tofte makes! Now it is complete!

When doing one this in-depth and trying to ensure every detail is accurate, these stickers will just top it off for me… and then for someone else… I think.
 

Attachments

  • IMG_8917.jpeg
    IMG_8917.jpeg
    379.6 KB · Views: 3
  • IMG_8919.jpeg
    IMG_8919.jpeg
    247.3 KB · Views: 3
Something else I did today. Redid the tank scale. I got it done and something just seemed off. Like something was missing. Then it hit me! I needed the stickers that @Jon Tofte makes! Now it is complete!

When doing one this in-depth and trying to ensure every detail is accurate, these stickers will just top it off for me… and then for someone else… I think.
You gotta put the sticker back on it or it just isn't right. Nice job on that scale, did you sandblast those parts too?
 
You gotta put the sticker back on it or it just isn't right. Nice job on that scale, did you sandblast those parts too?
It was so good I opted not too, plus since it was so full of grease inside, I got as much of it out and as clean as I could on the inside. But I didn’t want all that blasting stuff getting stuck in the residue, as well as contaminating the blast cabinet. But there wasn’t a single spot of rust scale on it.
You guys make me feel guilty.
I just wanted to go full bore on this one. This is realistically only my 3rd full rehab. And I thought this one was the right candidate to go crazy on.
 
Last edited:
So this is the lid and end caps that are original to the grill. Lid looks worse in pics than in person and is scratch/rust free. Control panel is a spare I have with slight fade.

I’m scared of using these end caps due to what the insides look like after just a quick hand wire brushing. They remind me of a couple sets that looked like they had earthquake lines going thru.
 

Attachments

  • IMG_8921.jpeg
    IMG_8921.jpeg
    190.7 KB · Views: 9
  • IMG_8925.jpeg
    IMG_8925.jpeg
    398.3 KB · Views: 9
  • IMG_8924.jpeg
    IMG_8924.jpeg
    283.7 KB · Views: 9
  • IMG_8923.jpeg
    IMG_8923.jpeg
    414.4 KB · Views: 9
I’m scared of using these end caps due to what the insides look like after just a quick hand wire brushing. They remind me of a couple sets that looked like they had earthquake lines going thru.
I would think you would see that on the outside as well if it was going to be a problem. Enough of the paint is missing on them. Are those too big for your sandblast cabinet?
 
I’m scared of using these end caps due to what the insides look like after just a quick hand wire brushing. They remind me of a couple sets that looked like they had earthquake lines going thru.
Low nap roller will give you a from factory look with light texture and will also hide any flaws in the aluminum. It's my go to for end caps and cookbox. I like it for those two reasons. You get that light texture that they came with from the factory and that's probably why they did that. To hide any flaws in the aluminum casting.

Screenshot_20250423_212747_Photos.jpgScreenshot_20250423_212245_Photos.jpgScreenshot_20250423_212529_Photos.jpgScreenshot_20250423_212915_Photos.jpgScreenshot_20250423_212833_Photos.jpg
 
Low nap roller will give you a from factory look with light texture and will also hide any flaws in the aluminum. It's my go to for end caps and cookbox. I like it for those two reasons. You get that light texture that they came with from the factory and that's probably why they did that. To hide any flaws in the aluminum casting.

View attachment 111480View attachment 111479View attachment 111481View attachment 111482View attachment 111483
That looks really good, I'll have to try that next time.
 
My old technique gave similar results but was harder to keep even and consistent. Still worked good though. Save some almost empty spray cans for finally coat because they splatter at the end of the can and if you take your time you can evenly texture the end caps and box.

Screenshot_20250423_222028_Photos.jpg
 
Thank you Steve! I think it still looks great without texture.
My preference has always been to keep the original paint on the cook boxes and end caps which is why I power wash them first. If all the paint is still on them afterwards I know the new paint will stick with proper preparation. You can blend in chips by sanding them down to minimize the difference in thickness.
 
My preference has always been to keep the original paint on the cook boxes and end caps which is why I power wash them first. If all the paint is still on them afterwards
Good idea! I did that on my green 1000LX. It just needed small touch ups but I wanted it even so I did a repaint


Back
Top