so how are you attaching your blower to the smoker


I think I have around 16 or 17 holes at 6mm each, I would need to go home and check to be sure. I'd read the post about overshoot so I started off with with about 12 3mm holes, then added more, then made them 4.5mm, then made them 6mm and then decided the bottleneck was the 15mm input pipe. At 6mm I could hold 120C but go no higher and the fan had to remain on 100%, plus it took around an hour to reach target. Once I added the second input pipe it was much faster to get to temperature and then it held it steady with the fan < 20% so the fire wasn't drawing through the injector. I know you only had the one input pipe Ralph which I why I started out with that but my tests suggested that's where my issue was, maybe the 57cm WSM needs a bit more air?

I should add that my WSM has little to no air leakage, the door and top have a nomex gasket installed and the other vent holes are covered in aluminium tape. I also tape around the input pipes as they go into the vent holes on the front. I'll probably have it on again at the weekend as a final test before my next big BBQ on the 16th for the boy's 2nd birthday.

The WSM is a bit larger than my water smoker, but I doubt that would be the reason why you seem to need more flow. I would guess it probably seals off a lot better than my cheapo smoker, that would more likely be the reason why you needed the two tubes to get the flow you need. Thanks for posting about your experience building an air burner, I only know what I have learned from my experience, seems like you went about building and tweaking yours using the exact right process and your implementation looks really nice! Hats off to you for a job well done, and thanks for sharing your experience with others...
 
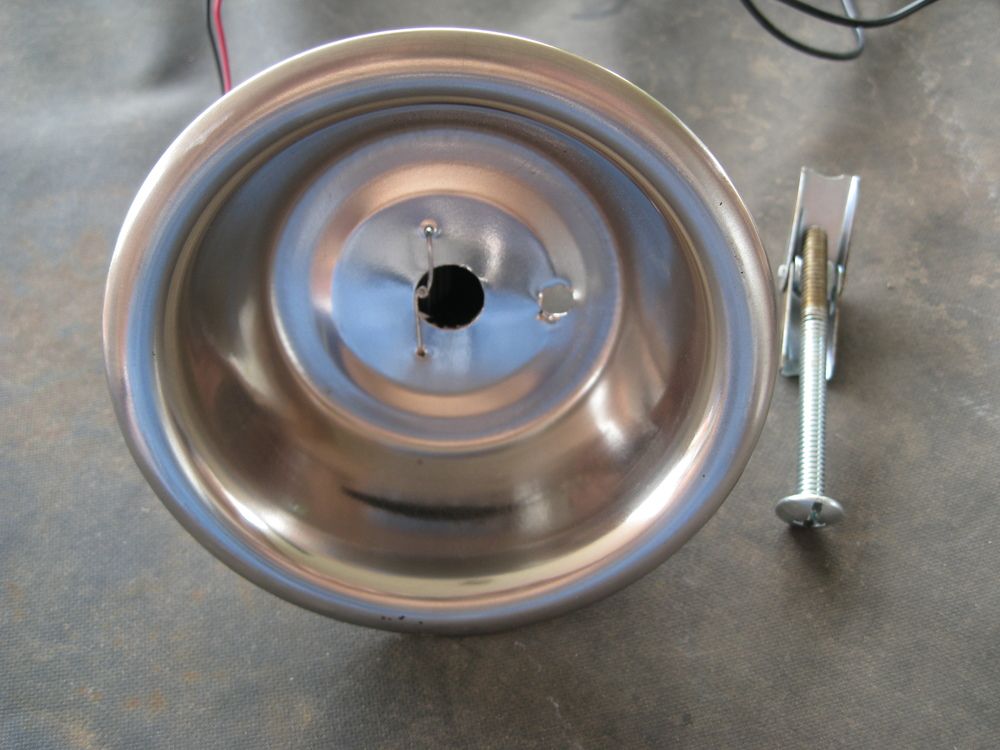
Cheers Ralph. Thinking back, the first HeaterMeter (pre-burner) test I did I did was pretty unsuccessful and the reason was that the aluminium tape hadn't arrived so the vents weren't sealed off, only closed. I'd used a spare steel cup-holder from my poker table build to cover the front vent and mated the fan to that, I'd used duct tape to stick it all together and when I set it all going the temperature shot up to the 160c range... to the point where I had to cool the front of the WSM with water because the tape was starting to melt. Even with the fan off the air leakage was massive from the closed vents, so you're probably right that it needs the two pipes because it's sealed tight now. You can still see the marks from that experiment on the front of the smoker, that tape doesn't like being melted :D
 
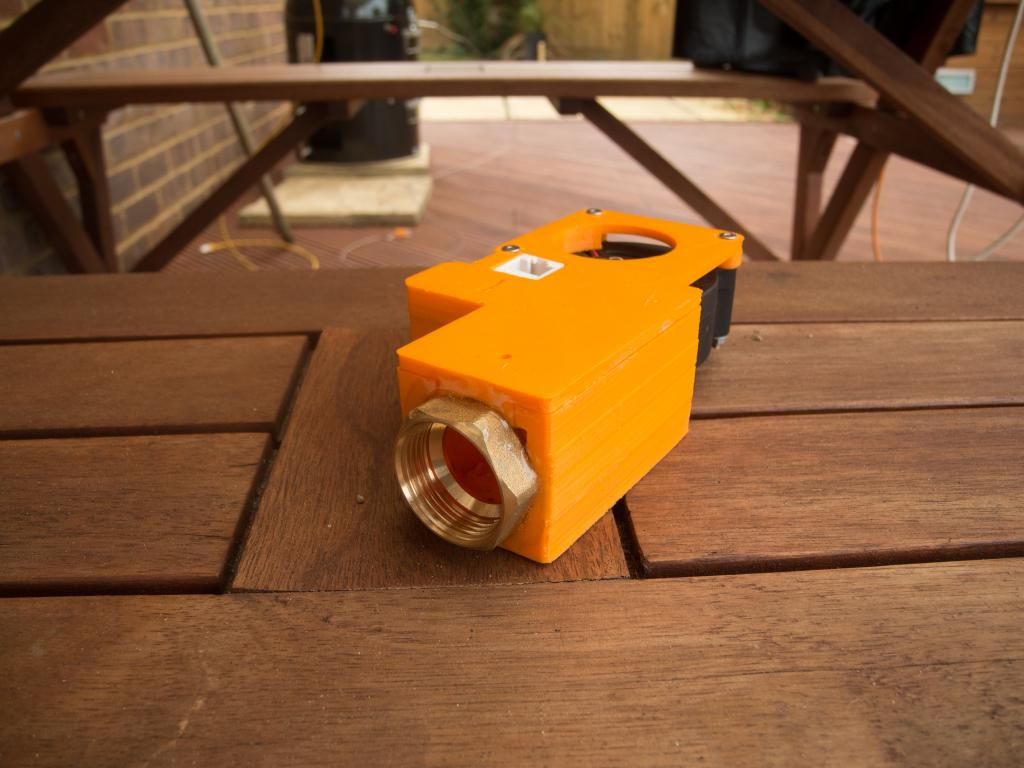
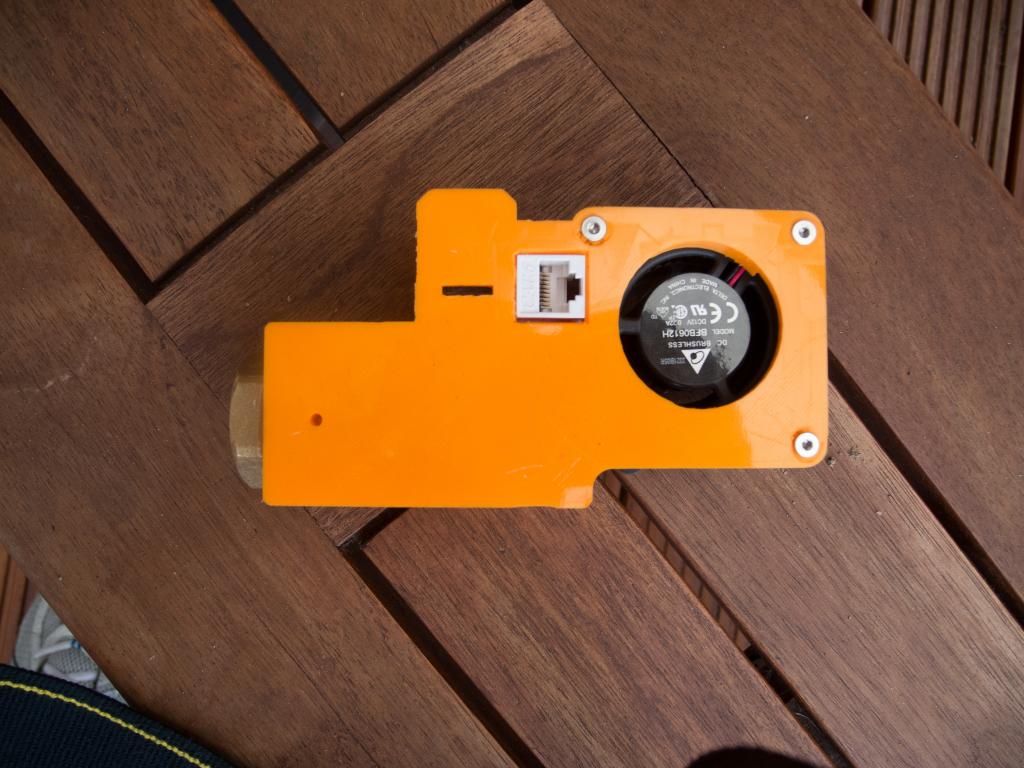
My V2 Rotary Blower lives! Thanks Tom Kole for the excellent design. The 3D prints I had done by a local bureau were pretty poor and need a lot of sanding and filing to get to a functional state. Job done and this was the result;

DSCN3032_zps1634ec63.jpg


I opted to use the 22mm brass compression fittings so epoxied a nut onto the outlet;

DSCN3031_zps4f14e0c6.jpg


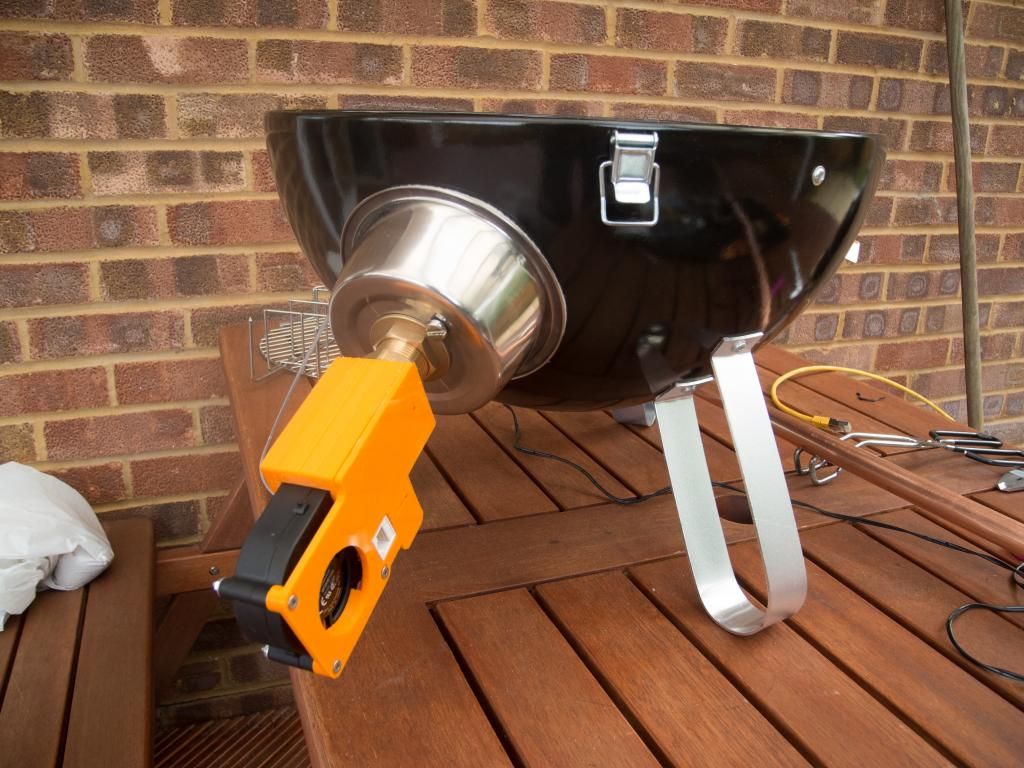
My first attachment was the dog bowl method and used a Tank Flange Compression fitting in 22mm;

DSCN3035_zps01500f6e.jpg


This proved to be unsatisfactory with the HeaterMeter not able to get decent control. I played with the PID values for two test burns but could not get to a happy control. I'm pretty sure the problem was the side entry of the blown air. Using Heat Beads, the pit oscillated by 30-50F and nothing I tried stabilised it. This is the problem;

DSCN3036_zps6efcd5ec.jpg


So time to build an Airburner! Thanks Ralph Trimble for the idea!

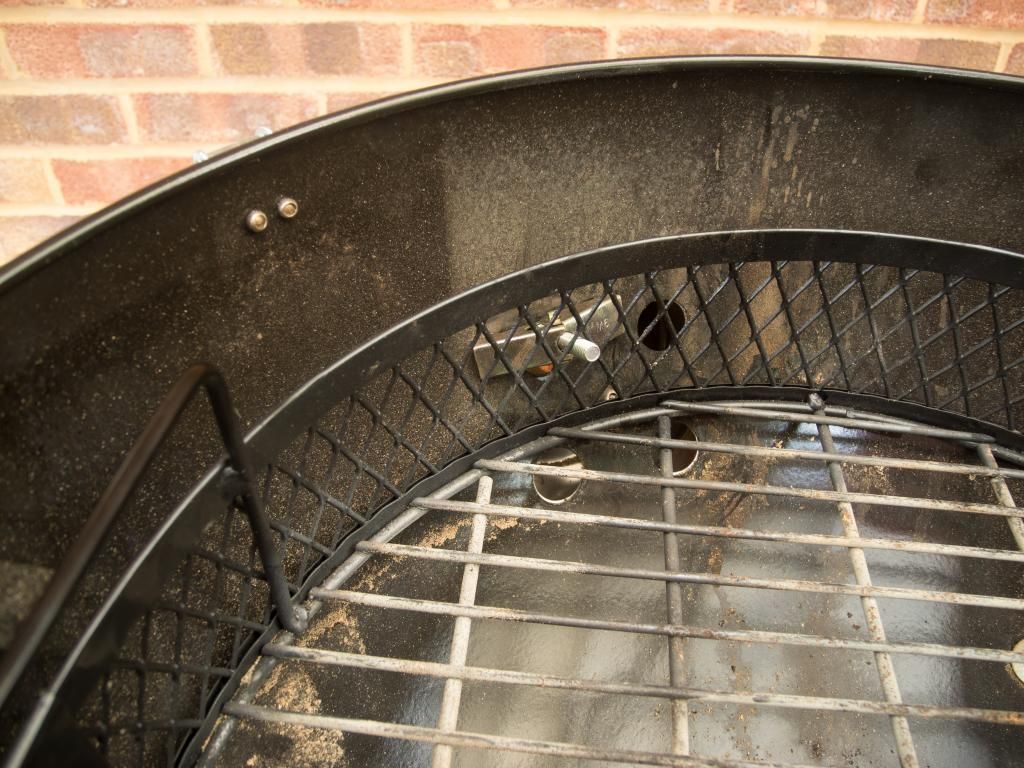
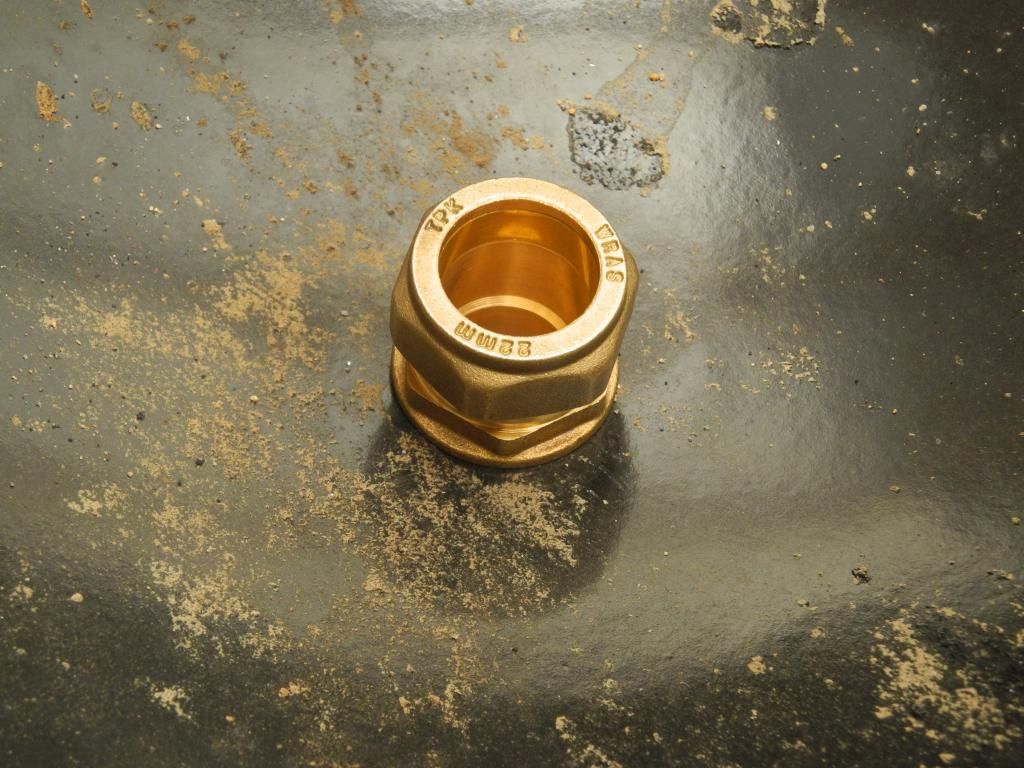
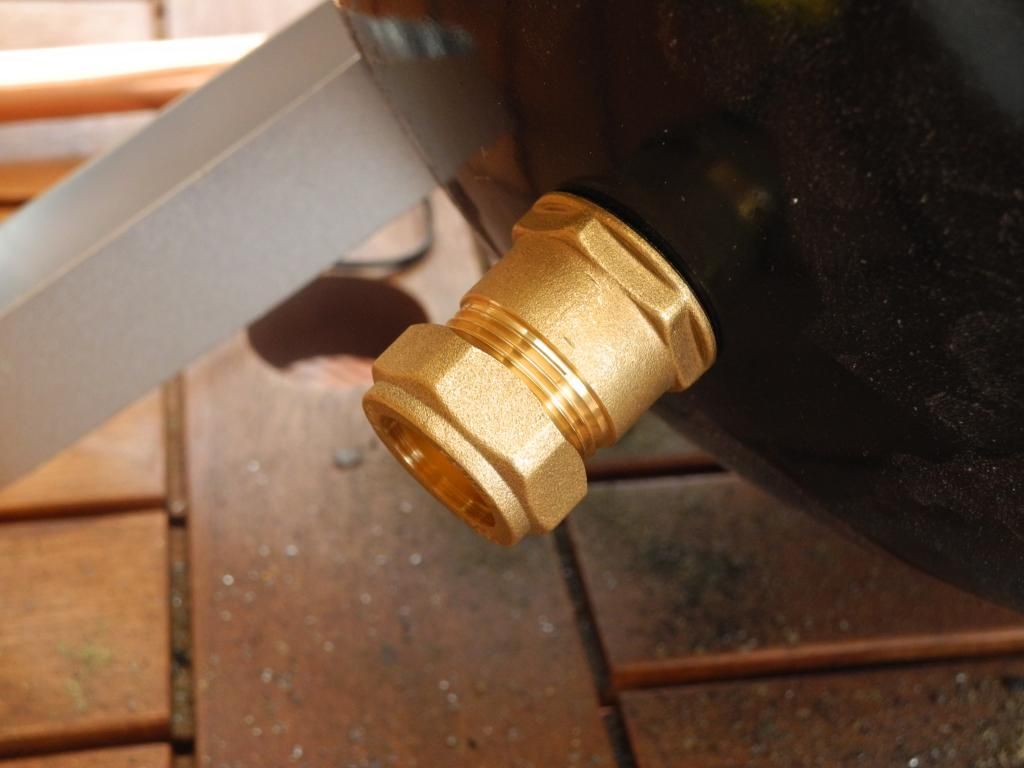
I decided to go with 22mm copper pipe (nearly 3/4") and drill a hole in the bottom of the smoker. I've used stock copper fittings readily available in the UK so this makes the build real easy and the Airburner can be removed and the hole plugged with a stock end plug fitting. I used a compression Male Iron Coupler and a compression Female Iron Coupler to "bridge" the newly created hole in the bottom of the smoker. This in side the smoker;

DSCN3037_zpsaea149c6.jpg


And this outside;

DSCN3038_zpscc35d5b9.jpg


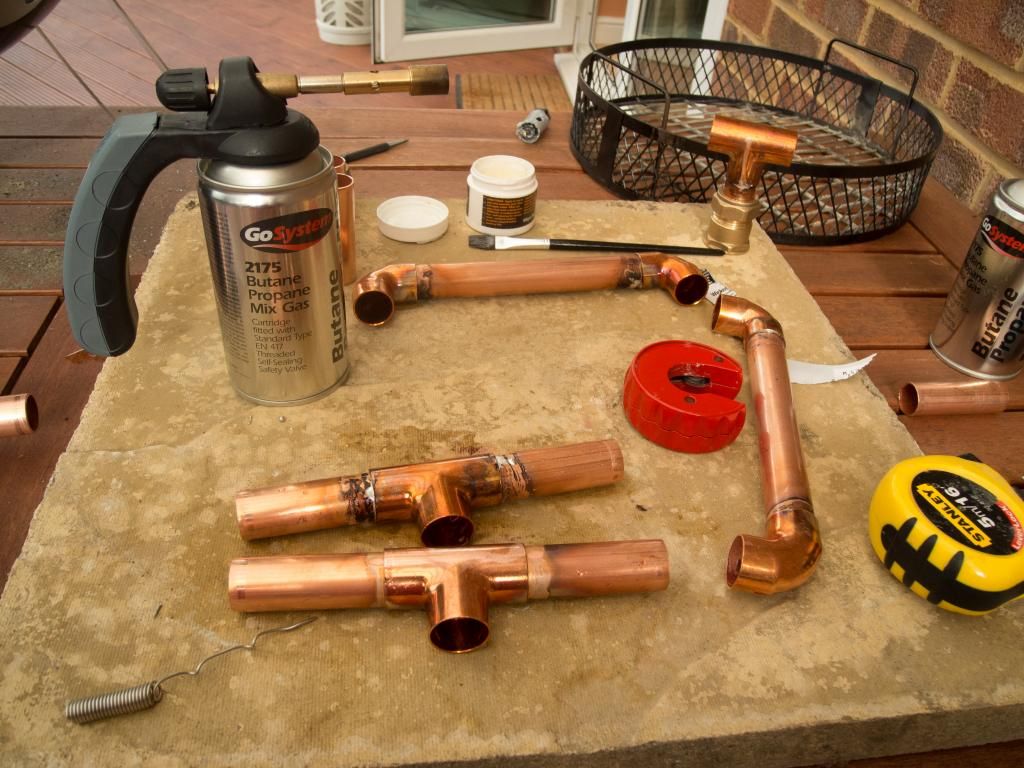
Then onto the Airburner build;

DSCN3040_zps655bbbd9.jpg


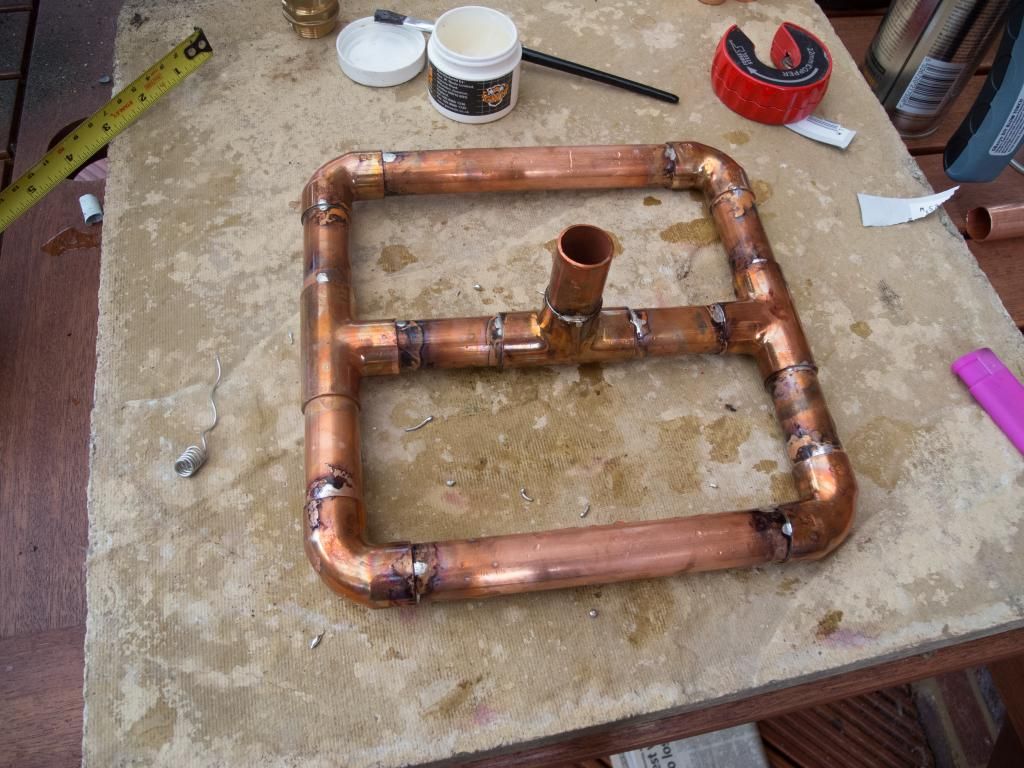
The finished item;

DSCN3041_zpsf4289515.jpg


A final 90deg elbow and a few extra pieces of 22mm pipe plus a 22mm Compression Coupling means I use the same nut that I glued on for the Dog Bowl;

DSCN3042_zpsdecf452d.jpg


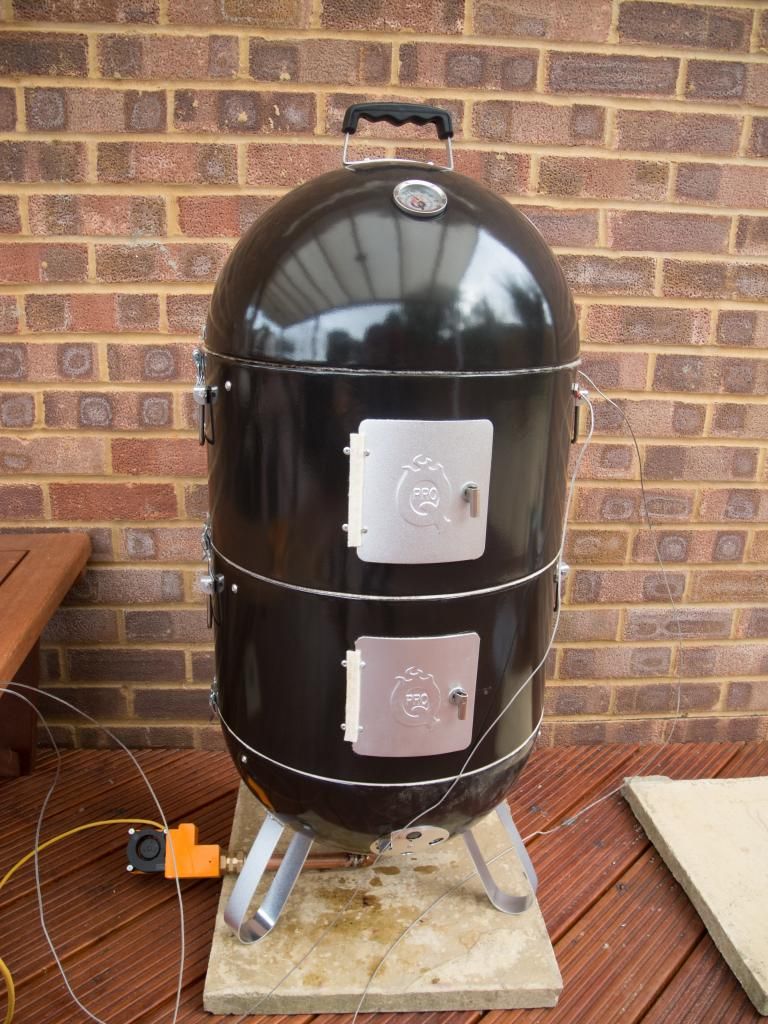
Pit is now almost Rock-Solid. I'll have fun tweaking the PID values for months yet!!

3 hours later and still within a degree of 225F either way.

DSCN3043_zpse963e898.jpg


Thanks again to Brian, Tom & Ralph for all your hard work and superb design.
 
Last edited:
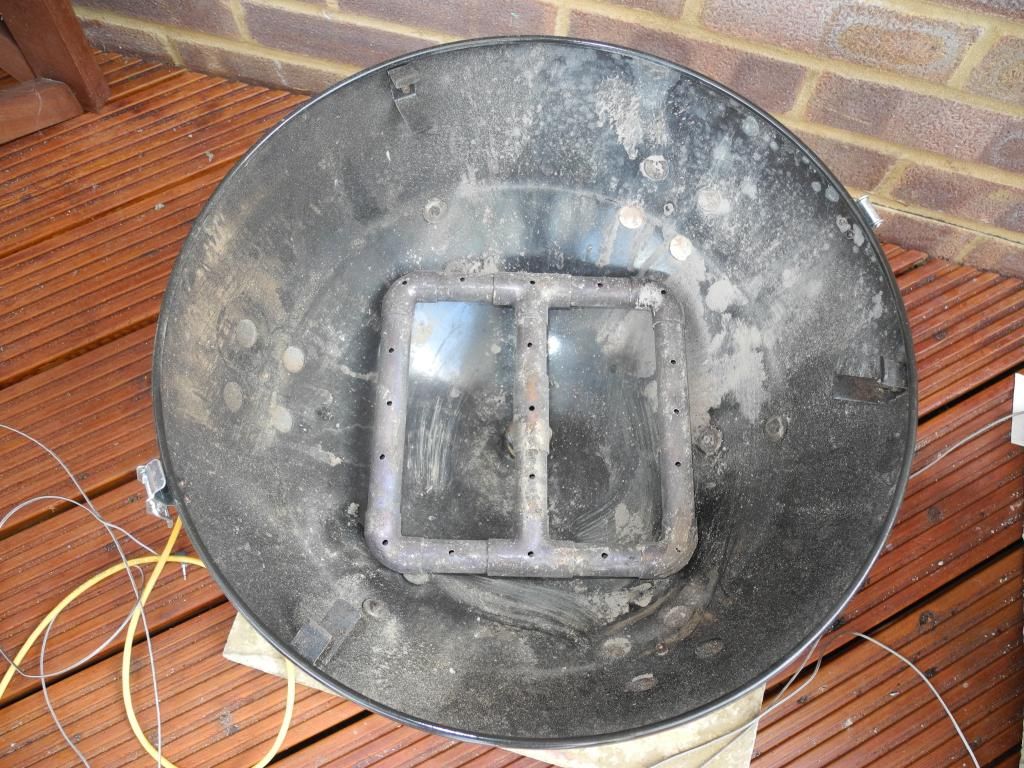
Here is the "airburner" installed in the fire bowl;

DSCN30471_zps8d58c2d7.jpg


4mm holes but I may increase these to 5mm. I struggle to get the smoker to over 325F last night but this may have been other causes!
 
WSM Fan & damper

Still very much a newbie here in the UK. A friend very kindly built me a Heatermeter for my WSM. Here's my attempt at mounting a fan & damper to the WSM.

I used PVC ventilation fittings with a servo operated in line valve. The beading is high temp silicon rubber to try and get some thermal protection for the plastic.

I've used it on a short cook & it performed very well, no doubt I will have to tweak the settings as I learn how it works.

Hardly elegant, but very cheap to build and so far at least seems to do the job :)

IMG_0925.JPG


IMG_0926.JPG


IMG_0927.JPG


What a fabulous resource this place is :)

Cheers - Bob
 
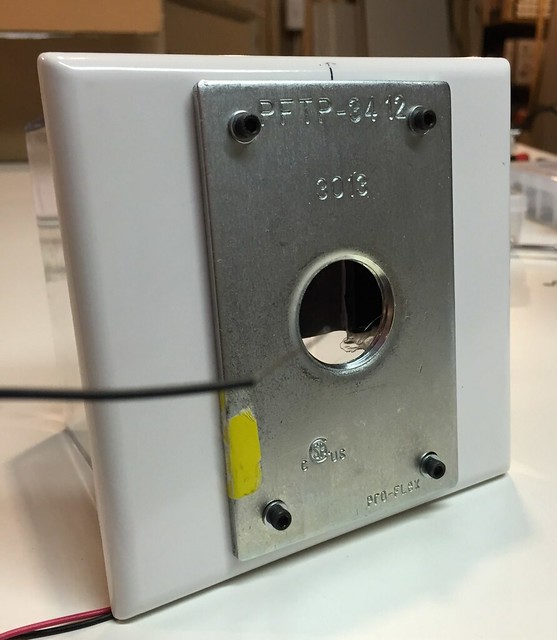
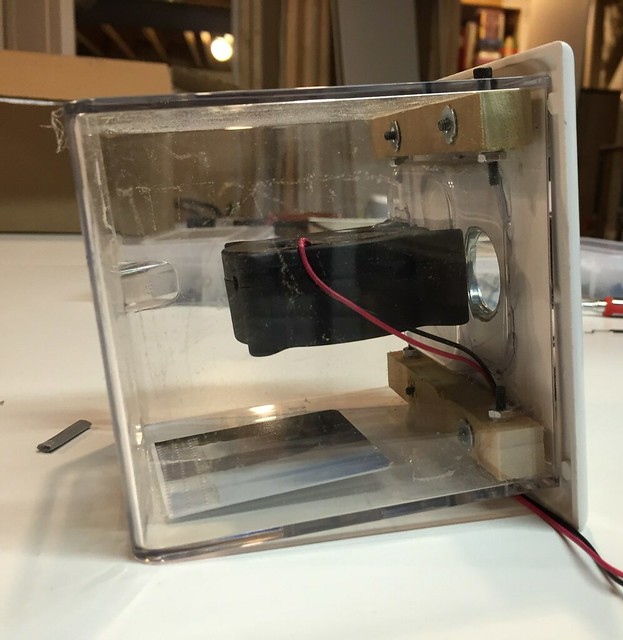
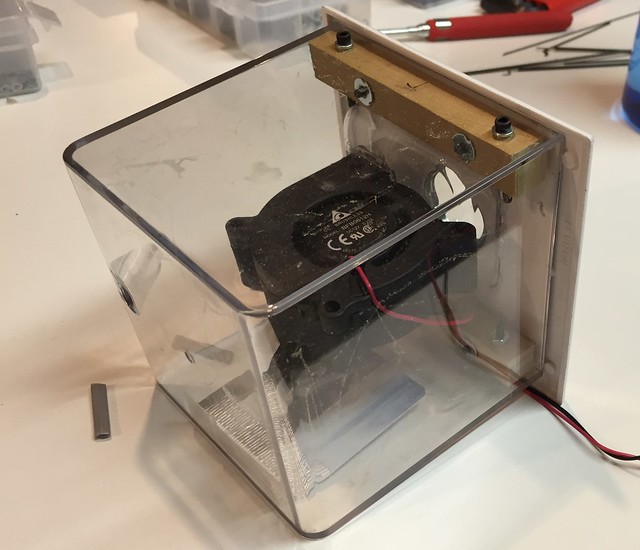
Here's my blower enclosure. It will screw onto anything with a 3/4" nipple, which already is on my Mini WSM and soon will be on my 18" WSM and 22" OTG. I really like how it turned out and can't wait to try it. The clear box was a happy accidental find in the garage...from a GoPro.


Still very much a newbie here in the UK. A friend very kindly built me a Heatermeter for my WSM. Here's my attempt at mounting a fan & damper to the WSM.

I used PVC ventilation fittings with a servo operated in line valve. The beading is high temp silicon rubber to try and get some thermal protection for the plastic.

I've used it on a short cook & it performed very well, no doubt I will have to tweak the settings as I learn how it works.

Hardly elegant, but very cheap to build and so far at least seems to do the job :)
...

What a fabulous resource this place is :)

Cheers - Bob

Agreed !

I like your selection of parts and seeing the damper and servo as part of the design. That fan should make all the heat you will ever need ! Keep an eye on it though.... I have had fans die from the radiant heat soak when the fan is not blowing air for long periods of time. I had to modify one of my designs so the air passage takes an elbow to keep the radiant heat from having "line of sight" to the fan.
 
Here's my blower enclosure. It will screw onto anything with a 3/4" nipple, which already is on my Mini WSM and soon will be on my 18" WSM and 22" OTG. I really like how it turned out and can't wait to try it. The clear box was a happy accidental find in the garage...from a GoPro.
...


Mike,
I like the idea of having some metal in between the fan box and the smoker... gives some opportunity for the operating temp to be lower for the fan. Is that piece of metal on the bottom some kind of flapper door for the air inlet ? Also, I was trying to figure out how the square output of the fan is sealing against the round 3/4" hole. In photo #3, the square output of the fan seems to be glued to something, but in photo #1, I can see one of the edges of the fan's square output... Are you using some other clear parts (?)

Edit
I think I see it now... the fan appears to be hanging in the air, but the outlet is glued to a clear "recessed square" shape behind the plate with the conduit fitting.

Are you planning to use the box for the Heatermeter too ?
 
Last edited:
My V2 Rotary Blower lives! Thanks Tom Kole for the excellent design. The 3D prints I had done by a local bureau were pretty poor and need a lot of sanding and filing to get to a functional state. Job done and this was the result;
...

Ho Ron,
I like your basket shown in photo 2... is that home made or a stock part ? I am a noob on the Weber parts....
 
Ho Ron,
I like your basket shown in photo 2... is that home made or a stock part ? I am a noob on the Weber parts....

Hi Gary, The smoker is the Frontier model from ProQ made by Macs BBQ. I believe they are marketed under the Napolean brand in North America. The basket is their stock part. I know replacements are available here in the UK and may also be available across the pond. It's also up on Amazon UK at http://www.amazon.co.uk/gp/product/B00JLCBOA8/ref=as_li_tf_tl?ie=UTF8&camp=1634&creative=6738&creativeASIN=B00JLCBOA8&linkCode=as2&tag=msb0a0-21
 
Mike,
I like the idea of having some metal in between the fan box and the smoker... gives some opportunity for the operating temp to be lower for the fan. Is that piece of metal on the bottom some kind of flapper door for the air inlet ? Also, I was trying to figure out how the square output of the fan is sealing against the round 3/4" hole. In photo #3, the square output of the fan seems to be glued to something, but in photo #1, I can see one of the edges of the fan's square output... Are you using some other clear parts (?)

Edit
I think I see it now... the fan appears to be hanging in the air, but the outlet is glued to a clear "recessed square" shape behind the plate with the conduit fitting.

Are you planning to use the box for the Heatermeter too ?

You spotted it. The inner clear box was the lid from iPhone earbuds. The bottom was supposed to be a flapper door covered by a piece of gift card, but it didn't flap. I actually had to tape over it as it was letting in too much air during my first cook, so that will have the cat5 jack in it instead. It worked great on its first run.
 
For the guys that have made these, are you finding that not having a flapper on the intake a problem? Especially the ceramic guys, I have to have my bottom vent barely open to maintain 250 and thats not using any sort of controller? I bought some sheet aluminum to mimic the stoker fan setup, but was just wondering what other have found.
 
I want to attach an "AirBurner" to my WSM ...and connect that to the fan. Ideally I don't want want to cut any holes in the WSM so I'm thinking of going through the holes in one of the dampers. Have I missed seeing someone who's already done that? Any tips?

Also, I've seen plugs that fit perfectly into the holes in the dampers of a WSM, but I have no idea where to get them. Any ideas?
 
Typically they use a stainless dog food bowl. If you use one of those spring loaded drywall anchors that should hold it fairly well through the existing holes.

IMG_0624resized_zpsdb5b2151.jpg
 
I want to attach an "AirBurner" to my WSM ...and connect that to the fan. Ideally I don't want want to cut any holes in the WSM so I'm thinking of going through the holes in one of the dampers. Have I missed seeing someone who's already done that? Any tips?

I did an airburner through the vent holes of my WSM 22.5". Had a real interesting time figuring out a de-mountable solution and was never happy with it. If I were to do it again, I would drill a hole through the bottom.

Also, I've seen plugs that fit perfectly into the holes in the dampers of a WSM, but I have no idea where to get them. Any ideas?

See this thread:
http://tvwbb.com/showthread.php?58808-High-temp-tape-for-vent-holes&p=652150&viewfull=1#post652150
 
Hello Dan Francis. I am intrigued by your "cigar box" attachment. I have been thinking of ways I could use a blower on my OTG - without drilling holes. Do you have any other pictures that show more detail? You could PM them to me if that is better.
 
Phillip P, thanks for speaking from experience. I looked yesterday and realized that the vents come in beside the charcoal bowl rather than under it so other than getting really creative, I concluded the bowl is going to have to be cut. I'm not QUITE ready to do that yet. Did you figure out a way to seal up the bottom hole when not in use with a blower?


Back
Top