Heatermeter Aux. Thermocouple And two probe board V6.1(Final Version)


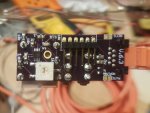
Thanks Ralph, that worked great!

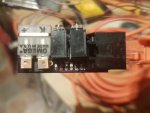
The only problem I had was finding panel mount jacks. For some reason I couldn’t find any on DigiKey or Mouser that were panel mount 2.5 mono jacks. Had to order some from Amazon and they’re junk, but they’ll do for now. If anyone knows what I’m doing wrong on looking the part up, lemme know.

Edited to add: Well, I just searched again and found several. I must have had something wrong with the DigiKey search filters the last time.
 
Last edited:
yes, there are several options for panel mount 2.5mm jacks...

The ones I chose for the Aux thermocouple board are actually panel mount, so they can be used in either the AUX board or in the standard pit probe configuration without the AUX board. . The picture at Mouser for the probe jack on the AUX board parts list is actually wrong, if you look at the datasheet you will see the actual shape of the jack, you want the ones that have the enclosed rectangular box. There are at least two manufacturers that make parts in this style. They look like this:

mj1_2502_SPL.jpg


Make sure NOT to get the style like on the HM board (the open ones where you can see the connectors inside), those are too wide...
 
Last edited:
This ought to be a sticky thread. Or at least linked to in the adaptadamper thread.

Just got the prints back from a friend and this board clicked in very nicely into the fan frame.
Excited to get the fan up and in action. I've had the board soldered up for almost two years!
 
whew. Trying to dig into the HM wiring side of this thing. I've got the following wired in the setup below.

HM Version 4.2.4 board with TC pit probe.
6.3 aux board with all the bells and whistles.
  • Ethernet pin 8 ground to power jack ground.
  • Ethernet pin 1 to probe 1 output
  • Ethernet pin 2 to probe 2 output
  • Ethernet pin 7 to left hand side of 100k TC resistor (note if modding board already built you must desolder leg of resistor from board).
  • OR in lieu direct connection to pin 7 as described above. Wire the 100k TC resistor to middle connection of a SPDT with one output to Ethernet pin 7 and one output back to board. See black switch shown in diagram posted below. This allows you to either have a TC at the HM or a TC in the aux board depending on the SPDT switch position.
** EDITED. updated list above to prevent future confusion. The four items above are correct.
 
Last edited:
John, I found this
ExcCjyZ.jpg


It sounds like I need to connect my 100K resistor to a switch, and connect that, GND, and the probe signal wires to their appropriate places on the ethernet jack. is that correct?

Here is the schematic with the switches mentioned above.
 
John - Thanks for confirming. Sometimes uncertainty in information at hand can be confusing!

After a little thought and digging out my 4.2.4 board diagram, I figured things out. I had tied the two aux board probes into the ground side of each board probe jack. I didn't realize there were additional spots for the probe connections already on the board and was confused with the location of the J2 connection another poster had mentioned.

Since I didn't have a small enough SPDT switch on hand i just connected the 100k resistor directly to pin 7.

What do you guys do to keep the 100k resistor from bouncing around now that one leg is loose?


When I solder the 100k resistor onto the board, I use shrink tubing completely over the wire and 100k resistor. I then route wire around the board so that the resistor does not move
 
Apologies all... I just bought the components for the Heatermeter Aux board, is there a build guide, instructions, or schematic somewhere? Sorry If it's somewhere obvious I've been looking but can't seem to find it. Thanks!
 
Apologies all... I just bought the components for the Heatermeter Aux board, is there a build guide, instructions, or schematic somewhere? Sorry If it's somewhere obvious I've been looking but can't seem to find it. Thanks!

The board is pretty self explanatory, as all the spots are marked.

I always start with the TC amp and the resistors and work up to the bigger parts.
 
Apologies all... I just bought the components for the Heatermeter Aux board, is there a build guide, instructions, or schematic somewhere? Sorry If it's somewhere obvious I've been looking but can't seem to find it. Thanks!
Ralph put one together that is pretty detailed. Post number 55 in this thread.
 
Hi, Apologies in advance....

I was wondering if someone can help me figure out an issue with the board. I've got my HeaterMeter 4.3 all soldered up and running, and everything works on the local end.

But for the life of me I can't get the thermocouple to read on the 6.3 Aux board I just get "No Pit Probe". The servo, blower, and food probes 1 & 2 all work.

I'm using all the components ordered off mouser.
And, I've jumpered the following on the HM 4.3

Pin 8 to GND
Pin 7 to top pole of double throw switch
100K resistor to middle pole of switch
bottom pole of switch to vacant 100K resistor hole
Pin 1 to J2 PROBE 1
Pin 2 to J2 PROBE 2

I've tested the continuity down the Cat5e (it's 10m/30ft long), and did a continuity test on the IC, and there don't seem to be any shorts.

But from there I'm stumped, not sure how to troubleshoot further.

Any help appreciated.... attached images, if useful, to spot any rookie mistakes.
20200414_205541.jpg
20200414_205604.jpg
 

Attachments

  • 20200414_205541.jpg
    20200414_205541.jpg
    96.4 KB · Views: 40
  • 20200414_205604.jpg
    20200414_205604.jpg
    88.8 KB · Views: 38
Hope you are all safe and well.
If any one has a bit of time, I could really use a little help.

I gave up on the other board, I just couldn't seem to get the TC probe to read no matter what I did.
So, I built a new one, from new parts, and a new board, adding only the components for the TC, 3.3v convertor, and bridging REFG (and leaving off all the other jacks except the Cat5 and TC).

The TC reads, but I get the exact same issue as Jason Abendroth had - it recognizes the TC but starts at 500 degrees and slowly lowers to around 200.

I checked the IC pins and they seem correctly connected, the HM 4.3 works properly with local TC.
Any help greatly appreciated.


It's been a log time since I had to troubleshoot a TC board, but have ran into this before and I usually fix it by resoldering the TC amp. I will even work on it while it's on, so I can get feedback while I'm working on it. Even though the TC amp soldering looks good, they aren't. Even using a meter on it can make seems ok as you put just a little pressure on it while checking it, it makes a good connection and gives you a false sense that it's ok.

It's not a good way to work on them but does work if you a very careful, I have yet ruin anything though.

Thanks John,
I ended up re-flowing the board using hot air and managed to get it working. Still out of three that I built, only one worked correctly first time.
If you ever re-design the boards could you give a little more length on the TC amp pads, that way there'd be room for the solder to wick?

Best,
Ed


I would but I used a standard 8 pin IC pad, I would need to manually make the change. Also, I probably would not be able to as is, because I routed alot of traces close to the pads
 
Once this is nailed down , it would be fantastic if this could be offered as a kit and pre soldered on the store (with appropriate mods to the Heatermeater board also as a option and extra fee )

I just dont' have the equipment or skills (dont' have a steady hand ) to do SMD level soldering


Back
Top