• Enter the TVWB 27th Anniversary Prize Drawing for a chance to win a Weber Traveler Portable Gas Grill! Click here to enter!

Genesis Platinum 1000 Restoration


Well, I’m just a rookie all over the board.

Here’s what it looks like so far.

I kept getting these little chunks/pieces of black paint in the roller and was having a difficult time getting clean passes.

We’ll see how it dries, I guess.

View attachment 116249

View attachment 116250
It's too bad that you got a little chunks of hard paint mixed in. That's frustrating but I think it will still look fantastic.

If not then you could always wait for it to dry and then knock down some of the high spots in the texture from the chunks in the paint by sanding it down a little bit to the desired amount of texture and then clean it and then spray paint a coat of the same paint.
 
It's too bad that you got a little chunks of hard paint mixed in. That's frustrating but I think it will still look fantastic.
You think the application looks okay?

I did my best to go back and get those little bits out and smooth over it.

Let me know if you think I had too much/too little paint on the roller, I couldn’t figure out what exactly it needed.
 
You think the application looks okay?

I did my best to go back and get those little bits out and smooth over it.

Let me know if you think I had too much/too little paint on the roller, I couldn’t figure out what exactly it needed.
Did you use 1/4 low nap roller? Just asking because the texture looks a little bit more prominent on yours. I think when your grill is all put together it will look fantastic.
 
That baby is in need of some freshening up. If you’re coming to the Madison area, I’ll give you a fully redone one. Blasted, painted, sanded and clear coated. Or I’ll be in Milton this weekend.

If you want to redo it yourself, I’ve only blasted them so I’m not very good insight on how to prep them for painting.
 
Touched up the cook box and hit the end caps again.

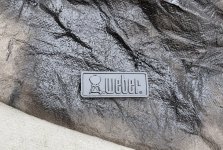
Removed the Weber emblem and cleaned and painted it.

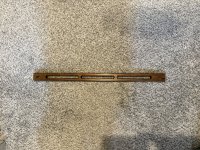
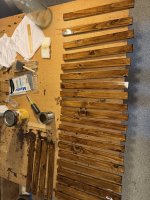
First round of seal on the slats and second round of stain on the handle.

Removed the wheels, cleaned them, and popped off the stencils.

I have an uncle who is getting into 3D printing and is about to retire, so he might be getting some calls from me. He’s going to do fresh wheel stencils. I will post the results and I think he’s looking to do some work with the printing, so you guys might have an option if there are one-off parts needed.

IMG_0791.jpeg

IMG_0800.jpeg

IMG_0801.jpeg


Back
Top