Ducane Gas Grill Restoration - 5004SHNE to 1600SHNE


I think dropping the crossover ignition was a mistake. If a burner blows out it does not reignite. They kept it on the Spirit, and Napoleon has it even though they also have individual igniters. Slight cost savings per unit that adds up with volume.
One igniter and one crossover tube has to be cheaper and easier than multiple igniters, not to mention safer.
 
Probably so, but not as cool. Same goes with the electronic ignition. The old piezo igniters just plain flat out work, and they last 20+ years, they are simple, effective and much cheaper than the electronic versions. Just ain't as cool.
 
Probably so, but not as cool. Same goes with the electronic ignition. The old piezo igniters just plain flat out work, and they last 20+ years, they are simple, effective and much cheaper than the electronic versions. Just ain't as cool.
While I like the electronic ignition, the only real problem with the piezo was that metal box that disintegrated. Just fix that.
 
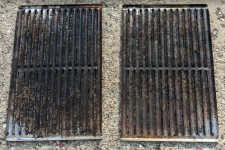
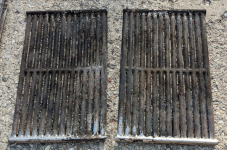
This post fits in nicely with the Skyline discussion yesterday about getting rid of other people's crud. Here are the sear grids from the donor grill:
1686225715504.png
1686225742309.png

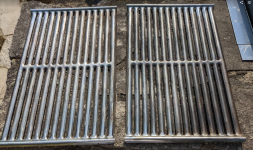
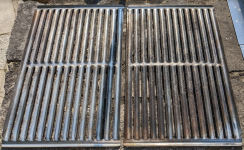
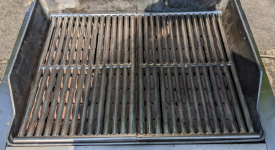
I was not expecting these to take that much effort to clean. But after two rounds of oven cleaner in a garbage bag, a bunch of brushing and scrubbing, and then finally just breaking out the angle grinder with wire cup wheel, I finally got them to a point where I would want to cook food on them.
1686226127806.png
1686226157953.png
1686226189252.png

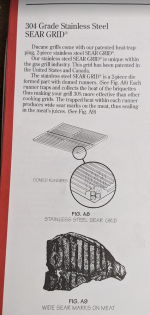
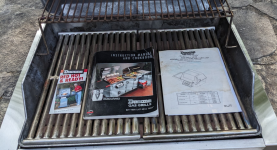
And here's the obligatory snippet from the owner's manual. These remind me a lot of the grates that came with my Silver B, although these are much lighter.
1686225906501.png

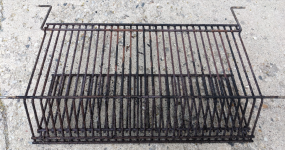
Next up is the cooking shelf. I could use a little advice on how to best attack this:
1686226377046.png

I've sprayed it with oven cleaner and put it in a garbage bag overnight. When I went to scrub it the next day, nothing really came off very easily. I hit some of the wires with the angle grinder and wire cup brush and that worked okay, but that would be a very tedious process to say the least, especially with all of the nooks and crannies. Any other advice? I'm assuming this is stainless steel, otherwise it would be rotted away by now. There has got to be an easier way, right?
 
This post fits in nicely with the Skyline discussion yesterday about getting rid of other people's crud. Here are the sear grids from the donor grill:
View attachment 72212
View attachment 72213

I was not expecting these to take that much effort to clean. But after two rounds of oven cleaner in a garbage bag, a bunch of brushing and scrubbing, and then finally just breaking out the angle grinder with wire cup wheel, I finally got them to a point where I would want to cook food on them.
View attachment 72215
View attachment 72216
View attachment 72217

And here's the obligatory snippet from the owner's manual. These remind me a lot of the grates that came with my Silver B, although these are much lighter.
View attachment 72214

Next up is the cooking shelf. I could use a little advice on how to best attack this:
View attachment 72218

I've sprayed it with oven cleaner and put it in a garbage bag overnight. When I went to scrub it the next day, nothing really came off very easily. I hit some of the wires with the angle grinder and wire cup brush and that worked okay, but that would be a very tedious process to say the least, especially with all of the nooks and crannies. Any other advice? I'm assuming this is stainless steel, otherwise it would be rotted away by now. There has got to be an easier way, right?
Nice work on those grates. Again, Ducane's engineering for those grates seems more like voodoo or marketing hype. "30% more effective than other cooking grids"??
 
Gotta remember in the day what they were comparing to. Thin wire grates space out big enough to drop a 2" thick steak through
Before the days of CI grates and SS grates. I remember a Kirkland Signature all 304 SS grill I had circa 2007 made by Nexgrill. It had stainless wrapped iron grids. Once the thin stainless layer wore away, the iron rods rusted quickly. They did make good on warranty replacement parts though.
 
Before the days of CI grates and SS grates. I remember a Kirkland Signature all 304 SS grill I had circa 2007 made by Nexgrill. It had stainless wrapped iron grids. Once the thin stainless layer wore away, the iron rods rusted quickly. They did make good on warranty replacement parts though.
The Member's Mark in the day had the same thing. There was a phenomena that would happen with those grates where they would literally explode. There would be moisture internally, the grates would get hot and the steam would build literally exploding them. I talked to a few people it happened to
 
The Member's Mark in the day had the same thing. There was a phenomena that would happen with those grates where they would literally explode. There would be moisture internally, the grates would get hot and the steam would build literally exploding them. I talked to a few people it happened to
Something similar to that occurred with mine. When they went, they went fast. Strange they would use 304SS on all other parts of the grill even the included rotisserie motor and spit but than skimp on the grates where it really counts!
 
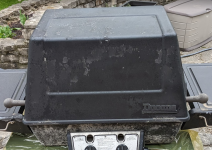
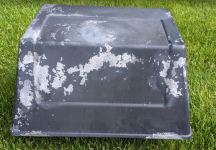
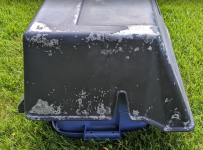
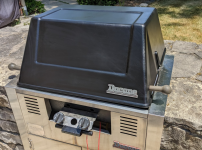
Next up is the lid. Same cast aluminum as the cookbox, so I tried to take the lessons I learned from that and apply it to the lid, since that is what we will be looking at all of the time.

Before:
1686317386187.png
1686317434732.png

After knocking off some loose paint with the wire cup wheel:
1686317614883.png
1686317643889.png

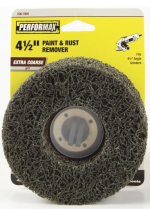
I was getting frustrated at the amount of time it was going to take me to strip the paint, so I bought a couple of these:
1686317772342.png

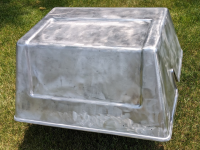
I took off most of the paint, and then eventually went back to the wire cup brush wheel to get a little paint that I missed, smooth things out, and get into a couple of the hard to reach spots:
1686318105476.png
1686318194372.png

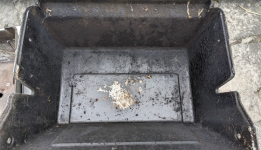
For the inside, I just used the wire cup wheel on the angle grinder and a smaller diameter wire brush on my drill since I wasn't dealing with paint:
1686318311298.png
1686318337526.png

After this, I sprayed it off with the hose to get any residual paint and dust off the surface, and then I sprayed and wiped it down with brake cleaner. Now it is ready for painting.

I want to reiterate - next time I'm going to have it sandblasted. :) I spent a lot of time on this, and also the investment into the wire cup wheel and paint stripping discs which I didn't have on hand. I'm thinking there had to be a better way, but once I got into the process, I couldn't stop.

Out of curiousity, what do folks on this forum pay to have a Weber cookbox sandblasted inside and outside?
 
Sand blasting is sure a lot easier and safer. I think prices vary very much with location and how busy your sand blaster happens to be. Also, bringing them something totally gunked up with grease will make them unhappy and drive up the price. Assuming you at least used some cleaner and got most of the sticky junk off, I would say $40 to $50 for a Weber firebox. My guy will usually do a firebox and two hood end caps for $50 to $60.
 
Sand blasting is sure a lot easier and safer. I think prices vary very much with location and how busy your sand blaster happens to be. Also, bringing them something totally gunked up with grease will make them unhappy and drive up the price. Assuming you at least used some cleaner and got most of the sticky junk off, I would say $40 to $50 for a Weber firebox. My guy will usually do a firebox and two hood end caps for $50 to $60.
That seems very reasonable. I definitely could have cleaned up the inside to get rid of the grease and gunk in a few minutes. I could have avoided $15-$20 in paint stripping discs and probably 3 hours of time. And I would have had a really nice surface for spray painting. Thanks for the info.
 
Next part finished was the lid. I had to clean up a couple of the small details first.

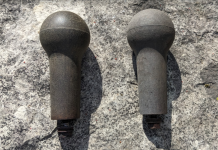
Phenolic lid handles, cleaned up one on the left. These actually have a pretty cool wood look to them, so I'm glad I was able to reuse them rather than buy new black ones:
1686923282380.png

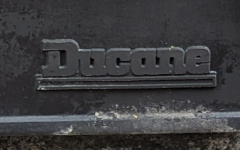
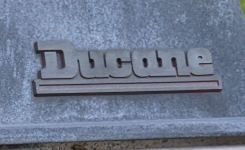
I didn't care for the dark Ducane emblem on the donor grill, so I cleaned up the one on the original grill which had a brighter finish.

Donor:
1686923392442.png

Original:
1686923445877.png

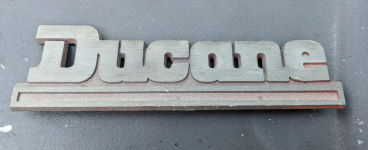
Cleaned up. Maybe at some point if I get ambitious, I'll do that trick that you guys do with the Weber emblem where you paint it black and then sand off the facing to reveal the metal letters and grill logo. You can see something similar with this one, although the backing color for Ducane was red.
1686923574128.png

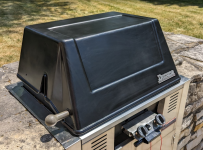
Painted and installed. Shortly after I installed it but before I took pictures, we had a rain storm. I tried wiping it up but it left some smearing on it from the pollen in the air. I thought it would clean up a little nicer for my photos, but you get the idea. I put two coats of the Rust-Oleum Ultra High Heat semi-gloss on it.
1686923902039.png
1686923952400.png

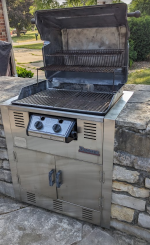
I think all I have to do is clean up the control panel, paint the side caps for it, and reassemble. Then I still have to clean up that multi-level cooking shelf and do a little more work on the stainless steel enclosure. This project is nearing the end.
 
Next part finished was the lid. I had to clean up a couple of the small details first.

Phenolic lid handles, cleaned up one on the left. These actually have a pretty cool wood look to them, so I'm glad I was able to reuse them rather than buy new black ones:
View attachment 72760

I didn't care for the dark Ducane emblem on the donor grill, so I cleaned up the one on the original grill which had a brighter finish.

Donor:
View attachment 72761

Original:
View attachment 72762

Cleaned up. Maybe at some point if I get ambitious, I'll do that trick that you guys do with the Weber emblem where you paint it black and then sand off the facing to reveal the metal letters and grill logo. You can see something similar with this one, although the backing color for Ducane was red.
View attachment 72763

Painted and installed. Shortly after I installed it but before I took pictures, we had a rain storm. I tried wiping it up but it left some smearing on it from the pollen in the air. I thought it would clean up a little nicer for my photos, but you get the idea. I put two coats of the Rust-Oleum Ultra High Heat semi-gloss on it.
View attachment 72764
View attachment 72765

I think all I have to do is clean up the control panel, paint the side caps for it, and reassemble. Then I still have to clean up that multi-level cooking shelf and do a little more work on the stainless steel enclosure. This project is nearing the end.
I like the way the handles came out.
 
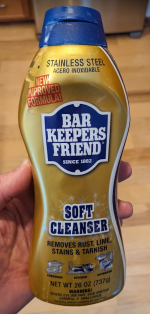
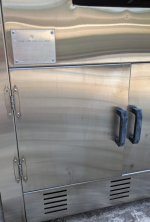
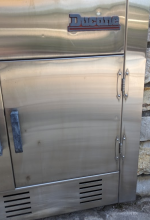
Quick question for the group. How should I go about cleaning up the stainless steel enclosure? Am I right that I should use Bar Keeper's Friend? Is there a particular type I should use? Powder or cream? Also, I think I saw that I shouldn't use steel wool, so possibly a green scotch brite pad going with the grain?

Am I on the right track? I'd hate to start in the wrong place and mar the surface beyond repair. TIA.

View attachment 71731
View attachment 71732
View attachment 71733

I wanted to give an update on the stainless steel enclosure cleanup. I tried ammonia first since I had some in the house. Unfortunately it didn't put too much of a dent in the stains. I was at Menard's and picked up a bottle of BKF Soft Cleanser:
1687442383439.png

For the stains that I had, this stuff worked like a champ with minimal effort on my part. It's not perfection, but it got rid of a couple of those bad streaks immediately. It looks better than the pictures show because I think I'm picking up reflections. The right door still has a couple of spots that I may deal with at some point.
1687442573113.png
1687442601475.png
 
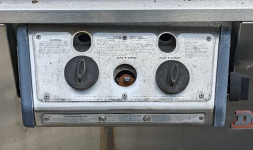
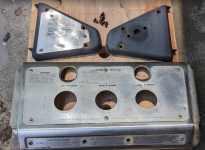
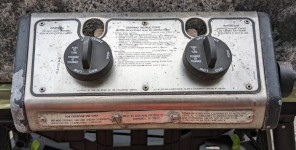
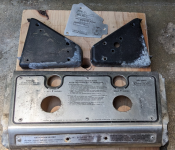
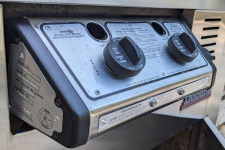
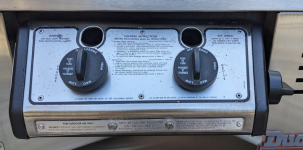
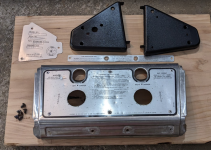
I'm getting close to the end. Next mini project was the control panel. Like a couple of other parts, I wanted to marry the best of the old grill with the donor grill.
Original grill:
1687443016345.png
1687443210521.png

Donor grill:
1687443052799.png
1687443296964.png

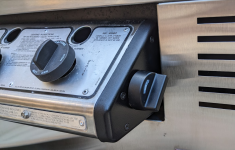
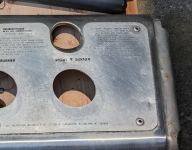
Other than the knobs, the original control panel was in better shape, so I will use a lot of those pieces. I drilled out the rivets on the plates to aid with cleanup. I cleaned up the side caps and gave them a coat of Ultra High Heat spray paint since I still had some left. The instruction plate on the main control panel didn't get a whole lot better, but it is what it is at this point. I also touched up the heads of the screws with a little black paint as well.
1687443466254.png

Since I had an extra control panel, I played around with some different techniques to clean it up, but anything that did any good also took off the print. This is where the Weber porcelain coated control panel is awesome, since you can just use some simple green and fine steel wool and it looks as good as new.
1687443725415.png

Here's the final product on the grill. The OCD in me is bothered that I used the old front plate that had the Blackville, SC 29817 address on it from the original grill, even though most everything else is from the donor grill. I also decided to use the side plate with the model # and LP designation from the donor grill, even though it is now converted to NG.
1687444013409.png
1687444039132.png
1687444068892.png

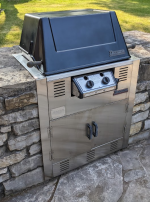
It is almost done. I just need to put a few finishing touches on it and do a final clean up. I might have finished pictures later today.
 
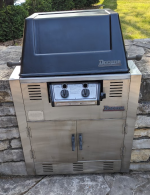
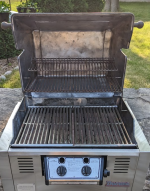
I finally finished it, other than that pesky grilling shelf. I've used oven cleaner, angle grinder with wire brush, heated it up to burn stuff off, etc. It has gotten better each time, but still not great. I've sure with a couple more hours with the wire brush, I can get it usable, but right now that needs to take a back seat to other projects around the house. Plus, after using the grill last night, I'm not sure if I'm going to keep it on the grill. That is a decision for another day. Here are some pictures of the grill:

1687526109717.png
1687526144353.png
1687526228314.png
1687526357190.png
1687526275990.png

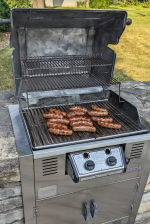
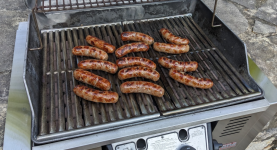
For the inaugural cook, I kept it simple and Wisconsin-style. The grill will never be that clean ever again.
1687526443675.png
1687526526887.png

A couple of notes after using it last night. Somehow, it must have settled in the enclosure and it now has a slight slope from front to back. The brats had a slight tendency to roll backwards, so I'll have to take care of that. Also, the entire left side was hotter than the right side, based on how the brats were cooking. Not sure if that is a normal hot spot (it shouldn't be based on the burner design), or if something else is going on. I also need to decide if I'm going to buy a cover for it.

Thanks for watching this thread. I'm really happy with the results, even though a few things weren't perfect in the end. I'm excited to use it and have some extra grilling capacity for parties. If anyone ever has any questions when they try to tackle a similar Ducane project, please let me know. I'd be more than happy to help.


Back
Top