Dave's Smokefire EX6 Experiences


The EX6 has been running good set to between 400 and 420 degrees. I'm trying to chew through pellets quickly but I've had no feed issues. It was going so well that I pulled the divider back out and just leveled off the pellets. Raised temp to 420 degrees as I ran down to a new butcher shop a little over a mile away and picked up a few things. I decided that since I had the Smokefire running and since it's made to actually cook on, I threw on some carne asada that I just bought. I wasn't in the mood for a lot of dishes, so I tossed the flour tortillas right onto the grill as well. Came out great, though not a ton of sear, but I wasn't running in the 500 degree range either.

Handled the lid being open and rebounded to the set point quickly.

20200222172800-4200768d-me.jpg

20200222172805-2b77e56a-me.jpg

20200222172809-89cc8452-me.jpg

20200222172822-21939ce0-me.jpg

20200222172826-95acea96-me.jpg

20200222172833-bac54401-me.jpg

20200222172837-a211d60c-me.jpg

20200222172841-85a0e320-me.jpg


It's pretty windy here today but so far, no temp issues.

The ash drawer modification where I installed some coiled stainless from a cleaning pad I had laying around has really made a difference in terms of embers and ash on the lower part of the EX6. At 400 degrees before the mod, you'd see lots of red embers in the drawer blowing around. Now, you hardly see any and the ash build-up is wayyyy less on the front of the EX6. The ash and partially burned pellets are largely isolated to the rear of the ash pan now, as it should have been from the start Progress in that area and possibly some progress in the hopper as well. I'm still concerned about how the controller will run the auger in reverse. If that's packing the initial part of the auger with sawdust, then it would also potentially create feed issues.

EDIT:

I did some research on the auger motor. it's made by Merkel-Kroff Industries, or Nidec as some of you may know. The auger motor appears to be a DC 24V brushless unit with five wires. It's likely got a PWM wire, 24V+, 12V-, Rotation Control and FG. I've been unable to locate the exact specs of the motor.


I did finally receive the Weber hardware for the EX6 yesterday, so eight days after I reached out to Weber and that was with expedited shipping.

Another update relates to the controller. I've not had any controller freezes like I did initially, so I'm not sure what/why that was occurring, but it's cleared up for the time being.
 
Last edited:
Back to the fun world of testing. I decided to clean out the auger down tube completely of pellets because I noticed that pellets seemed to be hanging up on the back of the chute down to the auger. The front would clear, but the back wouldn't. I never looked all that closely at this area before I started using the EX6, so what I found was interesting.

20200222151635-2d99cfc7-la.jpg


Apologies the image a bit blurry where I wanted focus, but if you look at the right side of this picture, that represents the back of the down-feed tube to the auger or, or a chute. On the right side of the slop right at the auger tube, there's a mechanical lip. This lip protrudes outwards by about 3/16" and then there was silicone sticking out from that another 1/16th of an inch or so. On the bottom of the image, which would be the right side of the down-feed chute, there's another significant lip which goes from about 3/16" to 1/4". Both of these lips would catch pellets and now allow them to smoothly flow into the auger. I don't know if that's what happening, but iI was surprised by the design here.

So to make my next test, I used some extremely rare test material. This is material I normally don't use, but I felt this called for drastic measures. Any ideas? If you guessed pieces of an Amazon cardboard box, you would be correct! I cut a piece and started to shape it into the back of the chute area. I then cut a couple more pieces to place into the triangular area at the right side of the chute. I then used some hot glue to join them together and/or attach them to the chute walls. You might be thinking that this will be a pain to remove?!? No. Hot glue can be removed with rubbing alcohol very easily if you didn't know that. After my arts and craft work was completed, the chute looked like this:

20200222151643-67c3fadd-la.jpg


This has eliminated the lip at the back side of the chute and drastically reduced it on the right side of the chute (bottom side of image). I went ahead and disabled the vibratory motor, moved the hopper separator further left and down and refilled the hopper with Cookinpellet.com 100% hickory. These are older pellets and I don't mind burning through them for testing. I want to see if the pellets feed more smoothly now.

I also notice that on the long ramp, pellets will stop feeding when there's about 2-3 pounds left in the hopper. I'm going to see if I can come up with anything to help with that, but the shallow slope is surely the cause. However, the bridging and lack of feeding in the down-feed tube seems to be a major issue and could be contributing to a lot of the pellet feeding issues.

Long term if this works, this is not a fix. However, it gives me enough to go on to build a permanent solution out of appropriate materials.

That's some more great creativity. I have to say, though, that there is little excuse for the chute leading to the auger to have those metal projections sticking out. If they are all like this, then it is little wonder they are having these problems. I do realize that the shape of the hopper, the metal it is made out of and the many other projecting bolts, etc. are also factors. Still, this poor workmanship right at the entry point to the auger looks really bad to me :confused: .
 
That's some more great creativity. I have to say, though, that there is little excuse for the chute leading to the auger to have those metal projections sticking out. If they are all like this, then it is little wonder they are having these problems. I do realize that the shape of the hopper, the metal it is made out of and the many other projecting bolts, etc. are also factors. Still, this poor workmanship right at the entry point to the auger looks really bad to me :confused: .

I agree. The design was already full of odd angles, but it's clear they were going for some sort of design envelope here (depth of smoker) or something which drove them to create such an odd design for the hopper. To leave sealing material and these overhangs to catch pellets doesn't make a whole lot of sense to me, just as the reversing auger doesn't make much sense. My neighbor asked me what I had been working on so much on the patio for the last week or so. I told her I bought a new BBQ smoker and it's kind of a piece of crap. I said I've been trying to make it work correctly and she asked me what brand it was. I said Weber and she's like, I thought that was a good brand? LOL.

I told her that they are a good brand, but I don't think their engineers came from Stanford. That was a nod to their son who's crazy smart and is attending his freshman year at Stanford.
 
I ordered up some black 1/8" (4" wide) and 1/4" (3" wide) Delrin bar stock from McMaster. I should have that on Tuesday and will begin fabricating more permanent parts. I decided to go with 1/4" for the triangular area, though I will need to mill a relief into it to clear two pop rivets at the bottom of the chute area. Once test fitted, I'll bond to the chute with JB weld.

The EX6 burned through pretty much all of the pellets without issue, so I shut it down for the night.

I also ordered two Weber 7622 heat defector plates which I'm going to modify to shield the drip channel on each side from the direct heat of the fire pot.
 
Dave,
I’m leaning towards keeping my EX6 if it handles a long low and slow this AM.
Please let my dumb *** know which Mods are game changers that need to be done and those that may be too difficult for me.
Honestly you are so impressive it’s hard to keep up.
Thanks!!
 
Dave,
I’m leaning towards keeping my EX6 if it handles a long low and slow this AM.
Please let my dumb *** know which Mods are game changers that need to be done and those that may be too difficult for me.

Will do. If I can get the embers/ash under control down low, the pellets to feed, ash reduced in the cooking chamber and a reduction of grease fire risk, I will document each mod. I'm working on all four of those things.
 
Will do. If I can get the embers/ash under control down low, the pellets to feed, ash reduced in the cooking chamber and a reduction of grease fire risk, I will document each mod. I'm working on all four of those things.
It’s going to be fun to see if Weber reaches out to you or just steals your mods. Well fun for me!
Thanks a lot Dave for joining the fun, I hope u stick around.
But if you move on to saving China USA trade relationships we will probably understand!!
 
Will do. If I can get the embers/ash under control down low, the pellets to feed, ash reduced in the cooking chamber and a reduction of grease fire risk, I will document each mod. I'm working on all four of those things.
Somehow I was thinking delrin last week. But wasn't sure it has heat properties or so. Great. Okay so electronics, feed, auger, fires, eveness, ash. Five minutes work for you
 
Somehow I was thinking delrin last week. But wasn't sure it has heat properties or so. Great. Okay so electronics, feed, auger, fires, eveness, ash. Five minutes work for you

lol. I don’t know about that. The Delrin I purchased is food safe and has a maximum temp of 180 degrees. Based on where it’s located, that should be sufficient. Fingers crossed.
 
I'M BACK AT IT...

So after a few days of not doing anything too crazy to the SmokeFire while I mop up my tears, I decided what better to do on my day off than to go out and screw around with the SmokeFire some more.

I reinstalled the hopper separator in a further left and lower position. Going to see what happens with the pellets this go around.

20200222093743-8a81c1e6-me.jpg


I also decided that I'd reconnect the vibratory motor. I removed four screws below the LCD control panel where the power cord plugs in. From there, that piece drops down and holds the actual controller and a Delta 120/240V AC to 24V DC power supply. This was good news since it had power taps for me to take 24V into a DC to DC Buck converter. This allows me to take 24V and turn it into 12V for the vibratory motor. I had originally planned to rob 120V power, so this made it easier dealing with low voltage. I connected the DC converter to the original cycle timer I bought, though I do have a better cycle timer that will accept a 24V trigger. For the sake of today and the fact I'm not 100% sold on this solution, I kept the original cycle timer set to 600 seconds off, 7 seconds on.

20200222093708-bc6d4831-me.jpg

20200222093722-5b134487-me.jpg


So with power taken off of the unused taps (fused @ 5A), I ran it to the DC buck converter:

20200222093734-195be995-me.jpg


From the converter and into the cycle timer, everything is contained within the auger assembly area. To remove this, it would take me about 10 minutes. The converter is adjusted with a simple micro screwdriver, adjusting one of the pots and watching the LCD's voltage reading.

One interesting thing I noticed was the controller assembly. It is separate from the LCD which is a bit different in design. It actually uses a CAN bus to communicate with the screen and has provisions on the board for a second CAN bus connector.

i.php


I also mentioned yesterday about some work I was doing to the ash pan to see if I could reduce ash coming out of it. I'm unsure of the consequences performance wise, but I can confirm it drastically reduced the ash coming out of the unit. The reason is, it keeps the larger unburned pellets largely isolated to the back of the ash pan, behind the drip pan.

20200222093641-c66f78ec-la.jpg


I uses some pieces of a stainless cookware cleaner that I bought a box of from Amazon years ago to plug the hole on each side. It still allows air to go through, but catches the ash and larger pellets. You can see how the ash is piled up around those pieces of stainless I installed. The gap on each side of the drip pan likely constricts airflow and actually accelerates the ash/embers shooting forward. I never saw an ember come out of the smoker after doing this, though I did see some red embers inside of the front of the ash pan. Those likely came down through the grease drip holes in the bottom of the cooking chamber.

Lastly I decided to replace the screws in the hopper from the torx or hex head, to stainless shallow head screws. In total, I replaced seven screws with what you see in the foreground:

20200222093654-8d5c5bda-la.jpg

20200222093658-8ffddc40-la.jpg


No cooks planned for today, though I will burn through the rest of the pellets in the hopper.

Would something like this work for the steel mesh? It's $8.99 at Amazon.

4PACK Stainless Steel Woven Wire Mesh Never Rust, Air Vent Mesh 11.8"X8.2"(300X 210mm), Hard and Heat Resisting Screen Mesh, 1mm Hole 20 Mesh Easy to Cut by Valchoose

61dz7pyy5WL.jpg
 
Would something like this work for the steel mesh? It's $8.99 at Amazon.

4PACK Stainless Steel Woven Wire Mesh Never Rust, Air Vent Mesh 11.8"X8.2"(300X 210mm), Hard and Heat Resisting Screen Mesh, 1mm Hole 20 Mesh Easy to Cut by Valchoose

61dz7pyy5WL.jpg

That's similar what I'm going to be testing. Not that exact product, but I have two types of stainless mesh/screen showing up this coming week.
 
Should have known you were steps ahead.:)

This process is fascinating to monitor.

Not defending Weber, but it does give one an idea of the complexities they had in designing the SmokeFire. You would think they have access to modeling software so they wouldn't have to experiment as much. I really do wonder if something was lost between pre and final production or communication between design and production.
 
Oh yeah. Designing something like this isn't easy.

I may not be posting much today because I'm going to testing something called Captain Morgan here at brunch, but for a very good reason. I just worked on something I really dread, my taxes. Between the Feds and California, they extracted an additional $10.3k from me. Then I had to pay my truck registration of $715, so I've spent $11k before 9AM. I'll be pouting all day, so apologies in advance for limited content or progress today. LOL

That $80 I made yesterday selling my Pit Barrel Cooker is really coming in handy right now. :ROFLMAO:
 
Awesome reading thru this thread and seeing your mods Dave.
I had issues with my EX4. Controller would not update and it would not get to 600 degrees. Long story short, I was sent a new controller, but ended up not installing at as they implemented an app update that suddenly allowed my smoker to update.
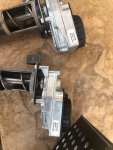
They did send me a new auger assembly, but they also send the chute with it as well. The instructions that came with it did not match what needed to be done to replace the auger. It actually looked like a different version of the auger/chute assembly where it is all one piece.weber1.jpg

Here is what they sent. I compared the new chute to existing and could not spot any differences.
weber 2.jpg

Top one is old auger. Notice sticker says "Rev. D". Bottom one is new auger and says "Rev. F"

weber3.jpg

One thing I noticed when replacing auger was there was alot of pellet dust in there. My first bag of pellets I just dumped in there as I am a pellet noob. Other than trying to vacuum this out, I see no way to clean this out other than removing auger, dumping it and then putting it back.
Going forward, I am dumping pellet bag into a bucket then using a cat litter pan scoop to scoop the pellets and load into hopper to avoid extra dust.
 
Today I spent a little bit of time fitting the test heat deflectors for the grease area. These are knock off versions of the Weber 7622 defectors for reference and cost about $12.99 shipped on Amazon for stainless. I bought them from warehouse deals for like $8 delivered.

I took eight small binder clips, removed the piece which you use to open a binder clip with your fingers and slid them onto the deflectors. This raises the deflectors around 1/8", to allow for better flow of grease. My goal here is to reduce ash in the grease, reduce partially burned pellets in the grease and to isolate some of the grease from direct flame heat. Will this work? No idea, but for $8 it was worth a shot. Zero mods, buy and install.

20200224201640-69693233-me.jpg

20200224201725-955948a6-me.jpg

20200224201659-9cded487-me.jpg

20200224201653-0a31d492-me.jpg


One other thing is the little lip at the end covers the hole into the grease pan. Again, likely reducing half burned pellets from dropping down in there.


Back
Top