Brand New Damper Design - "The Micro Damper"


You have an adapter that fits into the "universal" model on thingiverse,not one that fits the standard threaded model which is in the store (just to clarify). You can post it up, I don't mind, I'm sure it'll help someone out.

What is the opening measurement on the universal (not threaded?) model?
 
i have an adapter I designed for the Micro Damper to fit the BBQ Guru. I'll see if I can find it and post, if that's alright, SteveCK?

I would love to see it, I have the adapter and might as well put it to use (plus I am not sure why I am such a wuss and dont want to just drill a hole in the WSM :) )
 
I would love to see it, I have the adapter and might as well put it to use (plus I am not sure why I am such a wuss and dont want to just drill a hole in the WSM :) )

I'll see if I can find it when I get hole this afternoon, and post it on Thingiverse so you can download.
 
I don't remember offhand the diam of the "universal". Won't know until I get home tonight. Begg should know, perhaps he can beat me to it!

You should've just drilled a hole in your WSM! It's easy, and honestly a threaded connection is always better than a slip - especially because the plastic expands and contracts in different temperatures so you risk having it slide off if you don't glue/tape/adhere it someway on.
 
Why is there a "store only" version of the damper? There's no "store only" version of any aspect of the HeaterMeter.
 
Why is there a "store only" version of the damper? There's no "store only" version of any aspect of the HeaterMeter.

Both the universal and the NPT model files are on thingverse, the store version happens to be the NPT not the universal model.

Since I stirred the adapter convo up I will say I decided to go with the NPT model, I managed to get a nice solid connection between the BBQGuru adapter and a copper coupling that has 1"NPT threads ready for the Micro Damper. Will be a good experiment because the BBQGuru adapter does introduce a bit of a restriction due to its mounting method, not sure how much it may affect the Micro Damper but there is only one way to find out!

IMG_2871_zpsjeayksxj.jpg
 
Why is there a "store only" version of the damper? There's no "store only" version of any aspect of the HeaterMeter.

There's no "store only" version. What I have available in the online shop is exactly what is on thingiverse. Thank you very much.
 
There's no "store only" version. What I have available in the online shop is exactly what is on thingiverse. Thank you very much.

Oh, I guess I was confused by your reply to wbegg:

You have an adapter that fits into the "universal" model on thingiverse,not one that fits the standard threaded model which is in the store (just to clarify). You can post it up, I don't mind, I'm sure it'll help someone out.
 
Ah, I see. The store only has the threaded model. The "universal" on thingiverse is just a hole, kind of a "you go figure out what you wanna do to connect". The threaded is by far the best and most reliable way to mount it. A slip connection has many flaws. It could easily be knocked off, temperature changes can cause the plastic to expand and therefor fall off, are just a couple
 
First Cook with HeaterMeter and Micro Damper today on my WSM. I am mounting the Micro Damper using the BBQGuru adapter so effectively there is only one of the stock 3/4" holes on one of the WSM dampers available to push air. The smoker came up to temp slowly but eventually made it then hovered there for a few minutes. I added the meat once I felt things were stable and I struggled to come back up to temp, ended up opening another of the smokers dampers a bit manually to help get back up to temp which worked. The Micro Damper did well from there on out until I opened the lid at hour 5 when I once again struggled to come back up to temp, a touch of a damper by hand and all was well.

Thinking I need to reconsider my mounting method and just drill a hole to maximize airflow when the micro damper is fully open and fan is on; the single stock damper hole might be too constricting for this fan. Based on the graph I can probably tweak the PID values some to get a flatter line but I think fixing the airflow should come first.

All in all a great maiden voyage, cant wait until the next run!

hm.png
 
Yup, I don't recommend reducing below the 1" for this reason exactly. Shoot me an email when you run your next cook! I'm looking forward to the spring now
 
Hi, i am new to this forum (although i've been reading it a lot as guest). Just wanted to say thanks to steve for this magnificent piece of work!! Installed it at my HM and (dry-running) works perfect. Waiting for some rvs components to attach it to my Weber 57cm grill, so hope to test it with some picanha real soon.
 
Just finished a beef back rib cook with my HeaterMeter and Micro Damper on my UDS. Everything went great even with it being a very windy day with winds over 20MPH. The Wife changed the plans so I had to rush it a little towards the end but they came out great.
Thanks for making these great devices.
uds_zpsnnektwcm.jpg

20170212_165949_zpspeb1s9of.png

Beef%20ribs_zpslg2dvvdh.jpg
 
Last edited:
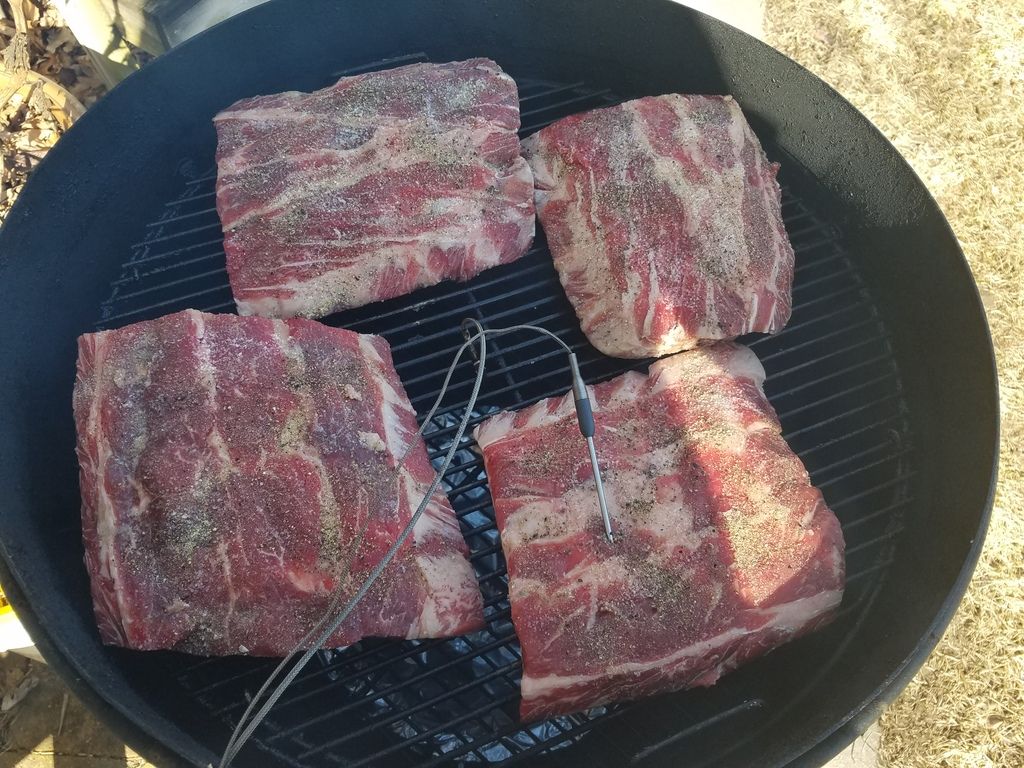
Using the Microdamper on my new Primo XL today. I didn't have anything to cook for, but found a couple of small butts on sale so decided to test out the MD with the Primo.

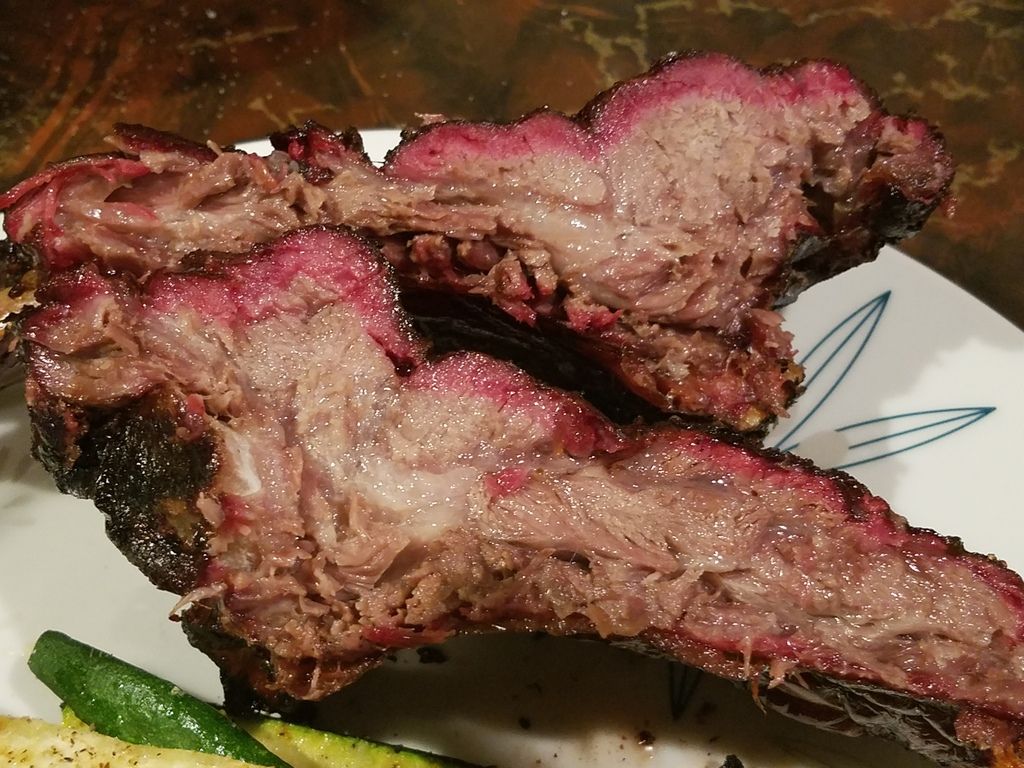
Replaced live link with the actual cook. I ran out of fuel about 2:30am or so. Last night it started struggling to keep temp while I was at a friends house. It still had lump, but it was sort of spread out. I should have added fuel at this time, but I thought I was fine. I didn't expect the cook to go as long as it did so I only used the left side of the Primo with lump. Will be better next time.

y3mLAgYx0ALxXW16B4dlViu4yIWOwOttboBKMSvU-bmEpEmU1OIEqKwQCeYJRZ4Nsyub1URCQgcs_O9F8gm7mfPwSzLzQ6qs6sQ7TNVPQvaZ2lbNB5hBNYez43P7WVdVyx-cVvQAp14oFEq41m0RvYneX1_g1ye7PSVFPBQtteMZFw


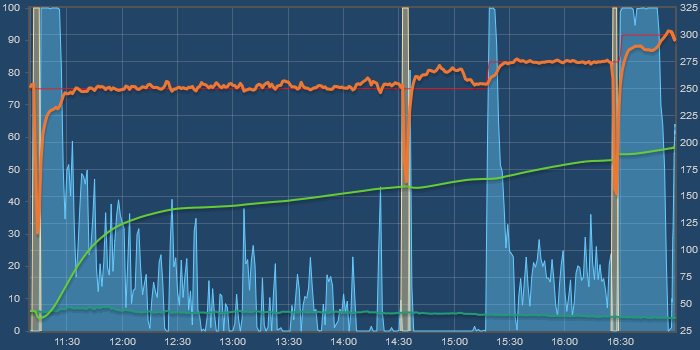
In the beginning, I was messing around with different temps as I worked my way up to 220. I also opened the lid a few times during testing and putting on the meat. After putting on the butts, I tweaked some settings. I'm not sure if these are perfect settings, but it seems to be working well for me at the moment.

y3mdEFhQP7pIdgG2LPEOexIi-QCQXtxhteq933-V2lMzSam_x9MlTijxFT3UEOpKg6UXsbeNWDl9GfjEU017sss8Mv3RkD8Y7SkwMC5YGk35SKzgLdGXOggOs1s-c4VyqonNvJ0yF5e3z1V1Ew1i-pabBtrvELvEHVqEZ3xKva9pYQ


Here is a currrent screenshot if you don't want to click the link. I'll update this shot with a full cook once it's done.

y3mtt-78iujxj2l5QKxAq3kW0rTqKC4cWksVR0AW1tQ0LUE5qFcw67QsCK6CtntJUj_Xxg4ipAqB-f-McSAsnUicBpPoIYhT0oxYm6a2YwIDCaVAkhtoz_lH5I3uIjVM2k0Snhkja5VBw637WC5EOcBC5qWuL1NV6kQzj15pvrHbh4


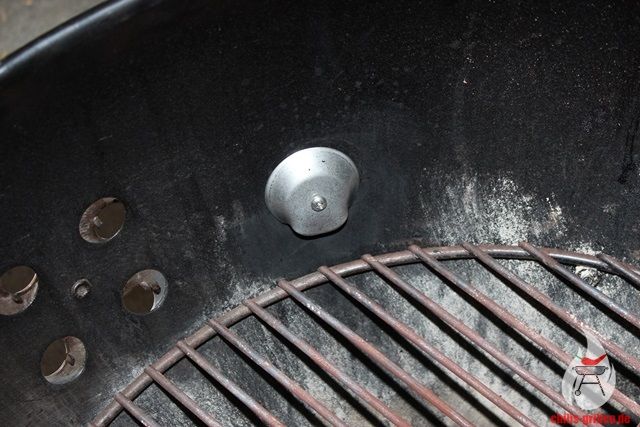
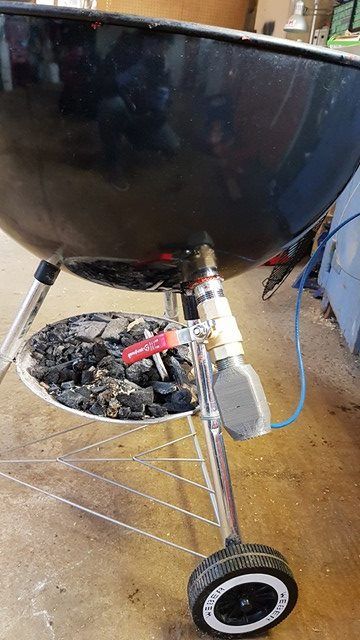
Here is the way I have my Microdamper connected. Eventually, I need to figure out how to surface mount that pipe fitting (or another fitting) so that it's not a thru fitting. If it was a surface mount fitting, I could slide it over over and easily clean out the ashes. Right now, I can only slide it over a couple of inches before the pipe on the inside hits the wall. Makes more challenging to fit the ash tool inside.

y3m2KzXineHNR1cSRWFAsCjBA_c4N1-CU7IanXWWYneM3l4DbCE-2nr4SzXfui0a2txG1hC_bLvGCKY14MfCbquVzz4PgCfLtKha9sbtQnjO9pCtOkxlQNTfjoGNnYadZhUNMYRnzqXky6O9GjJ1fmiOCr5iIWJRqTpGskJ6PlsyOs
 
Last edited:
Looks good. One thing people should note with their MicroDamper on a kamado. Your top vent should be only slightly closed compared to where it would be if you were running a natural running cook. If you're used to running a blower you would likely want to clamp the vent down - don't do it - the microdamper more closely resembles a natural cook
 
Thanks for the info Steve. I was running it at about half to 1/3 open. I'll try opening the top a bit more next time to see how it runs. I'm pretty sure most of my issues on that cook were fuel related. I ran it for 8 hours or so the next day with zero issues.


Back
Top