Are these dealbreakers for restoration?


Jake Lofton

New member
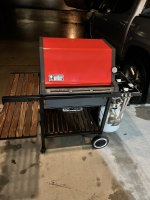
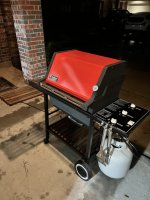
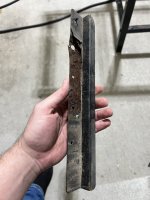
I have a few concerns about this redhead I picked up on the side of the road.

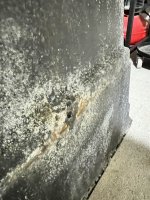
Are these dealbreakers? Some rust and a pea sized hole on the backside of the firebox.

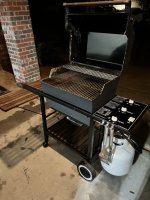
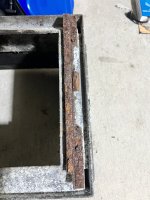
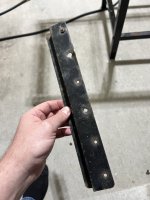
Also, there is rust on the rails bottom of the firebox, is it smart to attempt to remove the bolts holding the rails underneath
 

Attachments

  • IMG_6180.jpeg
    IMG_6180.jpeg
    146.1 KB · Views: 48
  • IMG_6181.jpeg
    IMG_6181.jpeg
    170.1 KB · Views: 49
  • IMG_6189.jpeg
    IMG_6189.jpeg
    202.7 KB · Views: 48
Welcome Jake! You can fill in small holes in the firebox and frame with a high heat metal paste like JB weld. Removing the drip tray rails can be tricky, they do snap off sometimes. I would soak them down with a penetrant first. Another way to approach it is to heat up the metal around the bolts with a torch for about thirty seconds and then start backing the bolt out.
 
They're not badly rusted. Just leave them there and wire brush them clean then paint them with the rest of the OUTSIDE only of the fire box. I think Bruce has repaired holes like that but I don't know the long term outcome
 
Yah, the bolts can be tricky. I use a 1/4" impact and try to back them out. They take a 5/16" socket. But, you have to be very careful and know when to give up. Otherwise, they will simply twist off. But, I get about 80% or better out with the impact. You might be best off just leaving them in place and painting them as best you can. The big concern is the second one. It looks like it is getting to the point that it might fail completely. Then you will have to do something. You can give them a try with a regular wrench or the impact, but hit them with a good penetrating oil like PB Blaster a couple times a day or two prior before you try.

Here is my how to on removing the Slide Rail Screws: https://tvwbb.com/threads/how-to-remove-cook-box-slide-rail-screws-the-easy-way.80899/

That "small hole" looks to me like it might be the hole for mounting the cook box to the frame on the left side. But, if it is indeed a hole that needs patching, you want HI TEMP JB weld. I did a couple grills with it and have had good results. I used it on my first personal grill rehab about 5 or 6 years ago. My son has that grill now and as far as I know, it is still good to go.
 
Welcome to TVWBB, Jake. I don’t have much to add to the good advice you have gotten from three of our best pros.

Looking at your picture of the hole, it does look to me like where the bolt goes to attach the firebox to the frame. Maybe some more pics showing the whole side?

I am with Bruce that the one side rail looks like it will have to go. Check out his video and be patient and careful!

None of what you show looks like a deal breaker to me.

A nicely restored redhead will be a gem to have :coolkettle: .
 
Thanks all for the advice.

I am now at another speedbump. The rightmost valve would not turn off, so I disassembled it. Upon inspection I found the valve lip was bent at the very bottom. Do yall have any recommendations as to how to bend this back without breaking it off?
 

Attachments

  • IMG_6195.jpeg
    IMG_6195.jpeg
    172.4 KB · Views: 13
  • IMG_6194.jpeg
    IMG_6194.jpeg
    166.3 KB · Views: 14
  • IMG_6196.jpeg
    IMG_6196.jpeg
    177.8 KB · Views: 14
  • IMG_6197.jpeg
    IMG_6197.jpeg
    154.3 KB · Views: 13
  • IMG_6198.jpeg
    IMG_6198.jpeg
    170.6 KB · Views: 14
  • IMG_6199.jpeg
    IMG_6199.jpeg
    205.2 KB · Views: 13
  • IMG_6200.jpeg
    IMG_6200.jpeg
    232.5 KB · Views: 13
  • IMG_6201.jpeg
    IMG_6201.jpeg
    213.1 KB · Views: 14
See if you can disassemble another of them and try to get it to mimic the other. IDK for sure but, I THINK I ahve a couple "scrap" manifolds around here. If needed (and if I do) I could pull that part and send it
 
See if you can disassemble another of them and try to get it to mimic the other. IDK for sure but, I THINK I ahve a couple "scrap" manifolds around here. If needed (and if I do) I could pull that part and send I’ll
Im gonna heat it up with a blow torch and see if I can bend it back slowly. I found a metal rod the perfect size of the hole so I can use it to not over bend the lip. I’ll let you know how it turns out.
 
Good week all!

I was not able to bend the valve back correctly but it somewhat works. Ill need to look into getting a replacement.

The impact worked like a charm, that paired with a little heat and the bottom rail bolts came right off.

I am now spotting rust on the side supports for the wooden pieces, one actually rusted through completely.

Does anyone know of any replacements I can purchase online? I am attaching some photos of the rusted pieces.
 

Attachments

  • IMG_6184.jpg
    IMG_6184.jpg
    120.3 KB · Views: 11
  • IMG_6185.jpg
    IMG_6185.jpg
    127.7 KB · Views: 11
Jake, last I hear RCPlanebuyer was still making those Z bars for the shelves. He makes them out of stainless steel. They will cost if he is still making them, but I don't know of another source.
You can contact him through this Craigslist add. Just tell him what you are looking for and he will give you a quote to include shipping.

 
Dave Santana/"rcplanebyer" stainless is definitely the way to go if you don't mind paying a little more. Otherwise, you have to try to get old used ones from someone's stash. If they are like mine, they will all require rehabbing even if not totally rusted out like your one example. These haven't been used by Weber for almost 20 years now.
 
Terrific! How much would you charge for the item + shipping to Houston area?
Honestly nothing for the valve. Though I have to check if I still have them in my back garage as I did give Jon Tofte a slew of stuff on his last visit. re shipping I will PM you if I have the valves. Odds are I can remove one from the manifold and simply put in a small box. Stay tuned. I just have to get out to the "back 40" and have a look
 
Honestly nothing for the valve. Though I have to check if I still have them in my back garage as I did give Jon Tofte a slew of stuff on his last visit. re shipping I will PM you if I have the valves. Odds are I can remove one from the manifold and simply put in a small box. Stay tuned. I just have to get out to the "back 40" and have a look
Sounds like a plan. I look forward to hearing back from you. :)
 
Up and running! Minus 1 burner 😩 
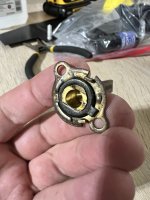
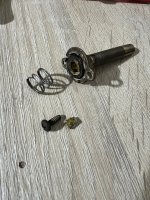
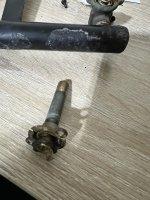
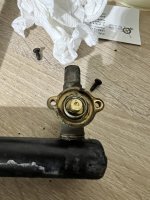
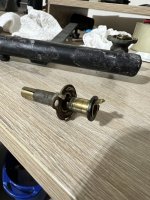
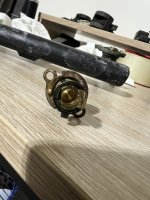
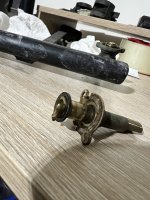
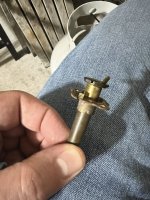
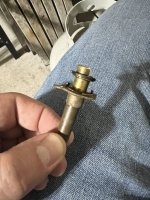
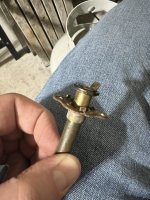
unfortunately the damaged valve piece I tried to bend back broke off. Now the rear burner is oos until I can locate a replacement
 

Attachments

  • IMG_6521.jpeg
    IMG_6521.jpeg
    133.2 KB · Views: 20
  • IMG_6520.jpeg
    IMG_6520.jpeg
    141.8 KB · Views: 20
  • IMG_6519.jpeg
    IMG_6519.jpeg
    155.9 KB · Views: 19
  • IMG_6518.jpeg
    IMG_6518.jpeg
    115 KB · Views: 18
  • IMG_6517.jpeg
    IMG_6517.jpeg
    245.8 KB · Views: 19
That is really interesting wood. Looks like a pine with some kind of dark stain on it.

Keep looking for a curb alert genesis 1000. You either swap entire manifolds or just a single valve. Nice job on the restore.
 
When the day finally comes I can get into my back garage I think I have some deep box manifolds. Just can't remember if I gave them to Jon or not. Rear garage was frozen shut now it's total slop bucket out there. I'll check
 
Thanks Bruce! It’s cedar with a dark stain. I didn’t think the stain I bought was that dark but I just went with it. I definitely think the lighter colors are better looking with the red however I will use this for now. I will probably swap it out once I decide whether or not to get the sides and box sandblasted. Got rcplane to make me some replacement z brackets! Top notch 10/10.
 
Last edited:


Back
Top