Adventures in Restoring a 2004 Stainless Steel Performer . . .


Don't take this in a bad way but, do you have OCD? When I found this forum I was just cleaning them up, replacing anything that needed it, getting them working well, and selling them. Then I saw what Bruce, Jon, and others where doing and started grinding fireboxes and painting, etc. Now you are upping the game to another level.;-)
I restored automobiles professionally for a portion of my career. Even built a few AACA Grand National winners. It's a mindset that just sticks with you.

Plus, even before restoring cars, my grandfather always told me, "It's the details that make the job." When I was a kid I read a book called "Corvette Restoration, State of the Art". This guy was crazy into details, like buying a 55 gallon drum of genuine GM factory frame coating and replicating the runs and drips on his Corvette frame. Adding chalk marks and overspray, actually adding imperfections to his car to make it just like GM made it. That book really changed the way I think.

I wanted a new stainless steel Performer, I can't buy one, so I'm building one. Still will cost less than a new modern Performer. Until someone finds one new in the box, I'll probably have the nicest one out there. That's all worth something to me. (y) :geek:
 
Last edited:
I restored automobiles professionally for a portion of my career. Even built a few AACA Grand National winners. It's a mindset that just sticks with you.

Plus, even before restoring cars, my grandfather always told me, "It's the details that make the job." When I was a kid I read a book called "Corvette Restoration, State of the Art". This guy was crazy into details, like buying a 55 gallon drum of genuine GM factory frame coating and replicating the runs and drips on his Corvette frame. Adding chalk marks and overspray, actually adding imperfections to his car to make it just like GM made it. That book really changed the way I think.

I wanted a new stainless steel Performer, I can't buy one, so I'm building one. Still will cost less than a new modern Performer. Until someone finds one new in the box, I'll probably have the nicest one out there. That's all worth something to me. (y) :geek:
Thanks - I needed that explanation. I am the polar opposite. I am more of a skunk works kind of guy. Just get it working and done. I restored my Genesis 5 so well I don't want to use it. I can get creative in fixing things, but not designing and building from scratch. Unlike a lot of folks that have 30 or more grills laying around, I get them, and cannot wait get them sold. I have only 1 more to clean up and sell. My personal Q320 as I decided to replace it with a Broilmaster P3 I restored (I did not make it too clean to use;-). I will be down to just my 4 keepers. My Genesis 5, WSM18, Performer, and BM P3. Then I am due for a break to fix up the house.
 
Joe, everybody works at their own level of enjoyment. "30 grills laying around" would be daunting to me. Just one project grill here for me is enough (okay, maybe two . . . or three). I didn't start this thread for any reason other than entertainment and documentation of my project. But like that Corvette book for me, maybe this thread will inspire someone to move to their next level. You can find the Corvette book on eBay for under $10.00, I'd advise anyone to read it.
 
I just bought one new one for the front of my keeper as the other one is in pretty good shape and will never be seen up against the wall.
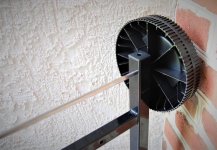
That's actually good thinking. It really rubbed me the wrong way to spend $40.00 for two plastic wheels worth $10.00, tops. Seemed like a money grab. But then again, custom printed inserts were $28.00, so what do you do? My inserts were destroyed. In the end with the generous discounts Weber gave me on this project, I really can't complain (although the wheels themselves were still $40.00 . . . haha).

On a side note, I was thinking that maybe vinyl labels could be cut relatively inexpensively and give 90% of the look for half the price of 3D printed inserts. . . good for a budget build.
 
I think adding new parts to any restoration project is fun and is truly the icing on the cake. It can also help expedite the completion of the project and often the old parts can be sold to offset the price of the new.

Performer parts 1.JPG

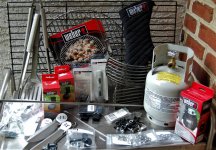
Eleven different vendors used to source these parts. Weber supplied the largest order. I'd highly recommend buying parts from Weber. In my case, some of the discounts were huge. New wheels are not in this photo as they have already been posted.

Propane tank is not new but my propane label is!

Since the stainless steel performer has those cool tool hooks included, I did some research and found the stainless steel Weber tools that were available for the age of my grill. Also the period correct grill mitt with the large Weber patch and the steel hanging ring.

The Weber 20 lb tank cover I'll sew to fit the 5 lb propane tank. You know, now that I made a new label and all . . . might as well cover it up.

That's a NOS, discontinued lower rack in the back part number 85520 . I'll paint my rusty one later and sell it along.

I didn't need a new burner, far left, but the Weber price was so cheap I couldn't pass it up. I'll keep it as a spare.

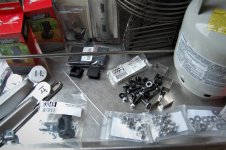
Performer parts 2.JPG

My favorite find from Weber was the assembly hardware kit, part number 85555. I think the list price was $36.00, but I was given a huge discount. I always found restoring/replacing hardware was the tedious part of any project. Stainless bowl hardware with aluminum washers on the right. Stainless steel axle in the photo. I was happy to find an original lid handle on eBay for $16.00. The charcoal cages were also very generously discounted, but were still the single most expensive purchase of the project.

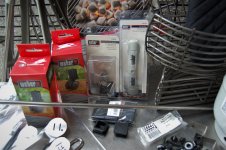
I found the caster wheels on an Amazon Warehouse deal for $6.50 each. I guess the boxes were damaged.

The white clamshell packaging for the handle and tool hangers are both dated 2003. I paid more for the package of tool hangers on eBay ($3.99 plus shipping) than the whole hardware kit from Weber. (This was before I knew the hardware kit existed, plus I wanted more than 3 hangers anyway).

Performer parts 3.JPG

I had this shirt on my list of part numbers for my order, but when I exceeded my budget I wanted to delete the shirt, they sent it along for free anyway. I can't say enough how impressed I was with Weber customer service. They really showed a lot of support for my project.

Kettle shirt.JPG
 
Last edited:
The charcoal cages were also very generously discounted, but were still the single most expensive purchase of the project.

This is going to be some grill. Are you sure you are going to want to cook on it? Could you post a picture of just the charcoal cages? Are they stainless rod? I have never seen those before.
Yes, I'll definitely cook on it. Just like if I bought a new grill. I drive my restored cars too . . . carefully.

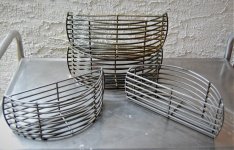
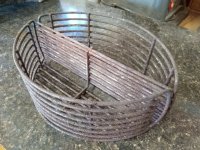
These are the wire charcoal cages that came with the Performer when it was new. Then I guess they switched to the stamped steel ones. The wire cages are beautifully made, very heavy, regular steel, so they rust like crazy. I'll take some photos.

Best price I could find for new cages was $100 a pair. Too much for me. So I found a used pair on eBay for $28 plus (inflated) shipping (they are still derusting in oxalic acid). I ended up paying the same for new cages from Weber as I paid for the used cages with all the shipping charges and tax on eBay. Live and learn. Just buy your parts from Weber is my advice. I'll use the used cages for now and keep the new ones for later.
 
charcoal baskets.JPG

Weber calls these, "Wire charcoal basket for the Performer model grills p/n 960080".

New in the front, used in the back. Slight green/yellow tint is the oxalic acid doing it's job. New baskets are bare steel coated in a preservative of some sort. They came wrapped in brown paper. No box, no labels, unlike the wheels. Go figure.

Photo below is the used baskets as purchased. Very rusty, in hindsight, maybe not worth the time cleaning them. Oh well, they are better now.

charcoal baskets before.jpg
 
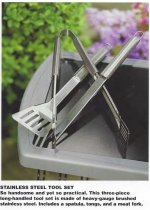
As part of the "Adventures in Restoring a 2004 Stainless Steel Performer." I decided it was necessary to find the period correct stainless steel tool set for my grill. So on this site there are old Weber catalogs (thanks Chris!) and I found a photo of the grill set I needed.

Stainless tools.JPG

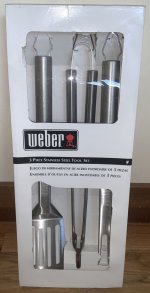
I found a few sets that had sold on eBay, but nothing recent, and the prices seemed kinda high for used BBQ tools. Like this set, still in the box, was $50.00 after shipping and tax. It sold, fast, like in less than a day.

weber tools 2.jpg

So I kept looking and found a pair of tools on Mercari, the tongs and the spatula, no fork, $18.00. So I just thought the tools might have been available separately and I'd just look for the fork over time. Wasn't really happy about it, but okay. So I bought them.

Then I get this message:

tool message.JPG

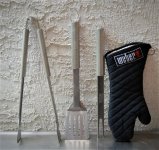
Can you believe that? Some people in this world are still awesome. I made sure to leave a killer feedback/rating for the seller as well as a nice thank you note. Also found the correct vintage grill mitt on eBay, that one is kinda hard to find. Has the big logo patch and the steel ring.

Weber tools 3.JPG
 
Last edited:
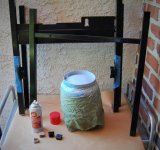
I have the frame and rails all cleaned and polished. There was a few isolated rust spots that I opted to just derust and touch-up, rather than repaint the whole frame. The factory paint is still in remarkable shape. The propane tank came out very nice once cleaned and polished, but the underside was very rusty, so I sanded the rusty spots to bare metal and repainted just the underside.

I used Fluid Film to coat the inside of the frame rails. I prefer that to paint as it never really "dries". The fancy word for it is thixotropic, meaning it's kind of a liquid/gel that just continues to flow over time. I think of it as a self-healing rust protection. It's also non-toxic. Spray some in the rails and push a loose paper towel through them (the axle works) and then move the rails into different positions periodically until the Fluid Film sets.

frame touch up.JPG

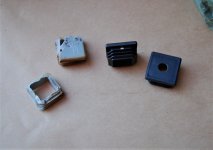
I also drilled (for drainage) a set of finishing plugs to install under the wheel-side frame. I thought it would make it look a bit more finished. I had to buy more plugs than I needed from Amazon anyway. So why not? When I dug the broken finishing plugs out of the handle-side top frame they were grey? I thought they were supposed to be black? Anyone else see this before?

frame plugs.JPG
 
Last edited:
I also drilled (for drainage) a set of finishing plugs to install under the wheel-side frame. I thought it would make it look a bit more finished. I had to buy more plugs than I needed from Amazon anyway. So why not? When I dug the broken finishing plugs out of the handle-side top frame they were grey? I thought they were supposed to be black? Anyone else see this before?

View attachment 31265

On the SSPs I've had, the kettle-side plugs are grey.

M5cJAW6Ko_SL1aDpYLvT-zrsdpOiAFrBQXDWBFcRT3WGJMFd4nb_d3QRl77jEl2Oy0ozykt4TFh8GDZM7E_6DhQW--zyafsBP5vVodwt59_61DRIz_d2JrJREbgnXMyU7x2LBEEtYRg=w800
 
On the SSPs I've had, the kettle-side plugs are grey.

That's what I thought, kettle-side plugs are grey (high heat plugs?) and the handle-side plugs are black. Looks like all four of my plugs were grey.
 
Last edited:
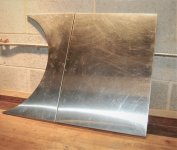
Next step, restoring what makes the "Stainless Steel" Performer a Stainless Steel Performer, the two top panels. (Okay, the One Touch blade assembly is stainless steel too, but let's not get pedantic :p).

SS top.JPG

While the top isn't in bad shape, it certainly doesn't look new. Yet, I don't think it has an appealing enough patina worth keeping. These panels were very difficult to photograph, but I think you get the idea. They have been cleaned, those are scratches and scuffs, not grease smears.

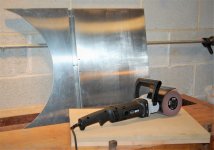
I had to build a simple platen with some scrap particle board to support the panels for refinishing.

I have an Eastwood Contour SCT (not a paid promotion :p ), but I don't have the drums I need to replicate the brushed finish on the steel. I tried the drums I have, they didn't work very well, so now I think I know what I need to purchase. Luckily I live in the same town as Eastwood, so please stay tuned.

top refinishing.JPG
 
Last edited:
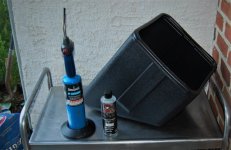
So, what's the easiest part to restore on a Performer? The charcoal bin, right? That's what I thought. But, not so much.

First off, mine was warped/dented in on the side. It also had scratches and rub marks like someone kicked it down the street. How does that even happen?

First, wash with an all-purpose cleaner and scrub with a brush. Lather, rinse, repeat.

To fix the dent I filled the bin with water and propped it up with the dent toward the sunny side of my yard, for a week. That fixed the dent.

The "white" scratches and scuffs were next. Most black plastics will respond to heat, and darken. You can use a heat gun or a torch. I've fixed many scratched car interior hard plastics with heat. For example, the bottom of hard plastic door panels that have been kicked over the years. Thing is, it's tricky. Scratch the inside of the panel with some sandpaper and practice before doing the visible side. If you go too far you've wrecked the part beyond repair.

I hit this with the torch and all the scuffs and scratches disappeared. I didn't think this would be all that interesting, or I would have taken a before photo.

Final prep was some Chemical Guys Tire and Trim Gel. If it lasts on my car plastic and tires for a few months, it will probably last for years on the grill.

charcoal bin.JPG
 
Last edited:
I use a heat gun. Would be afraid to even try a torch near my caro_O
I usually use a heat gun on a car interior, but I had this torch handy to light my charcoal chimney :D, my scratches and scuffs were mostly on the edges and corners of one side of the bin, so it was a focused repair.
 
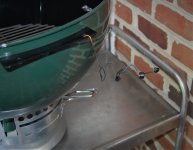
Working on some subassemblies today. I almost forgot these small parts for the regulator hose. Oxalic acid, wire brush, paint. Anybody know what the wire clip on the left is for? I'm guessing it held a tag of some sort?

regulator hardware.JPG


Back
Top