Jon Tofte
TVWBB 1-Star Olympian
Mike Lang, the author of "Another Pint Please" and our honored guest at TVWBB Upper Midwest Meet from a few years ago, wrote a nice article about using a Vileluxe:

 www.anotherpintplease.com
The one he cooked on did not have the newer bezels with markers, but it also did not have the front logo engraved like mine. I am guessing they gave up on that early on.
Here is the one Mike cooked on where you can barely see any logo left - and NO engraving:

The Vieluxe: a little Weber History via Denver — Another Pint Please
Last week we spent a long weekend in Denver visiting friends. To say it was a spectacular visit is an understatement. Denver is simply amazing. We had the hustle of the city on one side and the majesty of the mountains on the other. Our time flew by. Our host
www.anotherpintplease.com
The one he cooked on did not have the newer bezels with markers, but it also did not have the front logo engraved like mine. I am guessing they gave up on that early on.
Here is the one Mike cooked on where you can barely see any logo left - and NO engraving:


 !
!

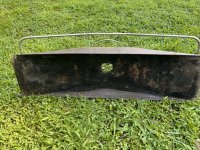

 . Much more importantly, at least one of the two triangular “smoker tubes” was fully intact and cleaned up well.

 !
! . It could become very difficult to even get them in the not-too-distant future...
.JPEG")


 !
!
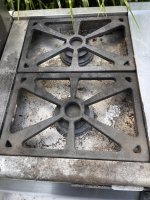
 ). All the grease came off pretty easily:
