Frank Conard
New member
I just found a rather nice Genesis Silver C natural gas on CL for $60.00. I plan to replace my Silver A with
this beauty after a thorough rehab.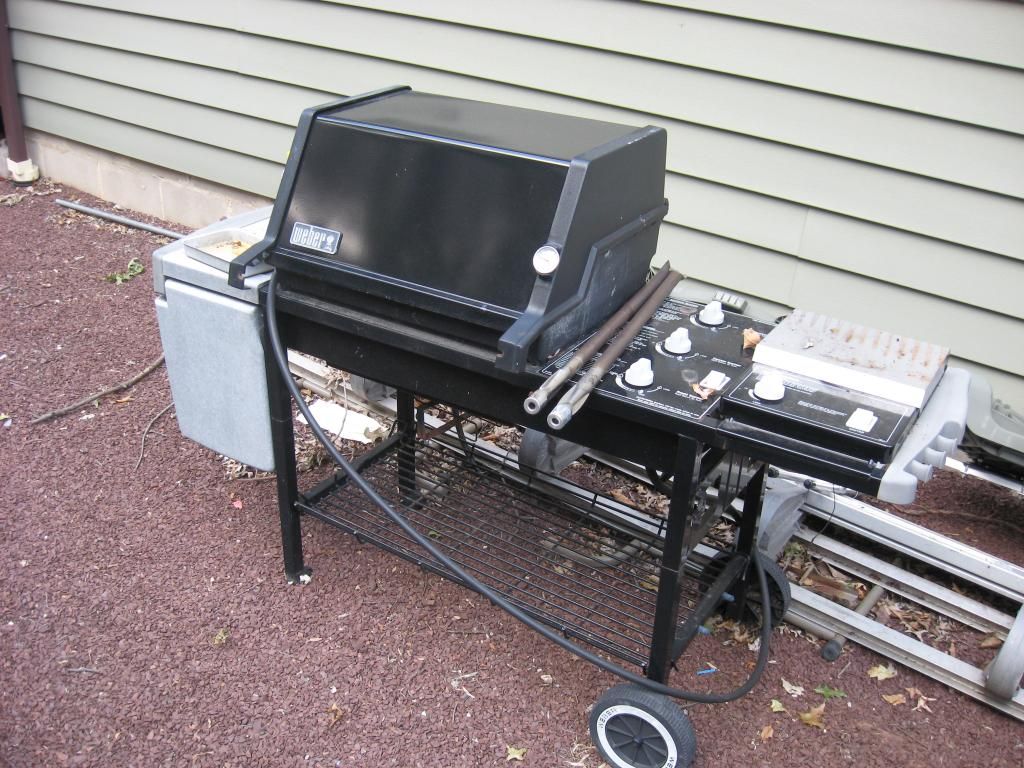
All in all this grill isn't in bad shape. It has cast iron grates and porcelain flavor bars both of which show a little rust.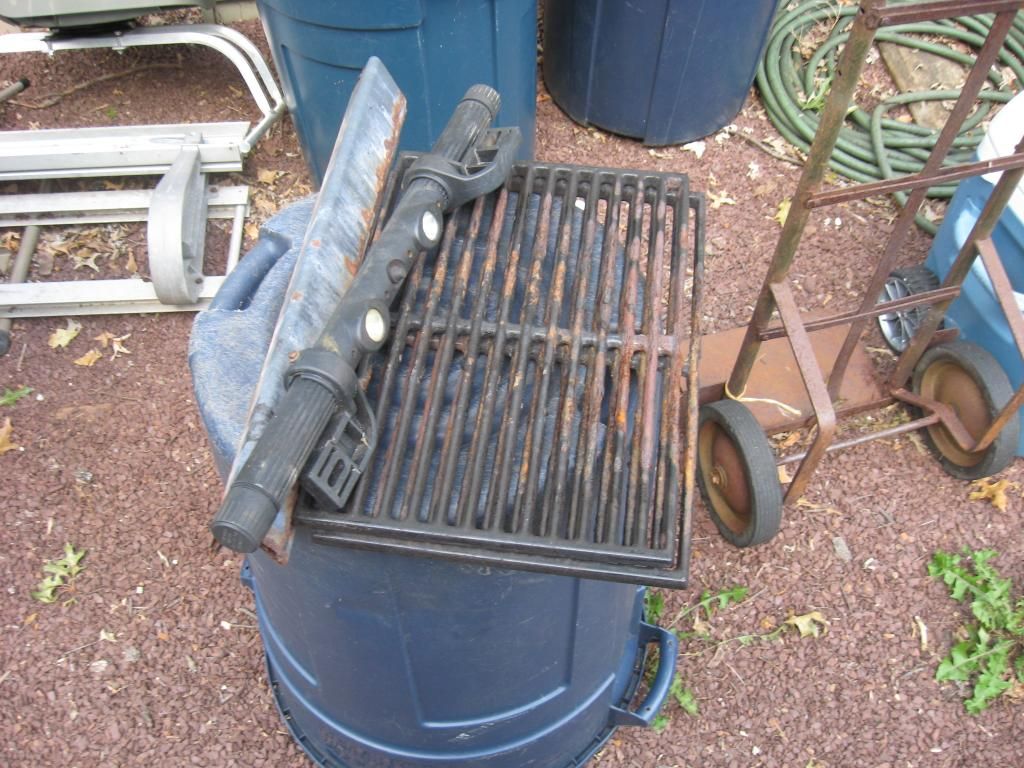
Burners were in good shape but the crossover tube crumbled into a pile of dust when I took out the burners. The warming grate and basket were both too rusty to save so I ordered new ones along with the crossover.
As you can see it had an after market lighted handle which was shot thru with rust and leaky batteries. I got lucky and found a brand new one at a flea market for $12.00. I'll have to reuse the Weber brackets from the old one but they're in good shape and I'll clean them to hopefully look like new.
The manifold mounting bolts were stainless and came right out. The single mounting bolt on the other side of the firebox snapped off it was so rusty.
My plan is to clean then sandblast the the interior,drip tray and any exterior corrosion then paint the exterior and top side panels.
Many thanks to the contributors of how to hints and procedures your information has and will save me much time and elbow grease.......
I'll post my progress with pics as I move along and again thanks for the help.
Made a little more progress today. Tried my hand at sand blasting. I went to Harbor Freight and purchased a sand blaster , respirator, face shield, gloves and 50lbs of play sand total cost $46.88
It has been an interesting experience to say the least, I have sand in my hair, ears, pockets and other places....I'll put up before and after pics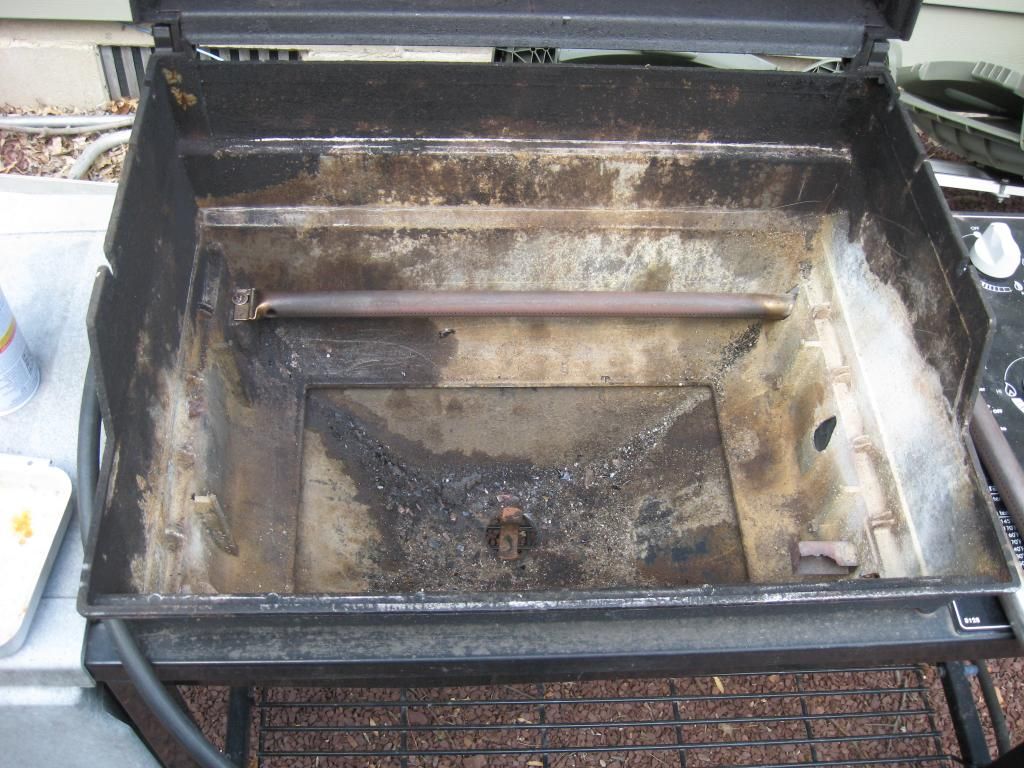 before
  after sandblasting
All told I have a little over an hour invested in sandblasting and it was well worth it. The exterior cleaned up beautifully As you can see the corrosion around the lighting hole is now gone. All the loose paint and surface marks are now gone and the surface is nice and smooth.
The only negative to sandblasting is it's messy. More to come as I progress and thanks for the comments and suggestions
this beauty after a thorough rehab.

All in all this grill isn't in bad shape. It has cast iron grates and porcelain flavor bars both of which show a little rust.

Burners were in good shape but the crossover tube crumbled into a pile of dust when I took out the burners. The warming grate and basket were both too rusty to save so I ordered new ones along with the crossover.
As you can see it had an after market lighted handle which was shot thru with rust and leaky batteries. I got lucky and found a brand new one at a flea market for $12.00. I'll have to reuse the Weber brackets from the old one but they're in good shape and I'll clean them to hopefully look like new.

The manifold mounting bolts were stainless and came right out. The single mounting bolt on the other side of the firebox snapped off it was so rusty.

My plan is to clean then sandblast the the interior,drip tray and any exterior corrosion then paint the exterior and top side panels.
Many thanks to the contributors of how to hints and procedures your information has and will save me much time and elbow grease.......
I'll post my progress with pics as I move along and again thanks for the help.
Made a little more progress today. Tried my hand at sand blasting. I went to Harbor Freight and purchased a sand blaster , respirator, face shield, gloves and 50lbs of play sand total cost $46.88
It has been an interesting experience to say the least, I have sand in my hair, ears, pockets and other places....I'll put up before and after pics
 before
  after sandblasting
All told I have a little over an hour invested in sandblasting and it was well worth it. The exterior cleaned up beautifully
 As you can see the corrosion around the lighting hole is now gone. All the loose paint and surface marks are now gone and the surface is nice and smooth.
The only negative to sandblasting is it's messy. More to come as I progress and thanks for the comments and suggestions
Last edited:
")


