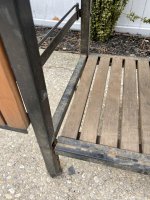
Weber Genesis 3000? Restoration.


Chris Binny

TVWBB Fan
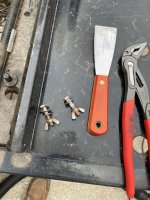
Finally getting around to this red head I picked up for $30 last fall. Pretty solid example and a good restore candidate. Still in the process so more will come out in drips and drabs as I get time to work on it, but just about all of my replacement parts are here so can get after it now. Main info sticker was blank, no model, no serial, either rubbed off or some solvent removed it. Side burner had an EE serial number that came back as a 99 Genesis 1000. But thanks to the old brochures here, it's easy to see it's not.
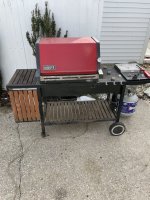
63606100629__188AC75B-7CDF-4BC7-935D-B5EE2556DA33.jpeg
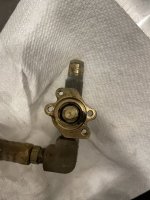
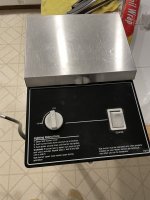
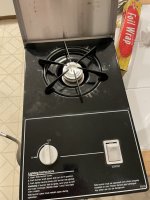
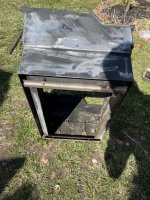
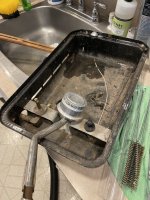
First, the side burner. Insect guard actually had a hole melted in it, and as a result, spiders clogged the entire burner tube (sorry no pics of this) so much so that gas would back up into the main cavity and ignite there. Who knew the spider guard was actually a real thing to give a crap about. Cleaned up well with some HF tube brushes, lubed up the valve, and back in business.
IMG_4143.jpegIMG_4154.jpegIMG_4192.jpegIMG_4193.jpeg

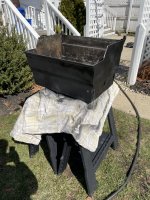
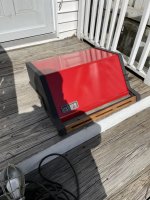
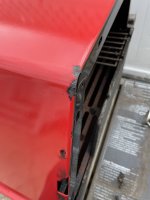
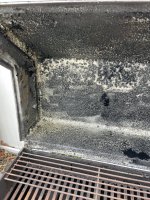
Next, the lid. Carbon Off, Carbon Off, Carbon Off. Stuff is absolutely amazing, I may go apply to be their salesman. Don't even bother with the hassle of oven cleaner. The satisfaction of scraping crud off is worth the high price of the stuff. Some porcelain chippage behind the endcaps. May touch up so rust doesn't make a home there.
IMG_4148.jpegIMG_4145.jpeg

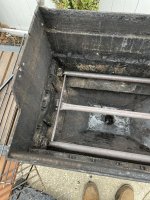
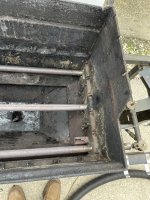
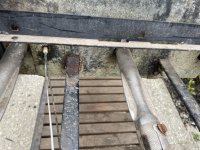
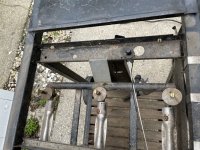
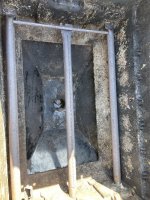
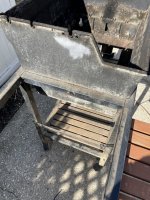
Continued disassembly today. Tossing the old cast iron grates, they've thinned out from flaking off over the years. Burners seem okay. Manifold is eroding where it attaches to the firebox and paint is gone where the gas is. Still pretty thick and hoping to wire off the loose stuff and passivate and paint. Interestingly the bolts that held the firebox to manifold appear to be real deal stainless, not black oxide like on my spirit 700.
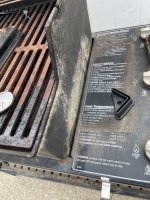
IMG_4138.jpegIMG_4140.jpegIMG_4187.jpegIMG_4188.jpegIMG_4189.jpegIMG_4190.jpegIMG_4191.jpeg


More to come. Working on it outside, so not trying to completely take it apart until i have time to put it back together. And I hope I got the image uploads right, still pretty new here and trying to figure it out.
 
how did carbon off work on the cook box do you have pictures i am thinking of using it but 24.00 a can wow
 
Simple answer is it works great on aluminum.

So, it's my first time with the carbon off. 100% perfect for the lid because it's gentile on the finish (both sides). Aluminum can handle just about anything, mechanical or chemical though. But beyond that, I actually cleaned end caps once by putting them in an oven on the clean cycle while struggling with the lid and EZ-off oven cleaner in a prior restore. Works, but kicks up a ton of fumes.

I didn't clean the cookbox yet but since I have another can, i'll probably use it. But you can get away with all mechanical means. All only applies to the inside as you know so don't waste the stuff.
 
I guess to rephrase, for the cookbox and end caps for that matter. It'll work like a dream, or you can go at it all day with the wire wheels. Carbon off will really help it along though. And as I see it, it's a one time thing to undo a previous owners 20 years of food grime.
 
Looks like you are on your way. The picture of the bottom of your one cast iron grate would have had me trying to restore, but I guess the top part was too far gone. I have a soft spot for those old original cast iron grates.

I am interested in seeing more about the CarbonOff, too!
 
Looks good.
I have a 1986 Genesis 3000, the first year. Black. Dad bought it new when they first came out.
Still on the back patio, haven't used it in about 5 years though.
 
Grates:

In my current Spirit 700 daily driver I bought the cast iron grates new about 4 years ago. They are the best, I really like using cast iron. I compared both with a set of calipers and they're much beefier than what the Genesis ones have eroded to. That's why I'm tossing them. I'll take a picture and show the difference. Already bought RCP stainless for the Genesis and looking forward to cooking with them.

Carbon Off:

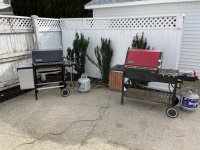
The carbon off will be nice for getting into the nooks of the cookbox casting. Will document when I get there. Really need a weekend above 40 degrees here in New Jersey for me to tackle this more. Current setup right now below.

63606104606__EECDC9D7-5272-4F92-9129-0EBC2833245E.jpeg
 
for a 20+ year old grill, the bones still look good. It's shaping up well and be sure to change out all the bolts to SS.
 
Okay, been a few weeks, but we've continued to make progress. Took the cookbox apart and cleaned to the best abilities of 3 grinder batteries. Never get a battery powered grinder. Looking back, I'd go the sandblast route (what does a local guy charge for that?), I didn't realize all the old finish would leave a 'lip' to where I had new paint, especially on the endcaps. On the cleaning, Carbon off is best left for the underside of the lid and endcaps where it's pure carbon. Going to try power dissolver soon to degrease the rest. Could be better, but like I said, don't get a battery powered grinder and I just lost interest after time working on the inside. Also should have used an orbital on the cookbox. I can see the marks left by the flap disc, even at 120 grit. The drip rails were changed, just not shown here.

IMG_4200.jpegIMG_4202.jpegIMG_4203.jpeg63804556646__51CB99CB-0632-4208-8A24-B3BDFCBC6069.jpeg

For the lid, i took the old handle off and sanded away the rotted gray stuff the best I could and hit it with spray spar urethane about 45 times. Still looks old, but it's been raining here and holding up well. This handle is really past it but I don't have the router setup to cut a new one. Also, went with socket button head screws for the handle bolts, Black oxide 18-8 from bolt depot. I'll get to that weber emblem at some point.
63804622718__43B8AEBE-76B0-4B45-9B2A-CB3EDC52DC5B.jpeg

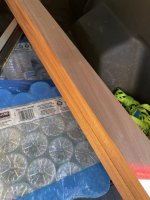
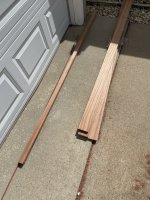
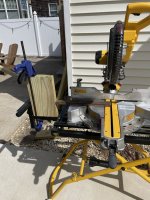
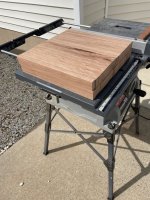
Wood. The wood may have looked intact but it was not. Dried out, warped, and in some cases rotted. Cedar is almost nonexistent here in NJ. Don't even think about grabbing 1x2s at the big box. Even pickens were tough at the local lumberyard. At the local yard, picked up Sapele, like a variant of mahogony I guess. OEM pieces measured 1-9/16" x 0.7". I bought 2, 14' sticks of 1x4 ($95 total btw) and ripped two strips to width on a friends table and miter saw. Cedar would have been maybe $10-$15 cheaper. Not concerned about the thickness difference.

I know I cut a few extra pieces, and didn't realize it until the end that i would have had a length for a new handle. Ugh. At least I have the wood for a right side flip up table if I can find the hardware. Either way, this stuff is beautiful. Can't want to show it off finished.
63854336761__09C95A74-2905-4236-87B8-107C3D38357A.jpegIMG_4289.jpegIMG_4292.jpeg63856446696__110E921C-A92C-4299-A320-00A24F0FB3D1.jpeg

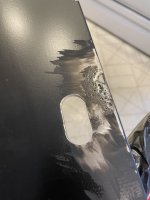
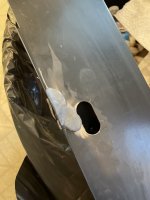
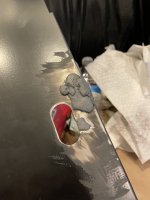
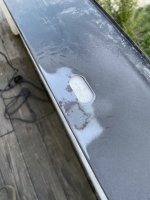
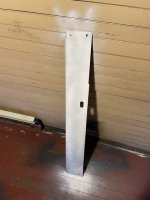
Front fascia panel. Took the flap disc out on Sunday and ground away some bubbling paint until we found this hole which i quickly hit with the rust passivator. Gave the JB steel stick a shot this afternoon. Can you tell it started to cook off too soon? Grind, sand, and prime. Short of a Bondo coat, I'd say this is pretty good. Drying right now, so no finished paint job yet.

IMG_4306 2.jpeg63874796722__4513B01A-D0E2-4A8D-BA54-38D826F1547C 2.jpegIMG_4309 2.jpeg63875187344__608CF6F3-1407-4B15-9E1A-BF8C73166C70 2.jpegIMG_4312 2.jpeg

More to come, even for a great condition 3000, this is still a lot of work.
 
Last edited:
Yah, that wood look really pretty, but awful expensive. Wow.
I can get a Genesis 1000 cook box blasted for $30. Well worth it in my opinion. You would be much better off with a $10 Harbor Freight grinder with a wire cup wheel than your battery powered one.
 
Yah, that wood look really pretty, but awful expensive. Wow.
I can get a Genesis 1000 cook box blasted for $30. Well worth it in my opinion. You would be much better off with a $10 Harbor Freight grinder with a wire cup wheel than your battery powered one.
Yeah, I walked in on Saturday morning and told them what I was trying to do and they said look around in their storage warehouse. So I picked this stuff out before knowing the price. And then after hearing the cedar price as a comparison, I was less upset. Wood is not cheap right now as everybody knows. And nice exterior capable wood is even worse. Not sure how much being in NJ cost me on top of everything else. You are right on the grinder; any tool run continuously needs to be plug in and there would be no love lost tearing up a few HF grinders.
 
I have two HF grinders and use them quite a bit. I had a third and it died after about 15 or 20 cook boxes, inside and out.

I haven't priced wood lately, but that still seems awful expensive. For my grill, I bought 6' cedar dog eared fence slats. I think they were about $5 each and I got three lengths on the table saw out of each of them. They were just the right thickness.
 
Something is up with wood, at least around here. There is no cedar to be found, none of the box stores have it. I promise!! I did want 3/4 actual thickness but still something is off. The sapele I got was $3.xx/ft for 1x4, I guess in the ballpark of oak. I'm kind of out of the loop on lumber prices too since this was my first trip in a few years, but on Friday, an 20' untreated 2x12 was $60 at the HD here. Luckily this is purely for fun and i'm hoping to make this my last grill (I'm 38) and I did buy a cover too so maybe I have a chance.

From a flip perspective, can you even flip a grill with wood slats these days if replacement of wood is needed? I learned how to churn out pieces this weekend but it's still a lot of work and you need to have the tools.

I hope the link below makes it relevant to where I'm at because I don't think this is a nationwide problem.
https://www.lowes.com/search?searchTerm=fence pickets&refinement=4294726305
We are trying to contract a new home build in VA and the builder is telling us that lumber and all building material are going up in price weekly.
 
Yah, it has been going up for a year now. Most of the lumber used in the northern part of the US is from Canada. With the border lockdown due to COVID, we are not getting hardly any lumber from them now.
 
Yep I made the same mistakes prepping my first 2 cook boxes......I grinded them so clean and perfect with wire wheels but didnt realize the areas with paint missing would show up as shiny and blotchy. That was many many grills a go....but I learned fast you either remove all of the original cook box and end cap paint or you just clean and degrease the cook box trying not to disturb the original paint very much at all. For most all of my cook boxes and end caps I roll on the High Heat paint with a 1/2" nap roller and apply 2 coats. This paint lays down naturally so the 1/2 nap is necessary to get any texture at all......this texture will mask the scalded or bare areas on the prepped box.
Note....it is imperative to shed your rollers prior to painting or it will mess up your handy work......ask me how I know :)
 
I agree Jim, except that I have found there are a lot of places on the outside of a cook box that don't require a complete stripping. The areas near the bottom outside on the left and right below the frame line are one. Also, the very bottom can be painted with out being completely stripped since those areas are never seen. I pay all of my attention on the area above the frame line on the cook boxes. But, end caps won't let you get away with that at all.
 
Yep Bruce.......I am shifting to more of that attitude. I was saying we have 2 options.....strip all the way............or just clean and degrease........The reason I roll on my paint is that I like the OEM texture look...and I dont like stripping the boxes and caps all the way back to bare aluminum. But to your point we only have to put lipstick on the part of the pig that is visible :)


Back
Top