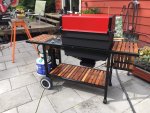
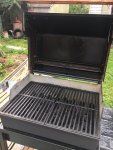
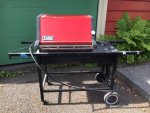
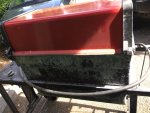
Weber Genesis 2000 NG restore candidate?


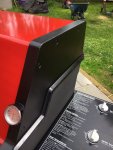
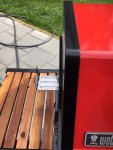
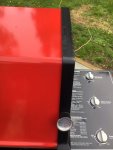
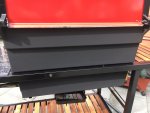
Not sure what the corrosion/peeling paint on the bottom front is. Also it looks like that grill is really suffering from oxidation or whatever you want to call the corrosion of the aluminium. The photo of the top right of the cook box looks really bad. A good cleaning and scrubbing will go a long way to seeing just how bad it is. Either way, even if you have to find a new cook box, it looks like the rest is pretty good.
Check the cook box for holes, especially down where the flavorizer bars rest on the right and left sides.
Hi Bruce. What if there is a small hole in the cook box where the FB rests? Any fix? Also, if where the screws for the rails that the enamel drip tray slides into on the bottom of the cook box are not intact, any fix for that?15936989795551100499262.jpg1593699080224756025243.jpg1593699130951810301443.jpg
 
Herb: Hi Temp JB Weld will fill in those small holes. I used it on my personal Genesis 1000 cook box and after 4 years, all is good.

As far as those mounts for the drip tray rails goes, You can probably use that same hole as the screw doesn't have to hold a ton of weight. Otherwise, try a slightly longer screw. Worst case is that you have to drill deeper. Even if you wind up drilling all the way through to the inside of the cookbox, it isn't a huge deal. You can also build that mount back up with some of the high temp JB Weld.
 
Only solvent at Lowe's was VM&P Naphtha. They said it should work fine....

I disassembled the frame and it looks in good shape with some surface rust and a few bubbled areas that I took down to bare metal. All the little star connectors look decent and appear stable, though a couple have rust dust on them. If I shake the frame I can hear some debris inside. I'm reluctant to remove the star connectors. Should I just leave well enough alone?

thanks again for the help. you guys really are amazing!
 
Fascia: That is the back of that panel, so not such a big deal.
Bolt hole on left side of cook box. That is pretty typical and it looks like just surface rust.
Corner on left side cross bar looks pretty rusty. If it is just surface rust, no big deal.
Bolt hole area where two pieces of frame join look to be surface rust.
What I would do on all those areas provided it is just surface rust and the integrity of the part is not compromises is that I would take an angle grinder with a wire cup brush to it. Get the rust out down to bare metal in those areas. Then hit them with some High Temp Rustoleum rust encapsulator. Then top coat them with Rustoleum High Temp Ultra semi gloss black paint. You can probably get by with non-hi temp paint on the fascia piece but it is pretty close to the cook box, so I would probably still go with hi temp there too.

Sorry to dive in here with a question about a previous comment that Bruce made. When hitting this surface rust with an angle grinder, hitting with rust reformer, and painting over, will there be any sanding required? I've seen other places on here that the frame is difficult to get smooth after grinding. Am I getting worried for nothing? Advice would rock! I have some surface rust like Tork did, but nothing concerning structural integrity. Thoughts?

If I'm understanding correctly, I can put high heat paint over rust reformer on the parts that I treated for surface rust? Rust reformer being not high-heat wouldn't cause any issues under the high-heat final coat?

I have Rust reformer, high-heat matte black, and high-heat ultra for endcaps and frame. Is this enough or do I need to throw the high-temp primer in the mix too?
 
Last edited:
I'm a new guy around here....but I had some significant rust on the front facia of my Gen 2000. I couldn't grind the rust off completely because the integrity of the metal would weaken, but I did the best I could with a wire wheel. Then I followed up with sanding the existing paint edges to "blend" in with the rusted area. I couldn't use rust restorer on the facia because it sits in front of the lower firebox and likely gets hot. I probably should've used a HH primer but I didn't have any on hand. I painted with four coats of HH Ultra and it looks pretty good. I'm hoping the rust doesn't reappear, but if it does I'll cross that bridge when it happens. You'd have to really look for the rusted areas to find them, but they are there. I call it texture!
 
I would use HH primer on areas that I grind down to bare metal and adjacent to high heat sources (i.e. around the cook box). Not rust reformer as it is not heat rated.. But, also note that Rustoleum HH ultra can be used directly on bare metal.
After using a wire wheel, you will need to do some sanding to feather in the paint to bare metal transition if you are worried about it being a very smooth surface.
 
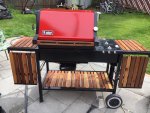
With y'alls help I was able to restore my Genesis 2000! I couldn't have done it without your kindness and patience. Thank you.
I wasn't very good at photographing my progress but thought I'd share what I have long winded as it may be...

-My Genesis 2000 began as an LP model and was converted by original owner to NG using Weber parts, but I re-converted it back to LP for now using a 1000 LX donor manifold.
-I had the firebox sandblasted and that was the best $70 I've ever spent.
-Initially I balked at the difference in paint color, but now I like the contrast between the High Heat (firebox) and High Heat Ultra (end caps and frame).
-For the slats I used cedar I'd salvaged from the deck my wife made me replace!
-I rebuilt the manifold and valves
-Since the grill is for personal use I kept the nearly new 13 bars and decent grates. I'll go stainless when I need to replace components.
-I did not sand the end caps, but used steel wool and there are some minor imperfections from the original paint, or lack thereof.
-I chose to reuse the end cap bolts because I prefer the black bolt heads.

I welcome your feedback...positive or negative!
This was a fun project and the Weber cooks great...and I can use my rotisserie! My Genesis E-310 is for sale now...
IMG_8414.JPGIMG_8370.JPGIMG_8417.JPGIMG_8416.JPGIMG_8415.JPGIMG_8420.JPGIMG_8421.JPGIMG_8474.JPGIMG_8286.JPGIMG_8284.JPG


Back
Top