Summit S-650 rehab/restore


Eric-NH

TVWBB Pro
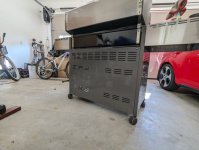
I figured I should start a separate thread on my progress and musings with this freebie, so here goes...

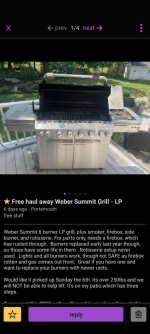
A week after finding a free summit 420, this sucker shows up for free as well. I figure, what the heck. I grabbed the 420 knowing the box was likely rotted but I wanted to see if I could fabricate a fix for it. I figured now I could do the same thing with the 650 and have a possible fix for people with the 4 and 6 burners. I decided to ask Weber if it was a part that was still available and if it was a warranty issue, figuring that if it was then there wouldn't be a lot of demand for my fix if people could get it fixed from the factory. With an amazing turn off luck, they said it was warrantied and sent a new cookbox for each of them!
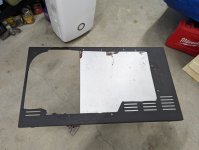
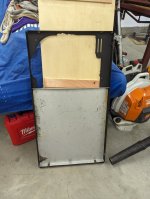
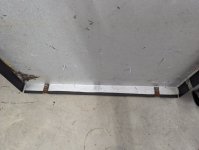
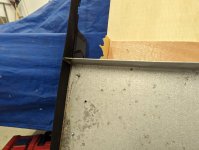
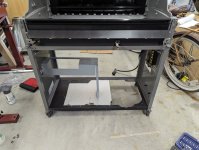
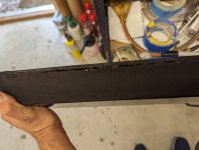
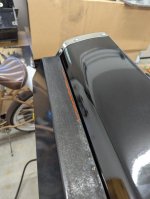
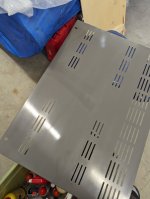
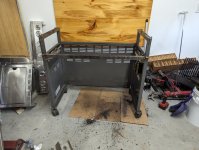
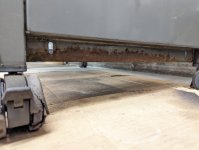
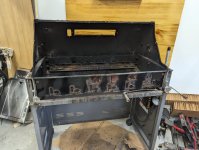
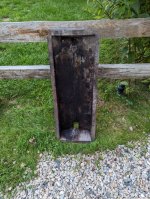
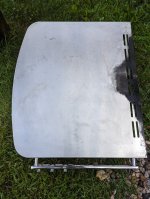
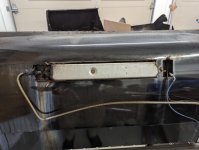
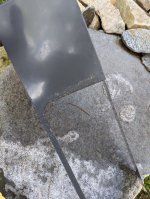
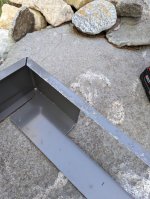
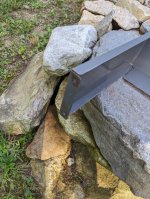
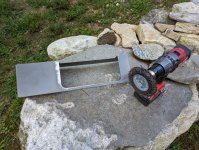
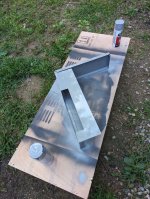
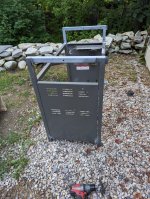
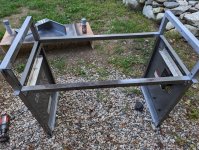
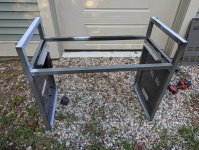
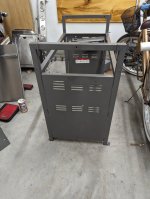
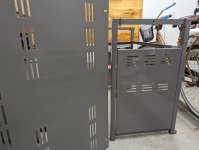
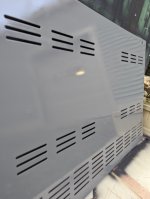
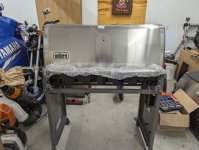
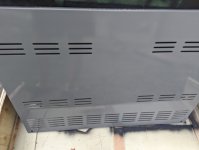
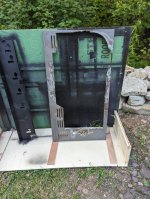
I've been pulling the 650 apart, seeing what it needs, taking inventory. The bottom panel was rotted, but I can do a decent temporary fix on it until I can weld up a neat custom one this winter. So far the only other surprise I've found is that the IR burner seems to be toast, just discovered that today. Is Ed Young's true value a good place to buy from? They appear to be the cheapest by a long shot. Anyway, enjoy the pics!
 

Attachments

  • 1000003515.jpg
    1000003515.jpg
    165.7 KB · Views: 23
  • 1000003502.jpg
    1000003502.jpg
    96 KB · Views: 24
  • 1000003514.jpg
    1000003514.jpg
    146 KB · Views: 26
  • 1000003254.png
    1000003254.png
    366.2 KB · Views: 25
  • 1000003498.jpg
    1000003498.jpg
    324.4 KB · Views: 25
  • 1000003499.jpg
    1000003499.jpg
    184.5 KB · Views: 23
If you need panels I have a set from the 450 available. One new lower panel and one used in good shape bottom. Oddly enough the left side facing panel is in the same shape as yours.
 
Made as little more progress. Cleaned up the drip tray holder and have a coat of silver on it. It doesn't match great, but it's inside the cabinet and not that bothersome to me. I've sanded down the few spots on the frame that needed touchup and have hit it with some primer. I'll use the Massey Ferguson gray on this so it should look pretty nice when I complete it. This grill should be a hell of a nice rehab once all complete, I'll have a blast cooking for our weekly family gathering on it, we have a crowd of usually 12 every Friday.
 

Attachments

  • PXL_20230830_213247394.jpg
    PXL_20230830_213247394.jpg
    227.8 KB · Views: 12
  • PXL_20230830_213254344.jpg
    PXL_20230830_213254344.jpg
    196.9 KB · Views: 12
  • PXL_20230830_213300148.jpg
    PXL_20230830_213300148.jpg
    263.3 KB · Views: 12
  • PXL_20230830_214000429.jpg
    PXL_20230830_214000429.jpg
    290.9 KB · Views: 12
  • PXL_20230830_224059084.jpg
    PXL_20230830_224059084.jpg
    275.5 KB · Views: 12
  • PXL_20230830_224104633.jpg
    PXL_20230830_224104633.jpg
    292.5 KB · Views: 12
  • PXL_20230830_224109741.jpg
    PXL_20230830_224109741.jpg
    325.1 KB · Views: 11
  • PXL_20230830_224118215.jpg
    PXL_20230830_224118215.jpg
    269.6 KB · Views: 12
If you need panels I have a set from the 450 available. One new lower panel and one used in good shape bottom. Oddly enough the left side facing panel is in the same shape as yours.
The only one that needs help is the lower one, and with this being the 6 burner the grill is wider and the 450 wouldn't fit anyhow. I'm not worried, I have some neat ideas for a custom one this winter
 
Quick coat of the MF grey on the frame. Really shows nicely, barely a difference from the original back panel and what I've painted. Mostly looks fresh instead of faded
 

Attachments

  • PXL_20230830_234725864.jpg
    PXL_20230830_234725864.jpg
    139.7 KB · Views: 12
  • PXL_20230830_234736215.jpg
    PXL_20230830_234736215.jpg
    86.6 KB · Views: 12
Last edited:
I've made some more progress, thought I'd share. Trimmed the rust areas from the lower panel in prep for my temporary patch. Have a few coats of paint on the cart, came out pretty well. Starting to assemble with some new shiny bits. Should be pretty nice once completed
 

Attachments

  • 1000003636.jpg
    1000003636.jpg
    68.7 KB · Views: 17
  • 1000003637.jpg
    1000003637.jpg
    143 KB · Views: 17
  • 1000003635.jpg
    1000003635.jpg
    58.7 KB · Views: 17
  • 1000003638.jpg
    1000003638.jpg
    138.8 KB · Views: 17
  • 1000003630.jpg
    1000003630.jpg
    233.7 KB · Views: 17
I am no fan of the current generation Summits, but my hats off to you for taking the time, effort, and expense to bring that one back. Looks like you are doing an excellent job (y) . I hope it comes together and gives you years of great cooks!
 
I am no fan of the current generation Summits, but my hats off to you for taking the time, effort, and expense to bring that one back. Looks like you are doing an excellent job (y) . I hope it comes together and gives you years of great cooks!
So far my expense on this one is about $30 in paint. The metal was scraps I had and am able to bend and fasten to make the bottom panel function and be sturdy. Burners and ignitors are in good second shape. Only other part I see that I will need is the IR burner and orifice, priced out to about $125, I think 140 with shipping. Ali in it should be a nice grill for real short money. And I have a great use for the size, every Friday is "cousins night"at the house. All my wife's family come over, her parents and 2 sisters with their husbands and 5 (total) kids. We do some cooking once a week! I jokingly call it Friday night Thanksgiving 😁
 
And I have a great use for the size, every Friday is "cousins night"at the house. All my wife's family come over, her parents and 2 sisters with their husbands and 5 (total) kids. We do some cooking once a week! I jokingly call it Friday night Thanksgiving 😁

Credit to you for restoring this grill and enjoying the purpose
of doing so. I don't believe I could make a list of 11 people
that I would want coming over my to house and having to cook for
once a quarter, let alone every week. :p
 
Nice, I'm definitely interested in seeing how you fix that bottom panel.
This is the temporary fix. I folded over the edge closest to the tank twice to "hem" the end and make it a lot more sturdy. I considered painting it but haven't yet as I have a more permanent solution in mind that I'll do at a later date. I kept the tank side open for airflow and so the tank could still hang at the moment. I plan to plumb it in to the house LP eventually, so then it will be a solid bottom for storage
 

Attachments

  • 1000003648.jpg
    1000003648.jpg
    132 KB · Views: 14
  • 1000003649.jpg
    1000003649.jpg
    151.8 KB · Views: 12
  • 1000003650.jpg
    1000003650.jpg
    129.1 KB · Views: 12
  • 1000003651.jpg
    1000003651.jpg
    160.2 KB · Views: 14
  • 1000003652.jpg
    1000003652.jpg
    154 KB · Views: 15
Coincidentally, directly from Weber seems to be the cheapest source for parts. And with all the warranty stuff they've generously done for me I'll just be ordering direct from them
 
Did a quick patch with high temp rtv. Didn't want to replace this IR burner cover yet, want to get it all functioning and go from there. This should at least keep the elements out (even though I plan to cover it) and function just fine for the time being. I ordered the burner, orifice, and thermocouple from Weber, total cost shipped of $177. So far right around $200 invested, and a decent amount of time that I actually really enjoy putting into it. Weber says 7-10 days on those parts, but then it's just time to assemble and start enjoying!
 

Attachments

  • PXL_20230906_192540796.jpg
    PXL_20230906_192540796.jpg
    84 KB · Views: 10
  • PXL_20230906_201053051.jpg
    PXL_20230906_201053051.jpg
    104.7 KB · Views: 10


Back
Top