New Case Option for HM v4.3.6/RPi ZeroW


Wesley Talbot

New member
First, I'd like to say that the official HM case is an awesome design - it's obvious Bryan put a ton of development into it and there's nothing wrong with it at all! And very importantly, it works with any combination of Pi and temp sensor options you want to use.

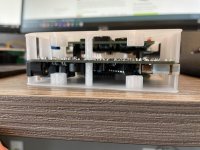
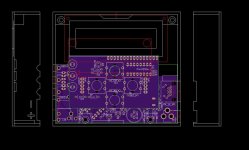
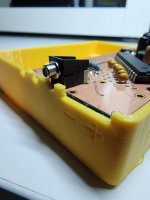
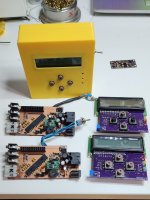
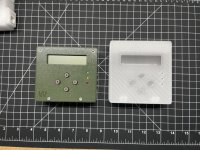
That being said, there were a few minor modifications I wanted to make to my particular case, and I could only find STLs of the original design (I primarily wanted to remove the additional space in the case when using the Pi Zero W, make it a fully bolted design with 4 cap screws, and add additional support for the boards in the case). Due to this, I just decided to design from the ground up using drawings of the boards and my own newly built HM 4.3.6.

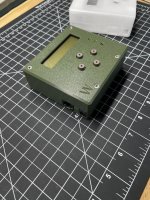
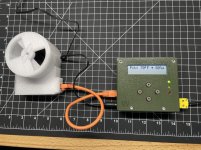
Bear in mind this design is for the HM v4.3.6 with TC and RPi Zero W. If you want to make changes, feel free to do so and I've included STEP files for download. Here's a link to my design (it does not have the debossed "W" on the front): https://www.printables.com/model/291963-heatermeter-v436-tc-and-rpi-zero-w-case

A few photos (the first one is my design next to the official design):
qLVouYv - Imgur.jpg

xLgFpb2 - Imgur.jpg

YR6CE56 - Imgur.jpg

CsConcG - Imgur.jpg

rglxDzo - Imgur.jpg
 
Last edited:
Something is not correct.

I tried to download the .stl files and upload them to Octoprint and its not uploading.

The file size seems really small at 373kb. It should be alot more then that.
 
Nvm, i figured it out, lol.
Haha, no worries! Please let me know if you run into any issues with the design. I was really careful with component clearances and designed it so the case won't touch or put stress on any of the parts.

Also, those little nubs in the cap screw holes can easily be punched out with the same hex wrench you use for an M3 screw, or you can also use a small screwdriver - just a way to eliminate any need for supports.
I have just about finished with the top piece, about 1.5 hours to print. The chamfer around the top did not print well. I will give the orginal zero case a print and see if it does the same.

Im using a
makergear M2
.5mm nozzle
 
I have just about finished with the top piece, about 1.5 hours to print. The chamfer around the top did not print well. I will give the orginal zero case a print and see if it does the same.

Im using a
makergear M2
.5mm nozzle
Yeah, boxes like this can be really tricky if everything isn't perfect - curling will occur if bed adhesion isn't 100% (in some cases it can happen even if it is!). I didn't need to do it on mine, but a brim or "mouse ears" at the corners can also be used to help mitigate this issue.
 
I wont be able to use the case as it is unfortunately. I am still able to make the 4.3.3 boards with the orginal components, as I have plenty of them. I guess the new probe jacks are smaller and thus the case doent fit properly. Otherwise, I do like the tighter fit for the board then the old cases.
Yeah, boxes like this can be really tricky if everything isn't perfect - curling will occur if bed adhesion isn't 100% (in some cases it can happen even if it is!). I didn't need to do it on mine, but a brim or "mouse ears" at the corners can also be used to help mitigate this issue.
20221010_172739.jpg
 
John, I have been 3D printing a LONG time and can assure you one problem is that your printer is WAY, WAY out of correct calibration.

Tom
 
John, I have been 3D printing a LONG time and can assure you one problem is that your printer is WAY, WAY out of correct calibration.

Tom
Oh it prints good, it has been doing prints almost non-stop making large bearing covers for UPS, Amazon. They have been printing perfect. I am using a .5mm nozzle and I was not printing at full width, whiched caused problems. I used to print with a .35 nozzle, but the covers were taking upto 12 hours to print, down to 8 now for the biggest cover.

Anyways, I was able to get the correct case printed20221028_205242~2.jpg
 
My number one gripe about the case is.. it's too lightweight. It's honestly not heavy enough to stay in place with the stiff lan cable that's used for blower. I've actually considered bolting mine to an inclined wooden block...,

My number two gripe, is it's not even water resistant. It's honestly completely unsuitable for using outside. The lightest sprinkle of rain will get inside of it.

My number three gripe, is the fit and finish really isn't all that good anyway. It looks like a homemade device not a professional device. It feels like just about the cheapest homemade device you can think of. Yes I'm on my second because it breaks so easy if you drop it.

It was made to be affordable and possible to self produce I get it. But the side effect of that is it's really cheap and cheesy.


Back
Top