You are using an out of date browser. It may not display this or other websites correctly.
You should upgrade or use an alternative browser.
You should upgrade or use an alternative browser.
My version of a wsm-table
- Thread starter Peter Lindfors
- Start date
Peter Lindfors
New member
I'm sorry i haven't posted any plans yet. My kids have been sick and...well, you know how it is with small kids.
If everything goes as planed, I'll have them ready soon.
If everything goes as planed, I'll have them ready soon.
Steve_Williams
TVWBB Fan
Beautiful. I think it is better than what Weber would offered
John Segura
TVWBB Member
Amazing job, I would love a cart like that for my WSM. It looks like you have an 18.5 WSM, is that right?
Peter Lindfors
New member
Yes, it's a 18.5 wsm.
JimmyE
TVWBB All-Star
yeap. i'd buy one from ya.
Count me in too! Absolutely love it!
Jim McKelvey
TVWBB All-Star
Late to the party, but holy moly that is one sweet cart! Love it!
Steve Servis
TVWBB Member
Looks great!
Let's sees some picks of you wheeling it around and using it soon.
Let's sees some picks of you wheeling it around and using it soon.
Alan Soden
TVWBB Fan
That's amazing. The details I notice - 3 hinges, not 2. The holes in the rings for the feet to prevent water from pooling, not one but 3 (again).
Table is secured with knobs to allow removal and cleaning. That's one of the best designed products I've seen, DIY or commercial.
Table is secured with knobs to allow removal and cleaning. That's one of the best designed products I've seen, DIY or commercial.
Brian Burke
New member
I know I'm late to the party here, but this mod is magnificent. It's the kind of mod that's so good that I actually get bummed out because I'll never have that level of skill. Just an incredible job, Peter.
Peter Lindfors
New member
Finally got around to doing the description I promised. Problem was, that while doing it, I didn’t document anything. Now I have redone some of the parts so I could take pictures.
The measurements on the pictures are all milimeters - sorry guys
The pipes
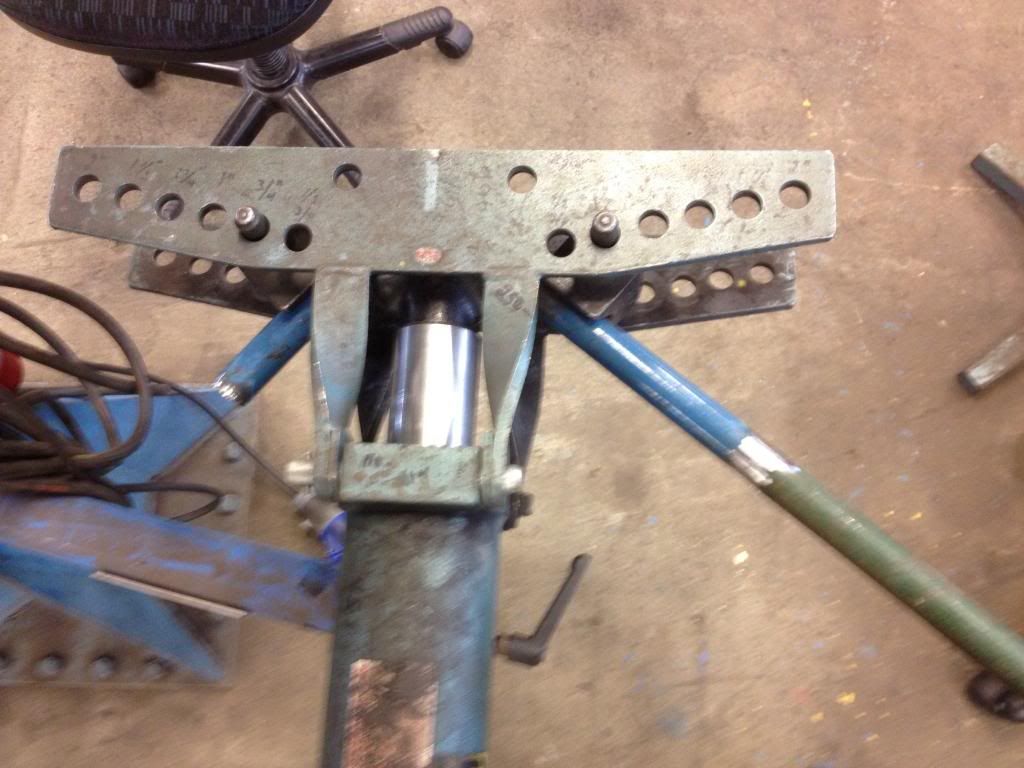
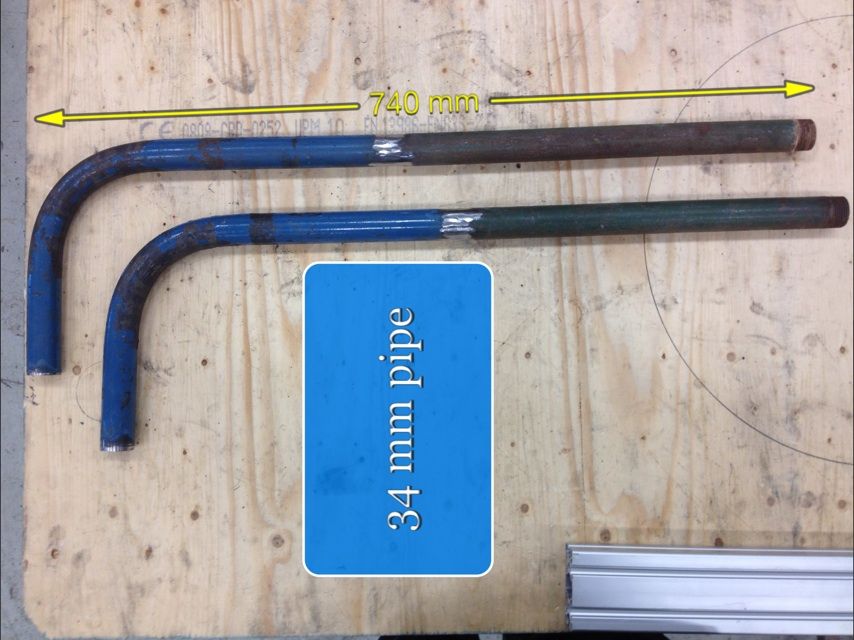
First I bend four pipes (1200 mm long, 34 mm in diameter) using a hydraulic pipe bender, cut them to the right length and welded them together.
To make sure that the angle and width was right, I made a frame with the correct measurements and fitted the pipes to that.
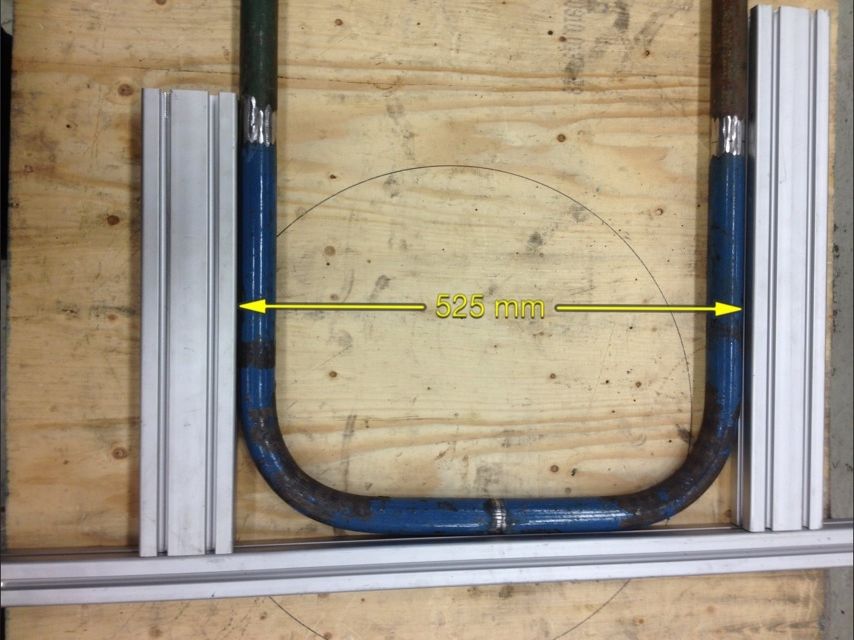
This is the measurements I used.
The base
I used 3 mm metal sheet (526 mm x 582 mm) to form the base of the cart.
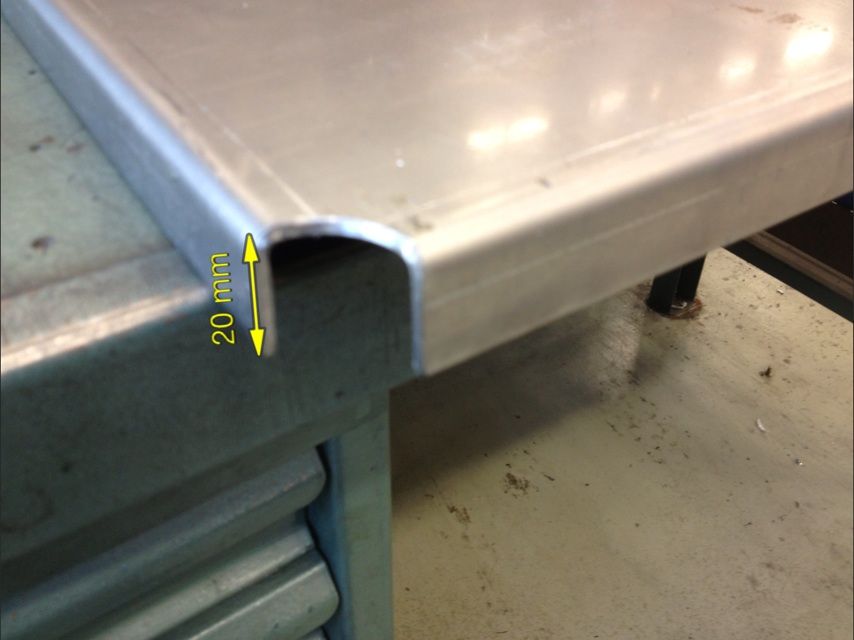
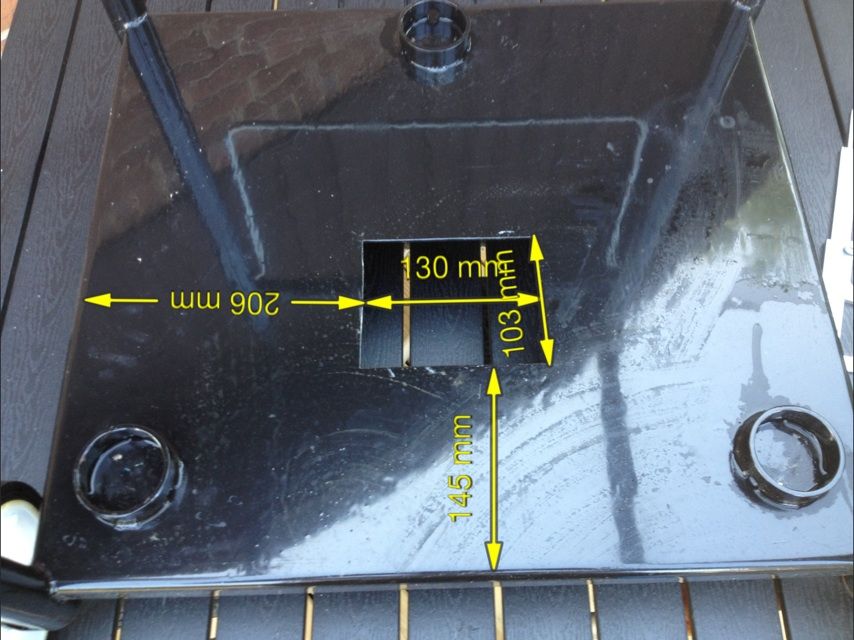
First I used a break press to make the edges (20 mm). Afterwards the measurements should be 486 x 542. Then I cut out the corners to fit the 34 mm pipe.
Then I cut out the hole for the drip tray.
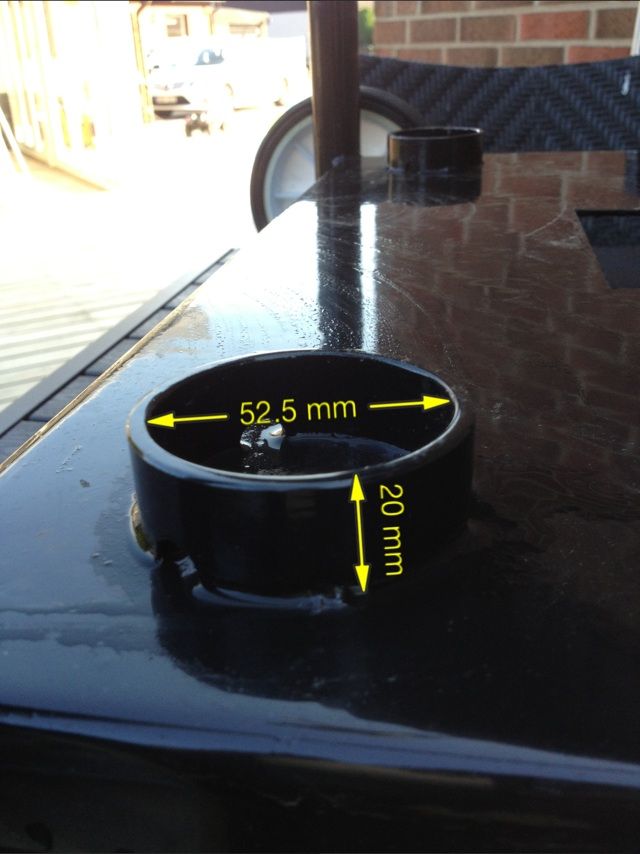
To make the cup which holds the legs in place I used a pipe with 52,5 mm inner diameter and 20 mm high. To make sure rain water does'nt gather in the cup, I cut out 3 holes in each cup.
The last two bits is the pipe which I used to stabilize the cart at the top, and the bracket which holds the table in place when its folded up.
The stabilizer is just a piece of 34 mm pipe, 505 mm long.
The bracket is a 8 mm hydraulic pipe bended as shown in the picture shown below.
Assembling the cart
With all the parts done, I assembled the cart. All measurements apart from the placing of the cups are shown in the picture below. To place the cups I would recommend just placing the WSM on the cart to see where to place them.
Everything is welded together, except for the bracket which I drilled two 8,5 mm holes for in the frame.
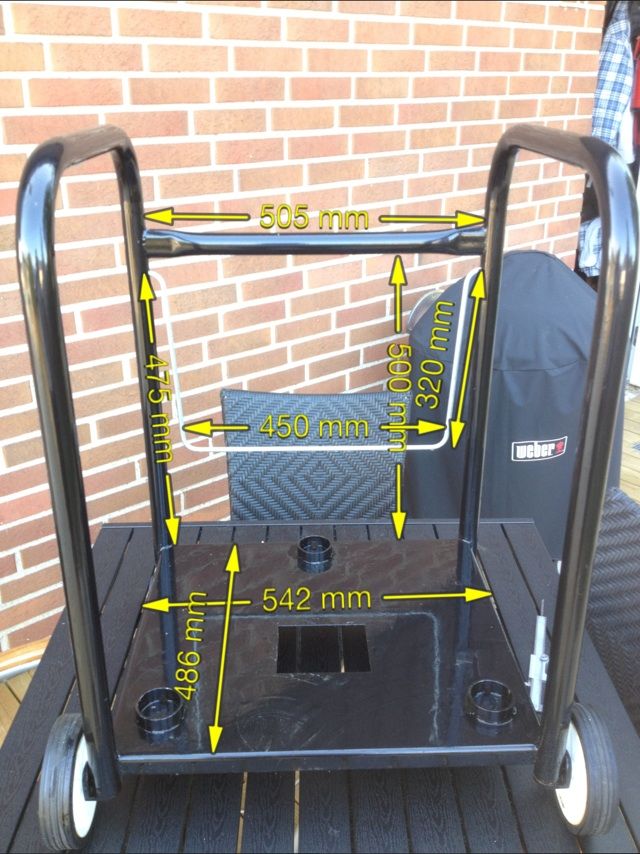
Then just remain panting it
How to make the table is described in the next post - can only have 10 pics in 1 post.
The measurements on the pictures are all milimeters - sorry guys
The pipes
First I bend four pipes (1200 mm long, 34 mm in diameter) using a hydraulic pipe bender, cut them to the right length and welded them together.

To make sure that the angle and width was right, I made a frame with the correct measurements and fitted the pipes to that.

This is the measurements I used.

The base
I used 3 mm metal sheet (526 mm x 582 mm) to form the base of the cart.
First I used a break press to make the edges (20 mm). Afterwards the measurements should be 486 x 542. Then I cut out the corners to fit the 34 mm pipe.

Then I cut out the hole for the drip tray.

To make the cup which holds the legs in place I used a pipe with 52,5 mm inner diameter and 20 mm high. To make sure rain water does'nt gather in the cup, I cut out 3 holes in each cup.

The last two bits is the pipe which I used to stabilize the cart at the top, and the bracket which holds the table in place when its folded up.
The stabilizer is just a piece of 34 mm pipe, 505 mm long.
The bracket is a 8 mm hydraulic pipe bended as shown in the picture shown below.
Assembling the cart
With all the parts done, I assembled the cart. All measurements apart from the placing of the cups are shown in the picture below. To place the cups I would recommend just placing the WSM on the cart to see where to place them.
Everything is welded together, except for the bracket which I drilled two 8,5 mm holes for in the frame.

Then just remain panting it
How to make the table is described in the next post - can only have 10 pics in 1 post.
Last edited:
Peter Lindfors
New member
As promised how to make the table.
The table
The table is made of a kitchen top bought at Ikea.
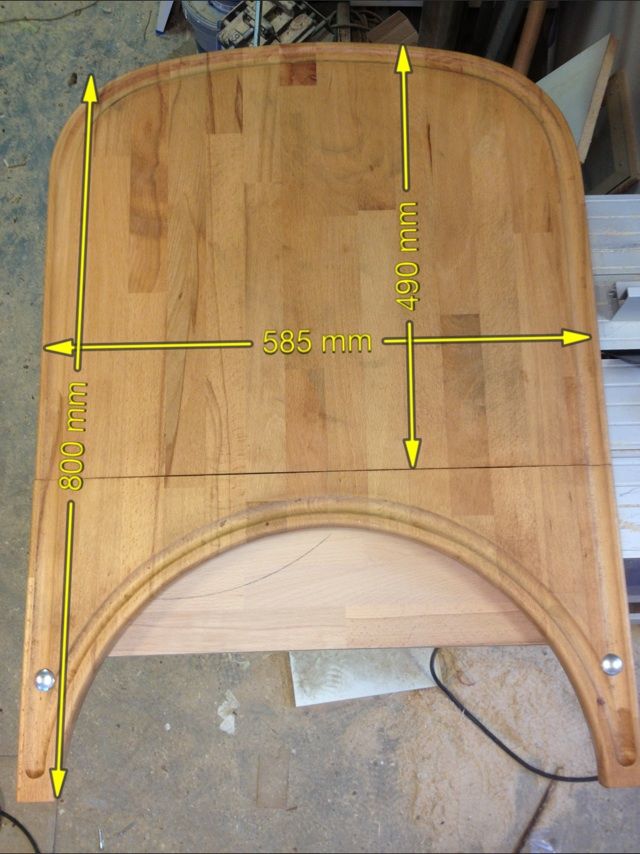
To get the right radius I used the lid from the WSM.
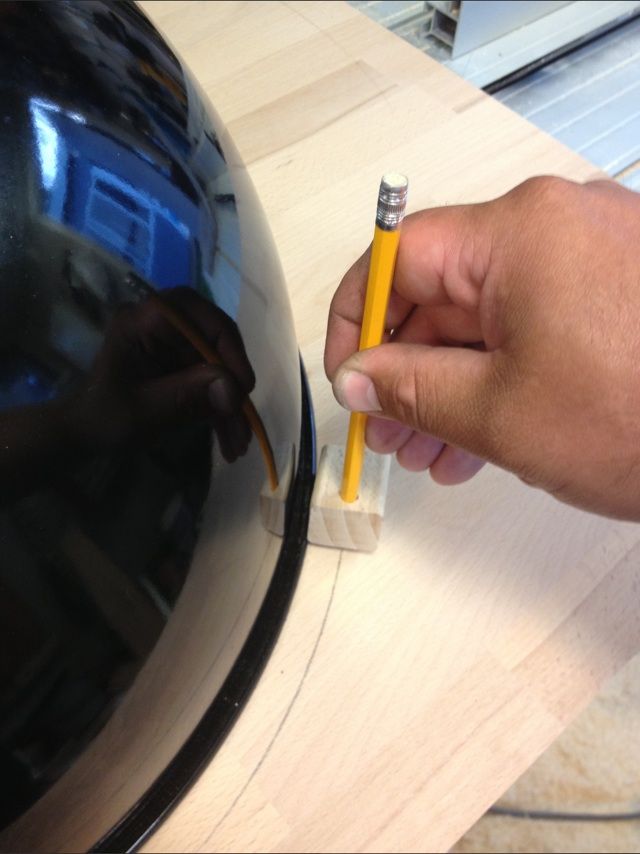
After shaping it, I did the routing.
After that I cut the table in two and put it back together with 3 hinges.
Then I made the lid holder (see the picture for details) and attached the stop for the bracket. I have no measurements for the stop, but you should be able to measure that yourself if you gotten this far
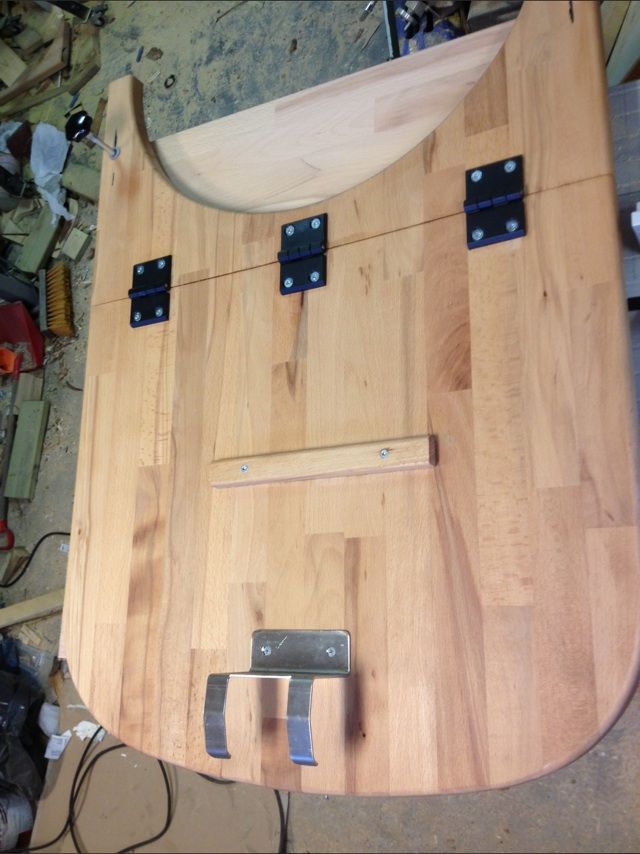
That was all, hope you guys can use it.
/Peter Lindfors
The table
The table is made of a kitchen top bought at Ikea.

To get the right radius I used the lid from the WSM.

After shaping it, I did the routing.
After that I cut the table in two and put it back together with 3 hinges.
Then I made the lid holder (see the picture for details) and attached the stop for the bracket. I have no measurements for the stop, but you should be able to measure that yourself if you gotten this far

That was all, hope you guys can use it.
/Peter Lindfors
Brian Johnson
TVWBB Pro
WOW. That's one good looking cart. Very impressed, very impressed.
Chris Sherman
TVWBB Super Fan
Peter
Thank you for posting the specs and procedure.
Many of us have been anxiously awaiting it.
Thank you for posting the specs and procedure.
Many of us have been anxiously awaiting it.
Leo Rousseau
TVWBB Super Fan
That came out ridiculously nice!!! Very impressed with the craftsmanship that you put into that!!! Enjoy Peter!!!
Nicky Kusters
New member
One of the best mods I've ever seen. Looks like it comes directely from Weber, like performer kind of style. Great!!
