HeaterMeter Monitor and ESP8266/ESP32 Streaming Library


would love to see a kit/tutorial or at least a BOM with links or a "shopping cart" shortcut to order the parts, for dummies like me. thanks for the cool project!
 
would love to see a kit/tutorial or at least a BOM with links or a "shopping cart" shortcut to order the parts, for dummies like me. thanks for the cool project!
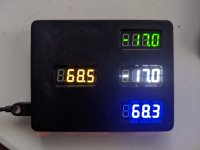
I've added a simple wiring diagram and parts list to the github README. It is just two parts so it is pretty easy to put together.
  • Wire 5V from the Wemos D1 Mini to the 5V pin on all 4 LED displays.
  • Wire GND from the Wemos D1 Mini to the GND pin on all 4 LED displays.
  • Wire D1 from the Wemos D1 Mini to the CLK pin on all 4 LED displays.
  • Wire D2 from the Wemos D1 Mini to DIO on the PIT display
  • Wire D7 from the Wemos D1 Mini to DIO on the FOOD1 display
  • Wire D6 from the Wemos D1 Mini to DIO on the FOOD2 display
  • Wire D5 from the Wemos D1 Mini to DIO on the FOOD3 display
That might look like a lot of steps but that's all the wires you'll need total so it isn't much. Wire all the 5V, GND, and CLK together, then just one wire per LED module.
Thanks!!!!
 
Got the code built (which was harder than it should have been because I am not familiar with this development environment). Ended up needing a few extra libraries TaskScheduler, ESP8266WiFi, ESPAsyncTCP, ArduinoJson. Also struggled a bit because I picked the wrong board type (D1 vs D1 mini). But up and running, made a few tweeks just for fun. Now have to print a case and solder it up. May mount a battery, and a button to toggle what is displayed (maybe show PID outputs). Fun little project. Thanks for sharing.
 
Oh geez, not sure how I forgot to include those in the readme, thanks for pointing that one. Actually I should probably remove TaskScheduler. I used it because I use it for a lot of projects and thought I'd use it here too but the only task is outputting some debug info so I'll remove that.

ESPAsyncTCP and ArduinoJson are definitely needed for HeaterMeterClient though.
 
This is exactly what I need! I have the parts on order. Is there a step by step for how to program? I’m good with wiring and soldering, but know zero about Arduino, and only very minor on raspberry pi( not that that will help.)
An “ultimate luddite guide” with:
1. plug in Arduino to usb port
2. use this program to get x from y
3. type “Example Words” here...
 
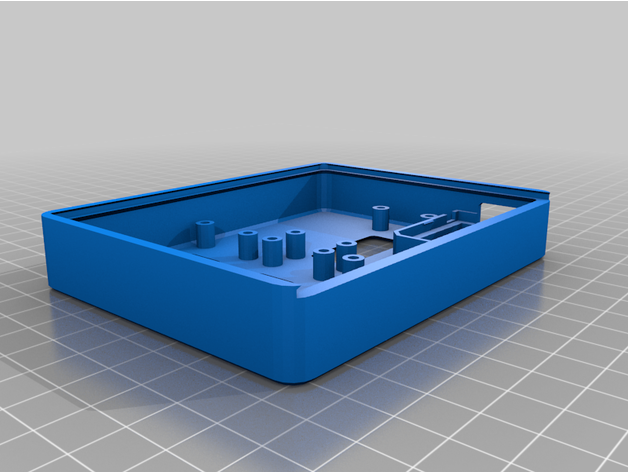
FYI, the LED modules linked in the readme.txt file are the wrong size for the case. They are 0.36", it would appear the case is designed for 0.56".
 
This is exactly what I need! I have the parts on order. Is there a step by step for how to program? I’m good with wiring and soldering, but know zero about Arduino, and only very minor on raspberry pi( not that that will help.)
An “ultimate luddite guide” with:
1. plug in Arduino to usb port
2. use this program to get x from y
3. type “Example Words” here...

Search youtube for wemos d1 mini arduino and you'll come across some helpful videos on getting things setup. I'd probably start with getting the onboard LED blinking to get your feet wet. You can then move on to something more advanced such as this project after you've got the basics down.
 
FYI, the LED modules linked in the readme.txt file are the wrong size for the case. They are 0.36", it would appear the case is designed for 0.56".
Ah dangit, I didn't realize that. I'll see if I can find the right size ones. EDIT: Why the heck are virtually all the modules for the clock / doubledot version?
 
Last edited:
Yeah it is mentioned on the Thingiverse page, if your displays are too flickery then just add capacitors until it stops. I added 3x of the 100uF/10V kind that are part of the HeaterMeter BoM. Only a couple of the colors flickered so it may or may not be necessary. I'll add that to the README in the next push.
 
I ended up making a mini version with the 0.36" LEDs. I can share the case mod if anyone needs it. Cool little gizmo.PXL_20210221_212213707.jpg
 
Great thanks, I'll see if I can merge them. Just need to figure out how to reconcile my misuse of lcd_window_offset to expand the size of the case for some reason I can't remember but I will blame on beer.

Working on different demo for an ESP32 using the library (with updates to make it compile) right now. :censored:
 
Feature Request: Update client to support "pidint" stream
I hacked up a version of the client to output this data, but might be a nice option to integrate into the released client. I am sure there are subtleties that I did not cover, but it seems pretty straightforward (famous last words).

Or am I think only one who likes to obsessively watch what the PID is doing during a cook?
 
Haha funny you should mention that, I just realized on Sunday that I hadn't added pidint support so that will be added. It is pretty easy to add support for message types as you've noticed, the only thing to be wary of is RAM footprint and processing time. I'm trying to keep the library as lean and mean as possible to leave as much space for user programs as possible. Nothing worse than putting together a project and after adding all the libraries you need you have like 5K of space left to write your actual code.

I was on the fence a lot if the library should pass the status structure to the callback only or to have it stored in the class all the time. Having it only passed to the callback saves RAM and only would use CPU cycles if there was a callback that wanted that information, but I figured there was a lot of cases where the callback would just be the trigger and people would then have to copy all the data from the callback into their own storage to make it accessible anywhere so I went with storing it always in the class. This sort of falls apart with the noisedump message, which would need 512 bytes of RAM to store it all the time.
 
I posted a remix on thingiverse. Note I am an amateur at Open scad, so not guarantee, but my print seemed OK.
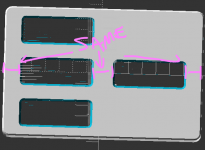
Does your model actually need lcd_ex_offset at all? The reason I use lcd_window_offset to expand the size of the case is because I want all the spacings to be the same (EDIT: or at least the outer sides), but your model doesn't have that symmetry. Looks like I can remove lcd_ex_offset from your design without compromising the design at all right?

1614090529015.png
 
Last edited:


Back
Top